![content.buywithvan.comhs-fshubfsvan-logo-white-1.png]](https://knowledge.buywithvan.com/hs-fs/hubfs/social-suggested-images/content.buywithvan.comhs-fshubfsvan-logo-white-1.png?width=120&height=48&name=content.buywithvan.comhs-fshubfsvan-logo-white-1.png)
Chapter 1: Start your day
This chapter walks you around the frame of the side panel: the header, the navigation rail, the date range and your account menu. Learning these first means every later view feels familiar, because they stay in the same place no matter which tool you have open.
Step 1: Explore safely
You are viewing sample data. Tour controls guide you; nothing you see here changes your real work. The dot indicates session and sync status.
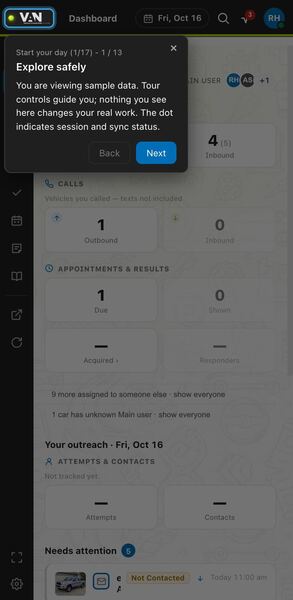
The VAN brand at the top left of the header is highlighted, and during the tour everything you see is sample data. Feel free to click around: nothing here touches your real vehicles, tasks or messages. In daily use, glance at the small dot next to the brand, which shows your session and sync status.
Step 2: Choose your next task
Use the rail to move between your daily tools. VDP reopens the last vehicle you viewed; Open VDPs lists every vehicle you have open.
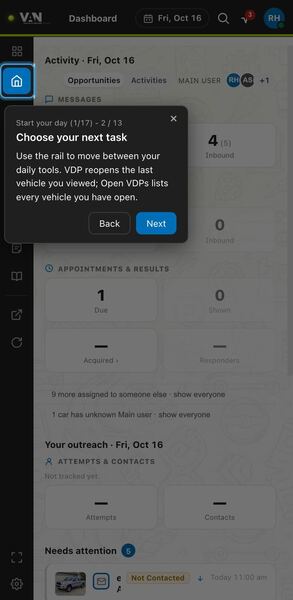
The rail down the side is your main navigation between daily tools such as Dashboard, To-Dos and the vehicle view. VDP jumps back to the last vehicle you looked at, which is handy after a detour, while Open VDPs lists every vehicle you currently have open so you can switch between sellers without searching again.
Step 3: Know your current view
This heading names the view open in your side panel.
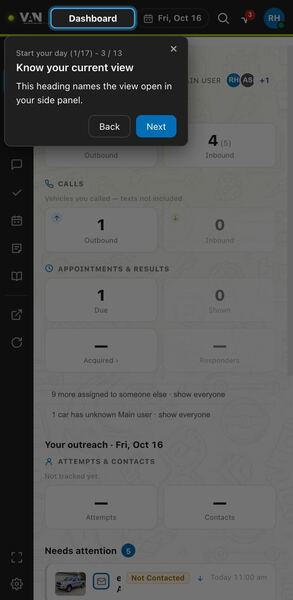
The heading in the header always names the view currently showing in the side panel. When you move quickly between tools, glance here to confirm where you are before acting, for example before completing a task or changing a filter, so you never apply a change in the wrong place.
Step 4: Make room
Cycle the rail size to leave more room for your work. Workspace also offers an expanded rail with labels.
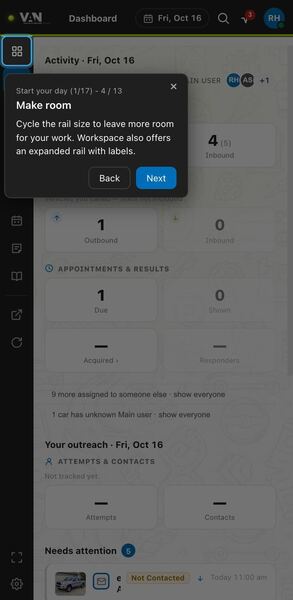
This control on the rail cycles its size so the panel content gets more width. Use it when you work beside a listing site and the panel feels cramped. In Workspace you can also choose an expanded rail that shows text labels next to each icon, which helps while you are still learning the tools.
Step 5: Reveal the hidden rail
Use the left-edge control to reveal navigation when the rail is hidden.
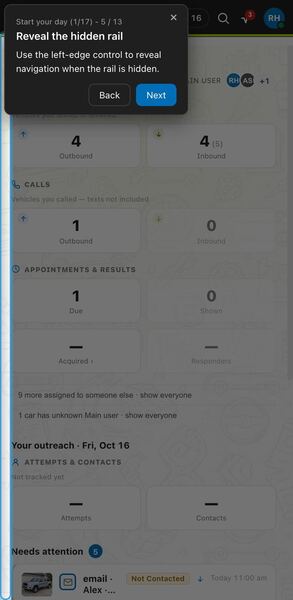
When the rail is fully hidden, a thin control at the left edge of the panel brings navigation back. Hiding the rail loses nothing; it only frees space. Use this edge control whenever you need to switch views and the icons are out of sight.
Step 6: Refresh or open VAN
Reload this view when you need fresh information. Open its VAN counterpart from the neighboring VAN control.
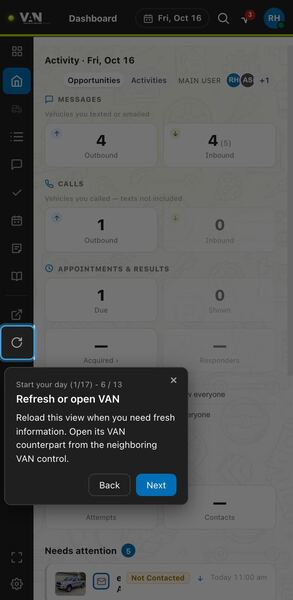
The circular arrow on the rail reloads the view you are on, so use it when you expect new tasks, messages or numbers that have not appeared yet. The control just above it, with the open-in-new icon, opens the matching page in VAN itself, which is useful when you need something only the full VAN web offers.
Step 7: Choose your working space
Open Workspace for more room, or return to the side panel to work beside a listing site.
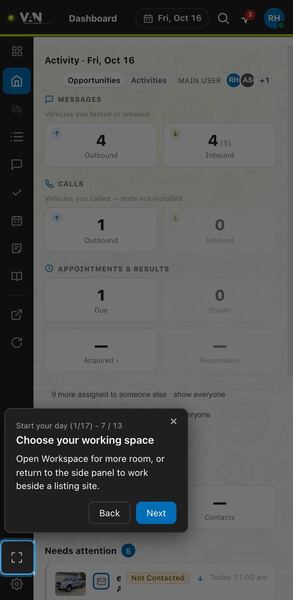
This button moves Companion between the narrow side panel and the larger Workspace. Workspace gives you room for long lists and detailed review; the side panel is best when you are messaging sellers on the listing site and want Companion visible beside it. Switch whenever your task changes.
Step 8: Find help and preferences
Open Settings for tours and preferences. Select the gear again to return to your previous view.
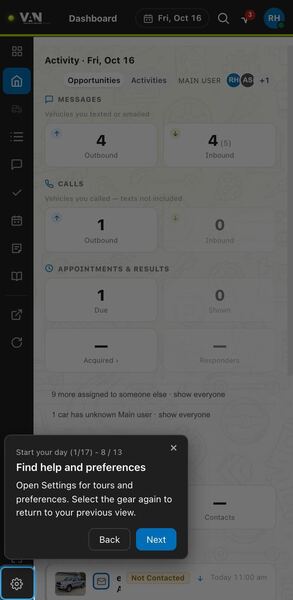
The gear opens Settings, where you restart tours and adjust preferences such as notifications and shortcuts. Selecting the gear a second time takes you back to the view you were on, so you can tweak a preference mid-task without losing your place.
Step 9: Set your working dates
This date range applies across views. Change it before reviewing activity, tasks, or appointments.
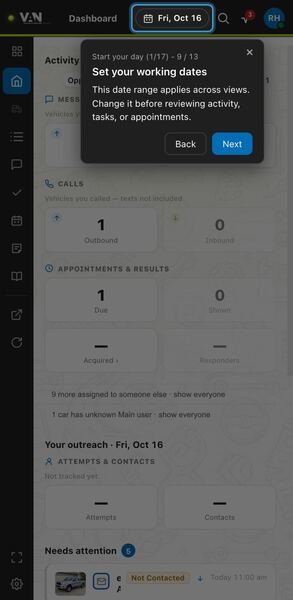
The date range in the header is shared by every view, so Dashboard counts, Activity and task days all follow it. Set it before you review your numbers or appointments; if a list looks too short or too long, the date range is the first thing to check.
Step 10: Pick a day or range
Choose Day, Week, or Month. Browse months, select a date, or use Today to return to today's day view.
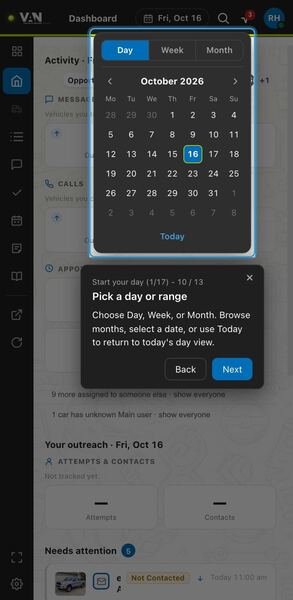
Clicking the date opens this picker. Choose Day, Week or Month, page through months and click a date to set the range. Today always brings you back to the current day view, which is the quickest way to reset after reviewing past performance.
Step 11: Check your account
Check your name, dealership, and coach. Use Contact, Help, or Sign out when needed.
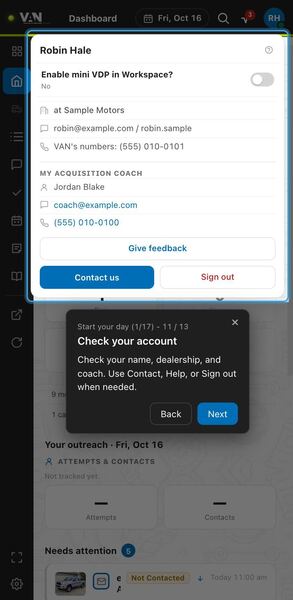
Click your initials at the top right to open this menu. It shows your name, your dealership, your contact details and your acquisition coach with their email and phone. From here you can open Help with the question mark, Give feedback, Contact us or Sign out. Check it if your numbers look unfamiliar, since being signed in under the wrong account would explain it.
Step 12: Tell us what to improve
Give feedback opens a short form. Write a suggestion or a problem in your own words, then Send it to the Companion team or Cancel.
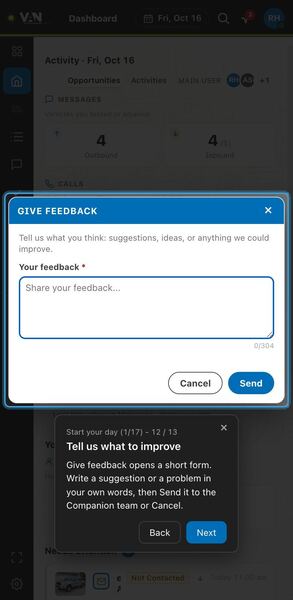
Give feedback opens this short form. Describe a suggestion or a problem in your own words, ideally including what you were doing when it happened, then press Send to deliver it to the Companion team, or Cancel to close without sending anything.
Step 13: Learn keyboard shortcuts
This reference shows your shortcuts. Use them outside text fields after leaving the tour; Settings lets you remap them.
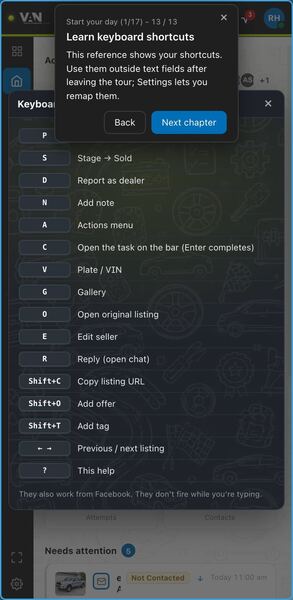
This sheet lists single-key shortcuts for work on a vehicle, such as changing the stage, adding a note or tag, opening the gallery, opening the original listing, replying, and moving to the previous or next listing. They do not fire while you are typing in a text field, and you use them once you leave the tour. If a key clashes with your habits, remap it in Settings.
Chapter 2: Review your priorities
The Dashboard is your scoreboard for the selected date range. It counts messages, calls, appointments and acquisitions, and lets you drill into any count to see the vehicles and conversations behind it, so you can spot what needs attention before you start working cars.
Step 1: Count vehicles or activity
Opportunities counts each vehicle once. Activities counts individual events. Choose whose numbers you review with the person picker.
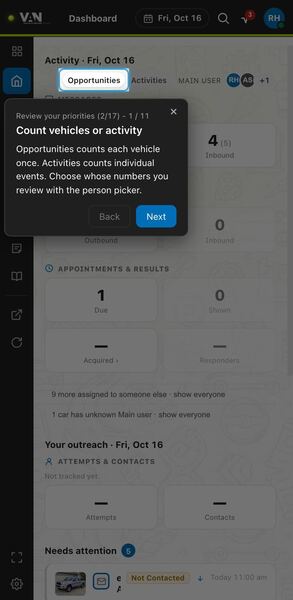
These two buttons change how the Dashboard counts. Opportunities counts each vehicle only once, which shows how many cars you touched; Activities counts every individual event, which shows how much work you did. Use the person picker to review your own numbers or another available person's.
Step 2: Review message activity
Outbound counts messages sent; inbound counts messages received. Open a count to inspect the related vehicles and conversations.
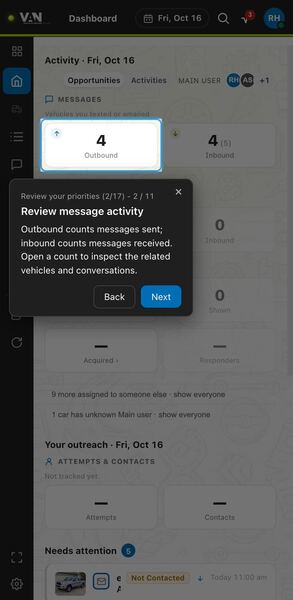
The message tiles show outbound messages you sent and inbound messages sellers sent back, so you can see whether sellers are answering. Click a count to open the list of vehicles and conversations behind it and follow up on the ones that went quiet.
Step 3: Review call activity
Compare outgoing and incoming calls, then open a count to inspect the underlying activity.
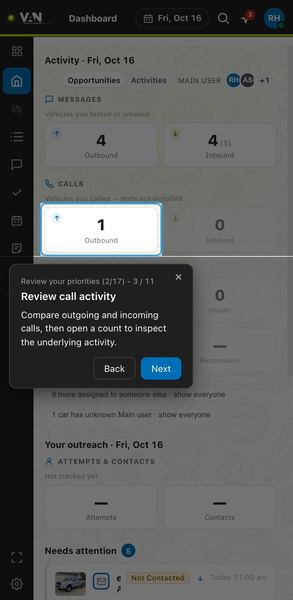
The call tiles compare outgoing and incoming calls for the selected range. Open a count to see exactly which vehicles and sellers those calls involved, which helps you find missed callbacks or sellers worth calling again.
Step 4: Review appointments and responses
Review appointments due, appointments shown, and responding sellers. A zero count has no detail list to open.
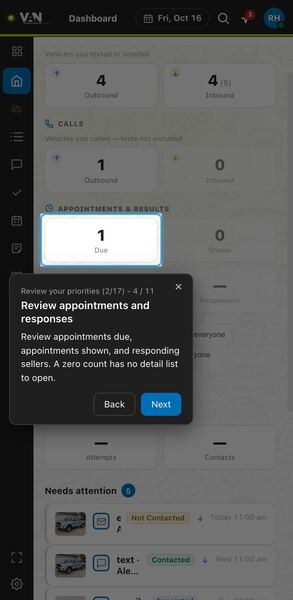
These tiles cover appointments due, appointments that showed and sellers who responded, giving you a quick read on how your pipeline is converting. A tile showing zero has no detail list to open; that is expected, not an error.
Step 5: Inspect a count
These rows explain the selected count. Open a row to inspect its vehicle or conversation.
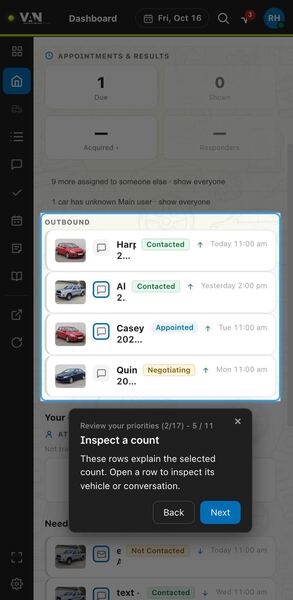
When you open a count, this detail area lists the rows behind it. Each row is a vehicle or conversation, and opening one takes you straight to it. Use this to move from a number on the scoreboard to the actual work in one click.
Step 6: Work what needs attention
Open an item to work through the attention run. Swiping right dismisses it; show everyone to include work assigned to other people.
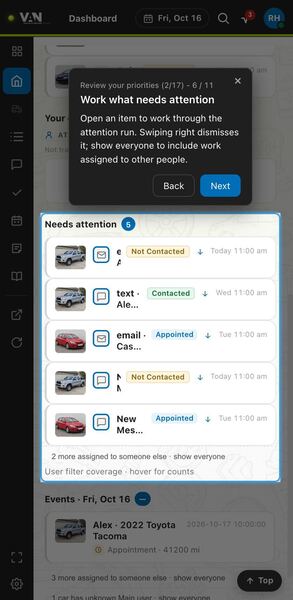
The attention block lists items that need you now. Open one to start working through them one after another. Swipe a row right to dismiss it once handled, and turn on show everyone if you also need to see items assigned to other people.
Step 7: Check upcoming events
Review events in your selected date range. Open an event's vehicle when you need its details.
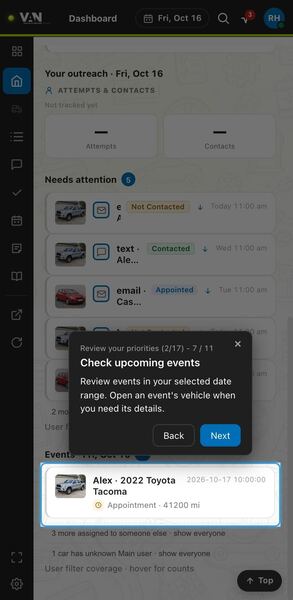
This list shows the events scheduled within your selected date range, such as appointments. Open an event's vehicle when you need the seller or car details before the meeting. Change the header date range to look further ahead.
Step 8: Review acquired vehicles
Open acquisitions to review the vehicles acquired during your selected date range.
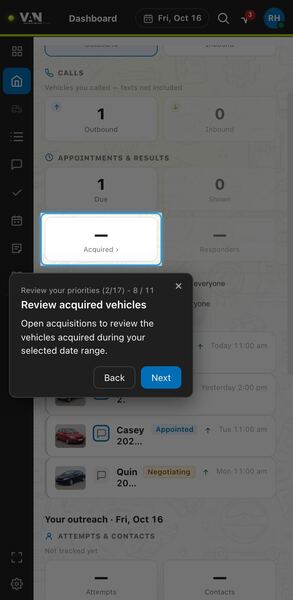
The acquisitions tile counts vehicles acquired during the selected date range. Click it to open the acquisitions view and see which cars made it all the way through, a good end-of-week check on your results.
Step 9: Inspect acquisitions
Review the total and vehicle count. Open a vehicle for details, or return to Dashboard.
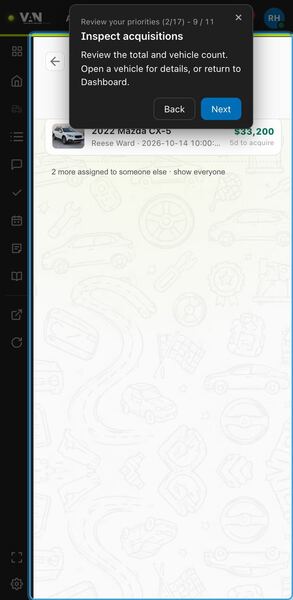
The acquisitions view shows the total and how many vehicles it covers, followed by each vehicle. Open a vehicle to review its details, or go back to the Dashboard when you are done reviewing.
Step 10: Recognize older information
This notice means the displayed information needs refreshing. Use Retry when the connection is available.
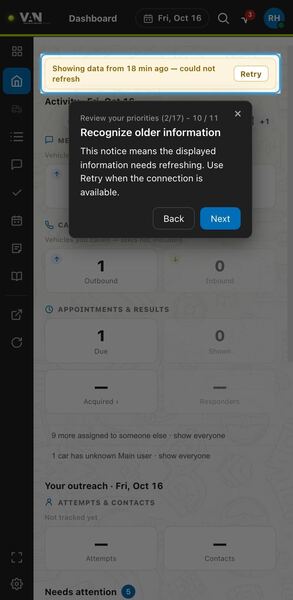
This bar appears when the information on screen may be out of date, for example after a dropped connection. Treat the numbers as possibly stale and press Retry once you are back online to load fresh data.
Step 11: Recognize a quiet day
Zero counts and "No events today" mean there is nothing to show for this sample period. They do not indicate a loading failure.
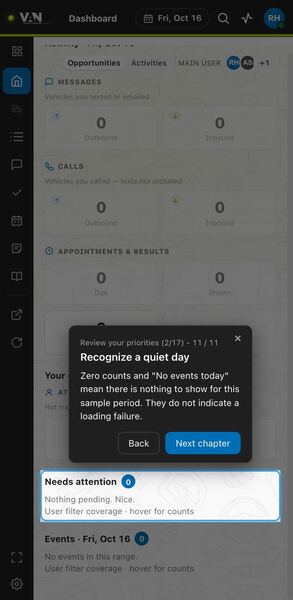
Zero counts and a No events today message simply mean there was nothing in that period; they are not a loading failure. If you expected activity, check the date range and the person picker before assuming something is wrong.
Chapter 3: Catch incoming work
Activity is where incoming work lands: messages, alerts, vehicles you opened and searches you ran. This chapter shows how to filter it, keep unread items under control and jump straight back into the vehicle or conversation that needs you.
Step 1: Open your activity
Activity combines messages, alerts, opened vehicles, and searches. The badge shows unread items, capped visually at 99+.
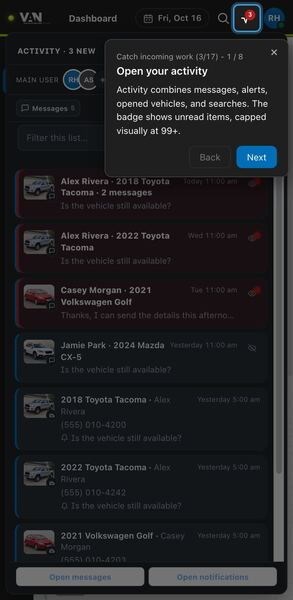
The Activity button opens a single feed of messages, alerts, vehicles you opened and searches you ran. Its badge shows how many items are unread, displaying 99+ once there are more. Check it between cars so nothing new slips past you.
Step 2: Choose what you review
Switch between notifications and all activity. Use the person picker to review another available person's activity.
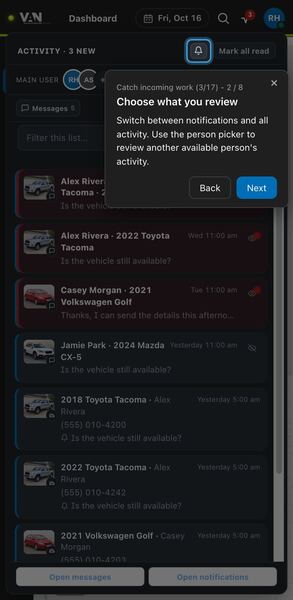
The bell button at the top of the Activity panel switches between notifications only and all activity. Below it, the person picker lets you review the activity of another available person, which is useful when you are covering for a teammate or checking what came in for the whole group.
Step 3: Narrow the activity list
Filter messages, leads, tasks, or calls. More filters includes notes and other activity. Search narrows the displayed list further.
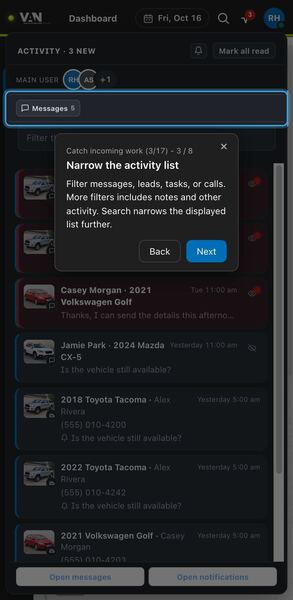
The quick filters narrow the feed to messages, leads, tasks or calls, and More filters adds notes and other types. Search filters the displayed list further, for example by a seller name, so you can find one conversation quickly.
Step 4: Manage unread items
Mark everything read after reviewing it, or use an individual row's eye control to change its read state.
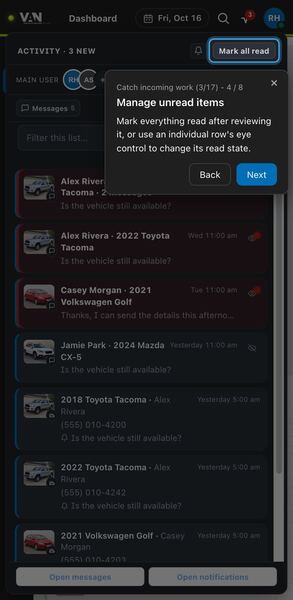
Mark all read clears unread status once you have reviewed everything. To change a single item instead, use the eye control on its row. Keeping unread items meaningful helps the badge reflect what truly still needs you.
Step 5: Follow a notification
Open a notification to reach its vehicle or conversation. Opening it marks the notification read.
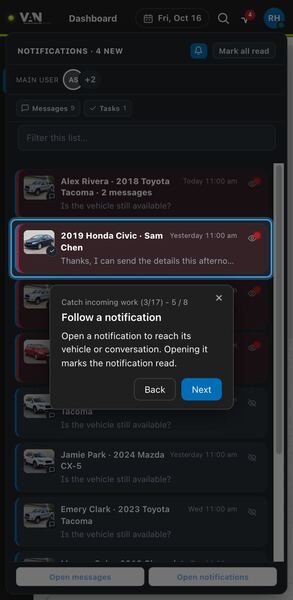
Click a notification row to jump to the vehicle or conversation it refers to. Opening it also marks it read, so there is no separate step. Work notifications from the top to handle the newest first.
Step 6: Return to recent work
Conversation rows reopen chats, vehicle rows reopen vehicles, and search rows repeat earlier searches.
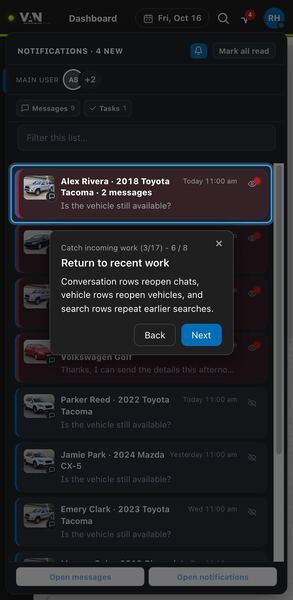
Activity also remembers your recent work. A conversation row reopens that chat, a vehicle row reopens the vehicle and a search row runs the same search again. Use it to pick up where you left off after an interruption.
Step 7: Continue in VAN
These links open the corresponding Communications or Notifications page in VAN.
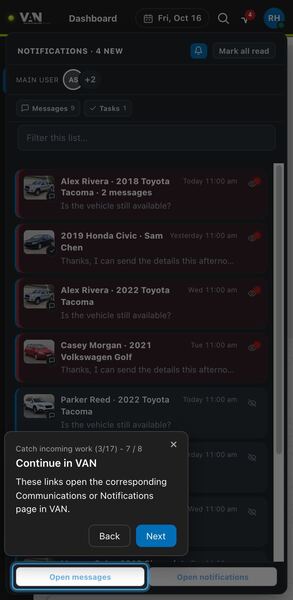
These links open the matching Communications or Notifications page in VAN. Use them when you need the full VAN view, for example to see history or options that Companion does not show.
Step 8: Notice incoming contact
Incoming message or call cards appear while Companion is open. Notification preferences control related alerts and sounds.
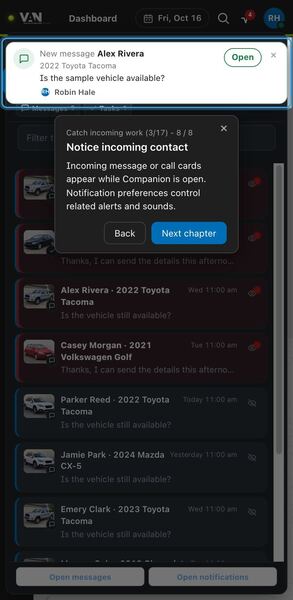
While Companion is open, a card pops up when a message or call comes in, so you can react right away instead of discovering it later. Adjust the related alerts and sounds in your notification preferences in Settings.
Chapter 4: Work due follow-ups
To-Dos holds your follow-ups pulled from VAN task lists. Here you learn to pick a list, search, sort and filter it, save your own list setups, and complete tasks, including recording what happened at an appointment.
Step 1: Choose a task list
Search saved lists, open one, or mark your default. The global date selects the exact day requested from VAN.
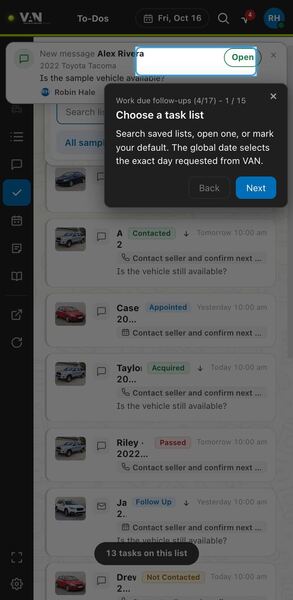
This button opens your saved VAN task lists. Search for a list, open it, or mark one as your default so it loads first. Remember that the header date decides which day's tasks are requested from VAN.
Step 2: Find a task
Search by vehicle, seller, task title, email, or phone. Clear the query to restore the current list.
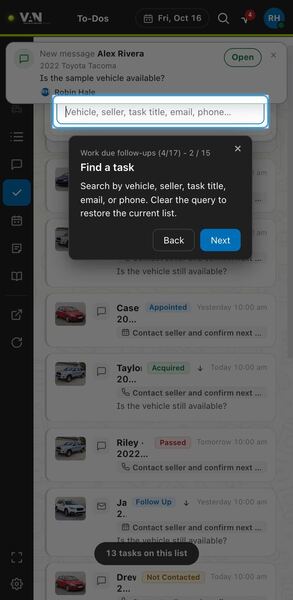
The search box finds a task by vehicle, seller name, task title, email or phone. Clear the box to get the full current list back. It is the fastest way to find a seller's follow-up when they contact you.
Step 3: Order your tasks
Sort by due time, vehicle, seller, title, type, status, stage, or assignee. Cards identify the active sort value.
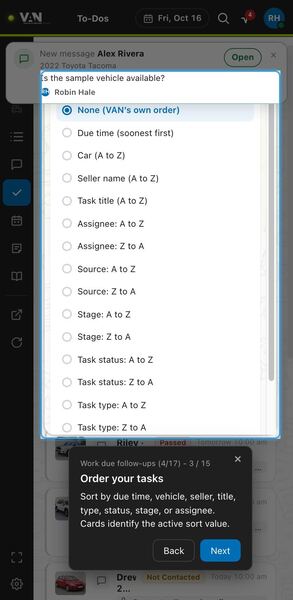
The sort panel orders tasks by due time, vehicle, seller, title, type, status, stage or assignee. Each card shows the value it is sorted by, so you can see why it sits where it does. Sorting by due time is a good default for working the day.
Step 4: Filter your follow-ups
Filter users, source, stage, task status, type, and tags. Counts help you see what remains.
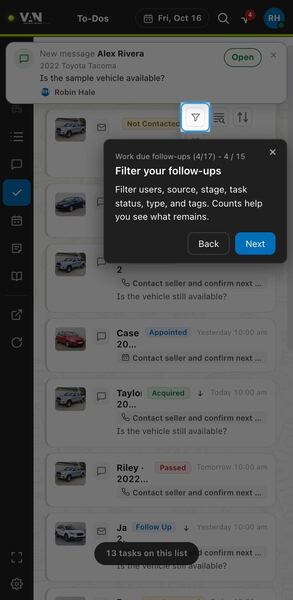
The filter bar narrows tasks by user, source, stage, task status, type and tags. The counts next to options show how many tasks remain, so you can tell at a glance how much work a filter leaves.
Step 5: Choose visible filters
Choose which filter fields appear. Header controls may move into More when space is tight.
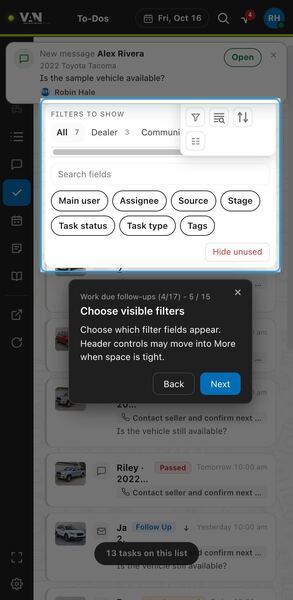
This panel lets you choose which filter fields appear, so keep only the ones you use. When space is tight, some header controls move into More instead of disappearing, so look there if a control seems missing.
Step 6: Finish a filter walk
Completed fields receive a stamp. Continue through the visible fields, then finish the walk.
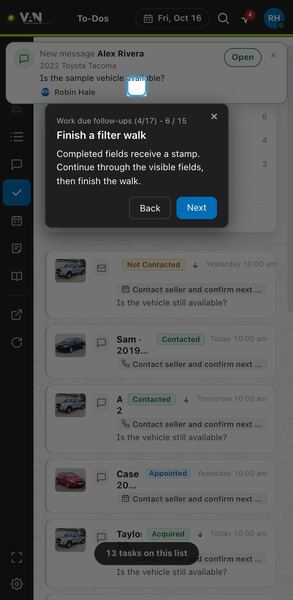
As you step through the filter fields, each one you finish gets a stamp, so you can see your progress. Continue through the remaining visible fields and then finish the walk to apply your setup.
Step 7: Manage task lists
Create, save, copy, rename, or delete a task list. Group by listing keeps a vehicle's tasks together.
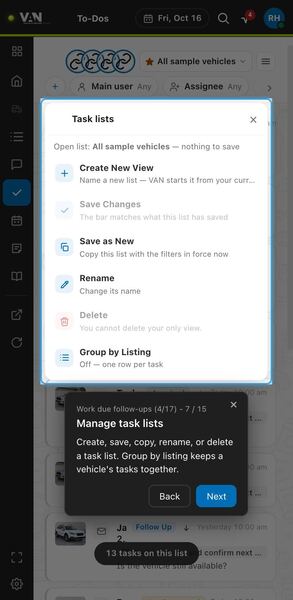
The lists panel lets you create, save, copy, rename or delete a task list. Turn on Group by listing to keep all tasks for the same vehicle together, which helps when one car has several follow-ups.
Step 8: Keep or discard changes
Accept or cancel the draft. Save into an existing list, create a new list, or undo your changes.
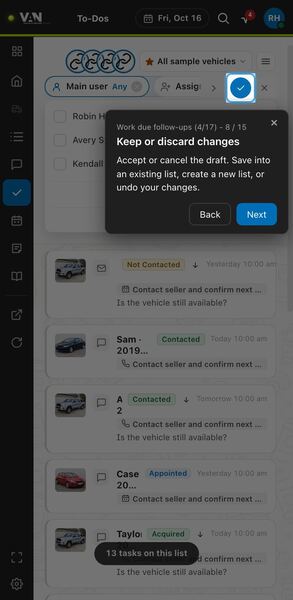
When you change a list, it becomes a draft. Accept or cancel it, save it into an existing list, create a new list from it, or undo your changes. Save setups you reuse so you do not rebuild filters every morning.
Step 9: Spot overdue work
Overdue tasks appear separately from day groups. The count tells you how many tasks match your current list.
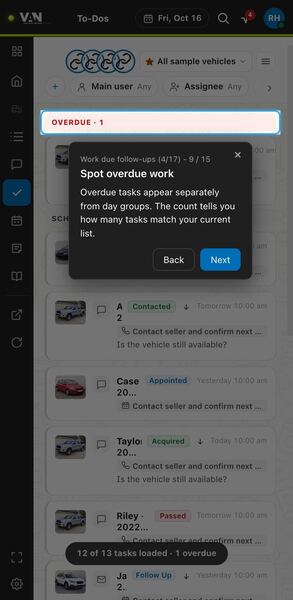
Overdue tasks are grouped separately above the day groups so they do not get lost. The count shows how many tasks match your current list. Clear overdue work first, since those sellers have already been waiting.
Step 10: Open the task's vehicle
Open the card to inspect its vehicle. The source icon opens the original listing; the task badge identifies overdue work.
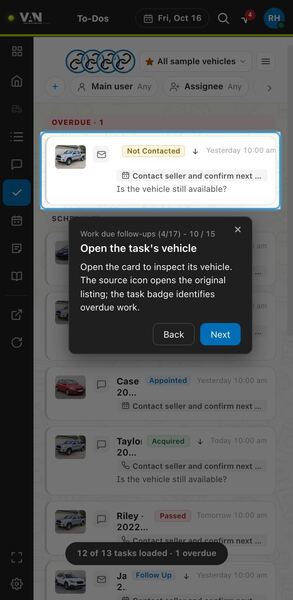
Click a task card to open its vehicle. The source icon opens the original listing on the listing site, and the badge marks overdue tasks. Review the vehicle before contacting the seller so you have the details at hand.
Step 11: Complete a task
Swipe right to complete a task. Completion has no Undo, so check the task before using the gesture.
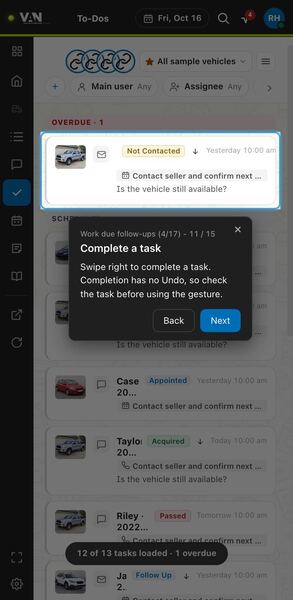
Swiping a task card right completes it. There is no Undo, so check you have the right task before swiping. Complete tasks as soon as they are done so your list stays an honest picture of what remains.
Step 12: Record appointment attendance
Appointment completion asks whether the seller showed or did not show. Choose the outcome that actually occurred.
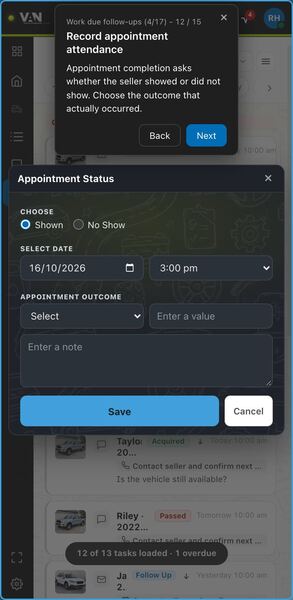
Completing an appointment task opens Appointment Status, which first asks whether the seller showed or did not show. Pick the outcome that really happened rather than the one you hoped for, so the vehicle record stays accurate for you and your coach.
Step 13: Record what the visit produced
For a shown appointment, confirm the visit date and time, pick Appraisal or Acquisition, enter its value, and add a note before saving.
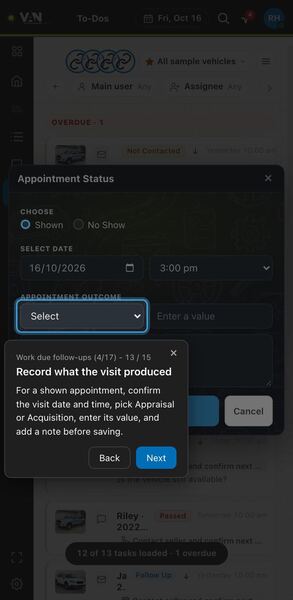
For a shown appointment, confirm the visit date and time, choose Appraisal or Acquisition, enter its value and add a note, then save. Fill it in right after the visit while the details are still fresh.
Step 14: Recover an empty list
Available actions can load more, clear search, remove filters, or change the view. A day without tasks can also be genuinely empty.
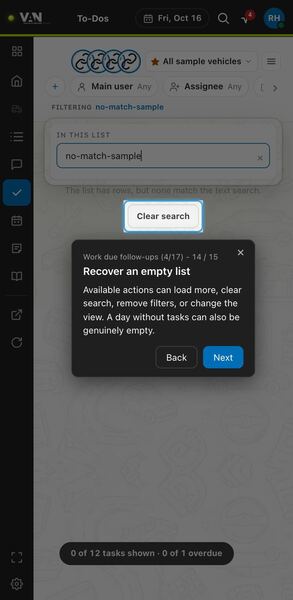
When a list is empty, the actions offered here can load more, clear the search, remove filters or change the view. Try them before assuming there is no work, but remember that some days genuinely have no tasks.
Step 15: Create tasks on the vehicle
Open a vehicle and use Actions, then Task, to create follow-ups. To-Dos has no floating creation button.
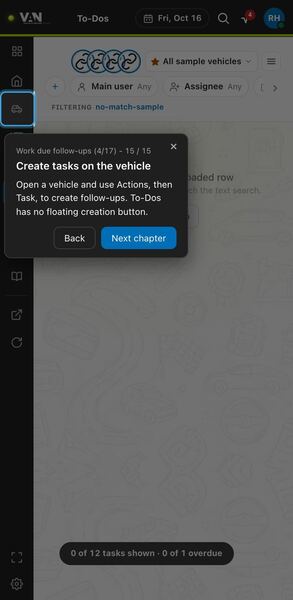
To-Dos has no floating button for creating tasks. Instead, open the vehicle, choose Actions, then Task, and set up the follow-up there so it is attached to the right car and seller.
Chapter 5: Find vehicles to work
This chapter covers how you find the right vehicles to work each day. You will pick a saved list, sort and filter it, switch layouts, and read the cards that summarize each car. It also shows how to save, export, and schedule lists so your best searches are always one click away.
Step 1: Choose saved inventory
Search saved lists, open one, or star a default. An empty picker means no saved lists are available.
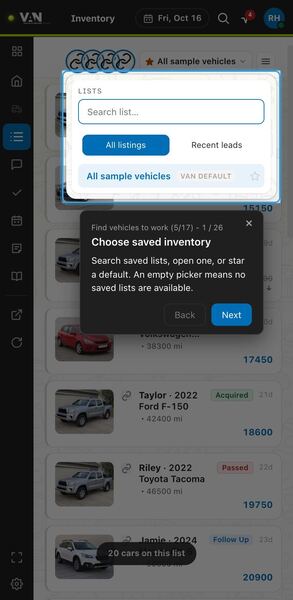
Click the list name at the top of the panel to open the Lists picker. Type in the search box to find a list, click a list to load it, or click the star on a list row to make it your default. If the picker is empty, no saved lists are available to you yet.
Step 2: Choose an inventory
When more than one inventory is available, choose which inventory you want to work.
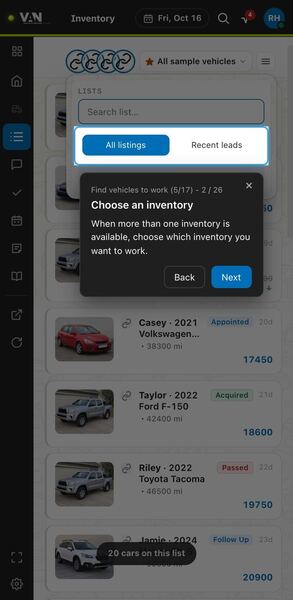
Inside the Lists picker, a switch such as All listings or Recent leads appears when more than one inventory is available. Click the one you want to work. Check it at the start of your shift so you know which inventory you are looking at.
Step 3: Put useful vehicles first
Choose a sort order. The header dot marks a non-default sort, and cards show the relevant sort value.
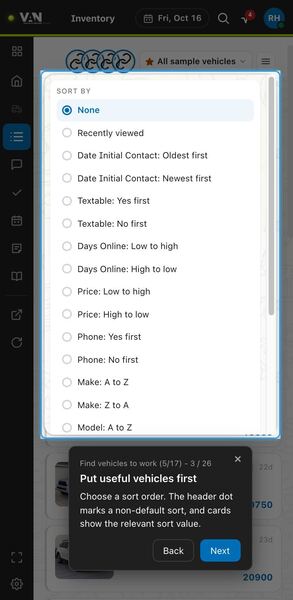
The sort button opens a Sort By menu with options such as Recently viewed, Date Initial Contact, Days Online, Price, Textable, Phone, Make, and Model. When you pick anything other than None, a dot on the button reminds you the order changed, and cards show the value being sorted. Sorting by price or days online is a quick way to put the cars you care about first.
Step 4: Show your filter steps
Filters start collapsed. Show them to work through users, source, stage, ad status, flags, and other available fields.
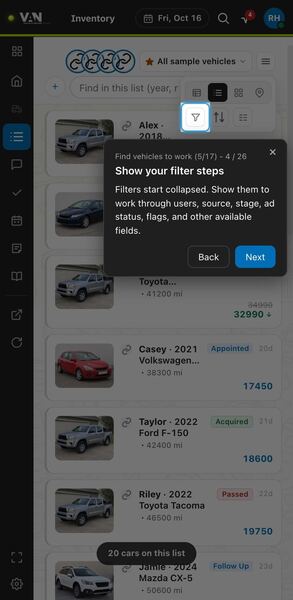
The funnel button, next to the layout and sort buttons, shows or hides the filter steps, which start collapsed. Showing them lets you work through users, source, stage, ad status, flags, and other available fields. Hide them again when you want more room for the list.
Step 5: Find within this list
Search the loaded list by vehicle details such as year, make, or VIN. Clear the query to return to all matching rows.
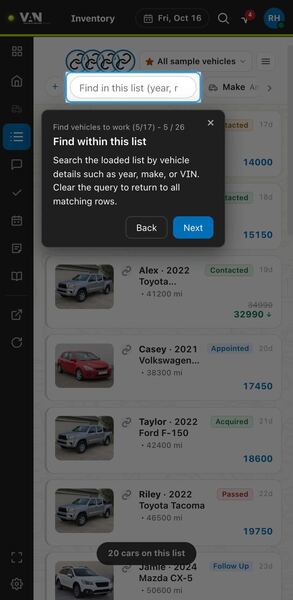
The Find in this list box near the top of the inventory searches the vehicles already loaded by details like year, make, or VIN. While a query is active only matching rows show; clear it to get back every row that matches your filters. It is a fast way to jump to a car a seller just mentioned.
Step 6: Choose matching values
Value chips show counts. Search within long option lists, clear one field, or clear the current group.
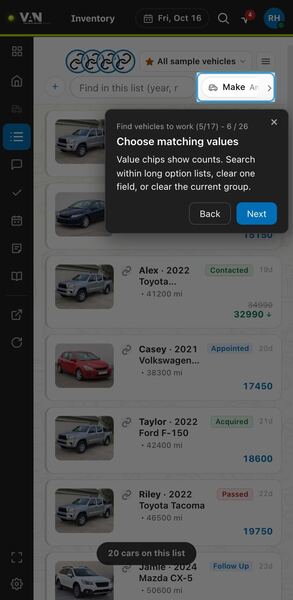
Each filter field in the rail, such as Make, opens its possible values with a count of matching vehicles for each. Use the search box to find an option in long lists, and the clear controls to reset a single field or the whole group. The counts help you see at a glance where most of the work sits.
Step 7: Filter by text or value
Switch between Search and By Value where offered. Enter the text, then apply it to the current field.
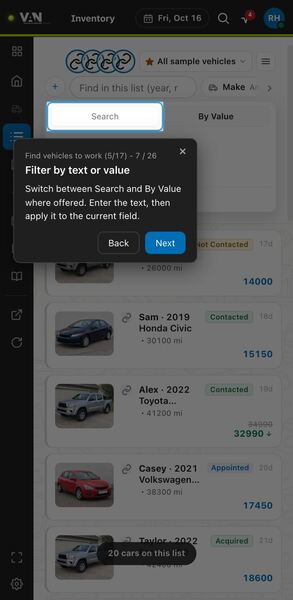
Some filter fields offer two tabs at the top of the drawer: Search and By Value. Type your text, then apply it to the current field. Use Search when the value you need is easier to type than to find in a long list.
Step 8: Move through compact filters
Use the rail arrows to reach additional filter steps. Clear the drawer's active selection when you need to broaden the list.
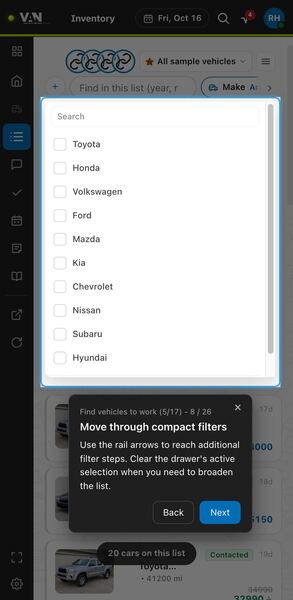
The compact filter drawer opens below the filter rail with a searchable checklist of values for the current field. The arrow at the end of the rail reaches filter steps that do not fit on screen, and the clear control removes the drawer selection. Use it when your list looks too short and you suspect a filter is hiding cars.
Step 9: Choose your filter fields
Browse categories, search fields, and choose what appears. Hide unused fields to simplify the rail.
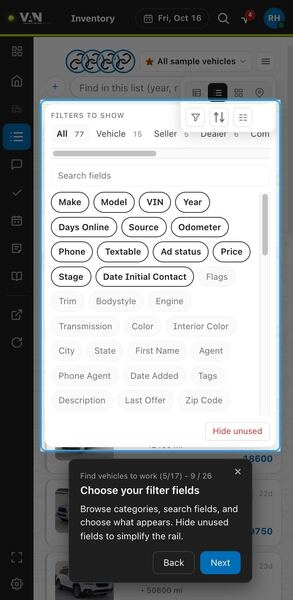
The fields button opens Filters to Show. Tabs such as All, Vehicle, Seller, and Dealer group the fields with a count, a search box finds a field by name, and chips such as Make, Model, VIN, or Price turn fields on or off. Use Hide unused to remove fields you do not need from the rail.
Step 10: Find controls in More
When the header is crowded, More contains controls such as search, sort, and the field chooser.
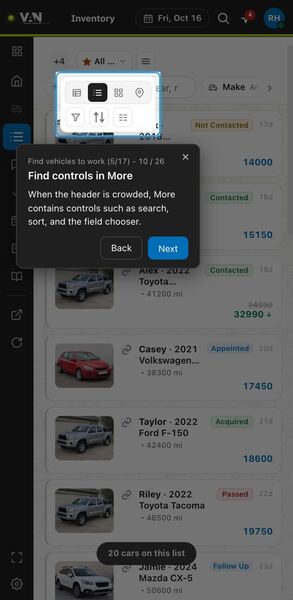
When the header is crowded, the More menu collects controls that no longer fit. In the example it holds the layout buttons plus the filter, sort, and field chooser buttons. If a control you expect seems to be missing, check here first.
Step 11: Choose a useful layout
List emphasizes scanning, Cards emphasizes photos, and Map emphasizes location. Each layout shows the current filtered inventory.
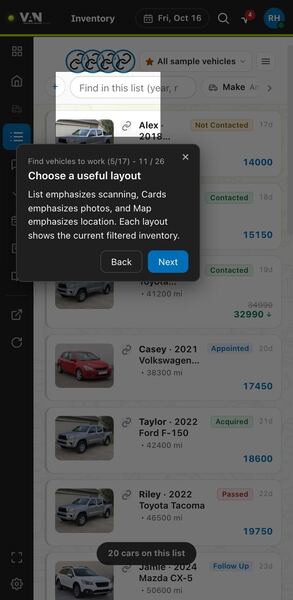
The layout buttons switch how the current filtered inventory is displayed. List is best for scanning many cars quickly, Cards shows larger photos, and Map shows where cars are. Your filters stay the same when you switch.
Step 12: Inspect a photo card
Photo cards show the vehicle, seller, VIN, and available picture count. Open the card to inspect the vehicle page.
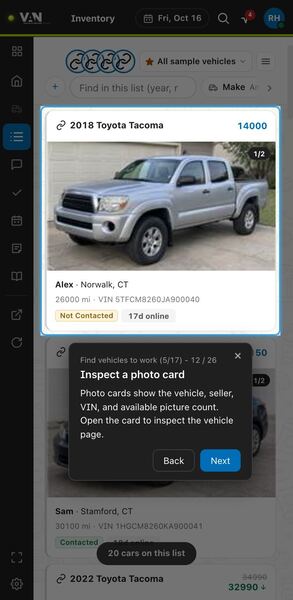
In Cards layout each vehicle gets a large photo card with the title, price, seller name and city, mileage, VIN, stage, days online, and a photo counter such as 1/2. Click the card to open the full vehicle page. Use this layout when photos matter, for example to spot condition issues before reaching out.
Step 13: Read a vehicle card
Check stage, asking price, price changes, miles, distance, and time online. Gone and dealer markers flag vehicles needing special attention.
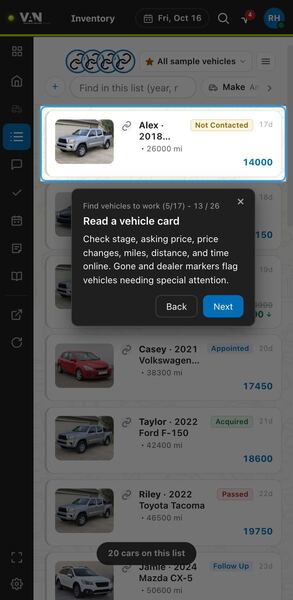
Each vehicle card packs the key facts together: seller and vehicle, stage chip, mileage, days online, and asking price, with a crossed-out old price and an arrow when the price changed. Gone and dealer markers flag cars that need special attention. Scan these before opening a car to decide where to spend your time.
Step 14: Inspect photos or the listing
Open a multi-photo gallery from the photo. Use the source logo to open the original listing.
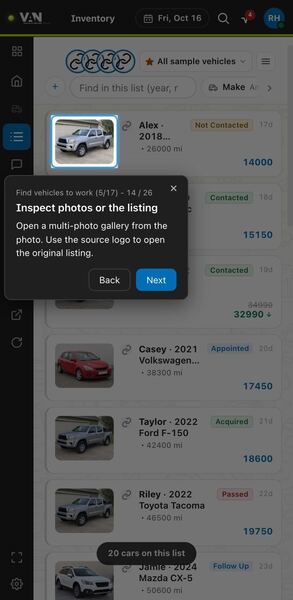
Clicking the thumbnail on a card with several photos opens a gallery so you can flip through them without leaving the list. The source icon next to the photo opens the original listing on the listing site. Use the gallery for a quick condition check and the source icon when you need the seller page.
Step 15: Pass or flag a dealer
Swipe right to pass; pending to-dos are deleted and Undo appears. Swipe left to report or unreport the seller as a dealer.
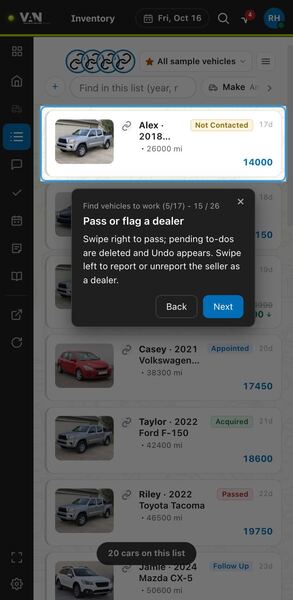
List cards support swipes. Swipe right to pass on a car: its pending to-dos are deleted and Undo appears in case you change your mind. Swipe left to report the seller as a dealer, or to remove that report.
Step 16: Work by location
Map pins group vehicles by ZIP. Read the note on vehicles without a location, or show another batch of vehicles.
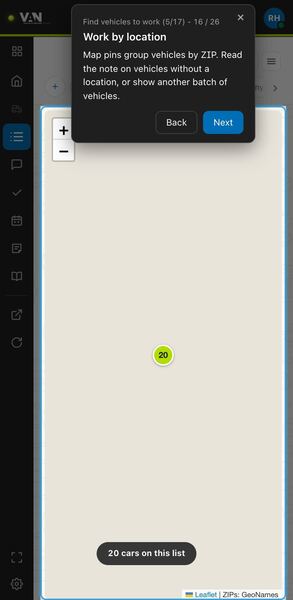
In Map layout, round pins show how many vehicles share a ZIP code, and you can zoom with the plus and minus buttons. A note covers vehicles without a location, and a control shows another batch of vehicles. Use the map to see where cars cluster before planning visits.
Step 17: Inspect a ZIP group
Open a vehicle from this ZIP's list. These map-sheet cards do not support swipe actions.
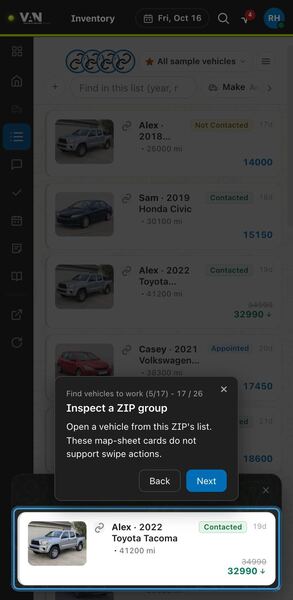
Clicking a ZIP pin opens a sheet with the vehicles in that ZIP. Click a card to open its vehicle page. These sheet cards do not support swipes, so pass or flag dealers from the regular list instead.
Step 18: Manage saved lists
Create, save, rename, copy, or delete a list. Inventory also offers scheduled delivery and exports.
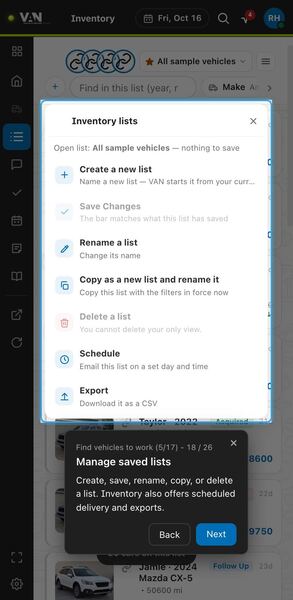
The menu button next to the list name opens Inventory lists. It shows the open list and offers Create a new list, Save Changes, Rename a list, Copy as a new list and rename it, Delete a list, Schedule, and Export. Options that do not apply are greyed out with a reason, such as nothing to save or not being able to delete your only view.
Step 19: Name your list
Give the list a recognizable name, then save it.
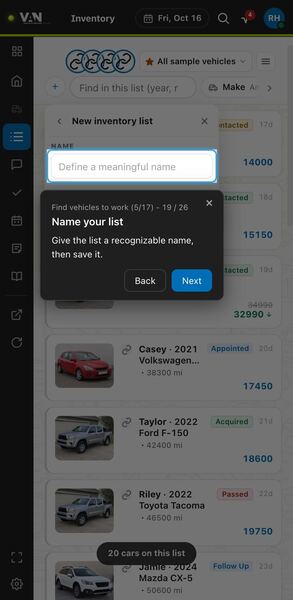
When you create a new inventory list, the Name field asks for a meaningful name. Type something you will recognize later, such as the area or price range it covers, then save. Clear names make the Lists picker easier to use.
Step 20: Resolve your list draft
Accept or cancel the draft. Save into an existing list, create another list, or undo the changes.
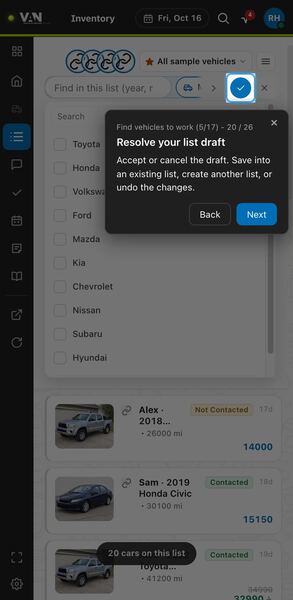
When you change filters, a check button and an X appear next to the filter rail. Accept the draft with the check or cancel it with the X. You can then save the changes into the existing list, create another list, or undo them.
Step 21: Export the list
In List layout, choose current rows, all rows, logs, or PDF. Review the selected scope before exporting outside the tour.
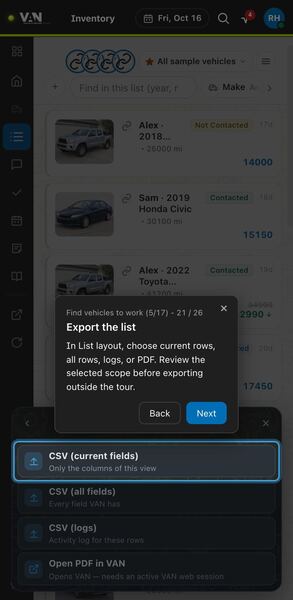
The Export sheet offers CSV (current fields) with only the columns of this view, CSV (all fields), CSV (logs) with the activity log for these rows, and Open PDF in VAN, which needs an active VAN web session. Export is available in List layout. Check which option you pick before exporting so the file contains what you expect.
Step 22: Manage scheduled delivery
Create a delivery schedule, or edit and delete existing schedules for this inventory list.
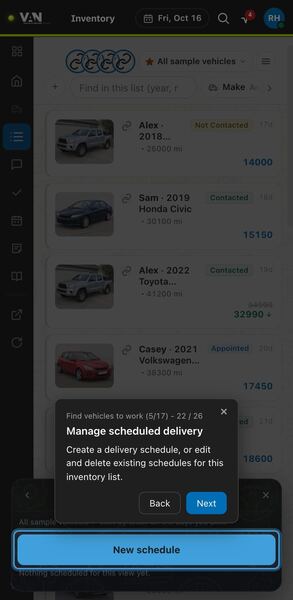
The Schedule sheet emails this list on the days you pick. Use New schedule to create one; existing schedules appear here with edit and delete buttons, or a note says nothing is scheduled yet. A schedule gets the list to you without exporting by hand.
Step 23: Set delivery details
Choose days, time, format, teammates, and email recipients. Save the schedule or delete the existing one.
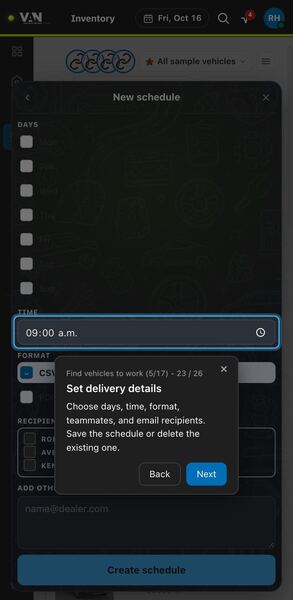
The New schedule editor lets you tick days from Mon to Sun, set a time, choose CSV or PDF, tick teammates as recipients, and add other email addresses. Press Create schedule to save it; an existing schedule can also be deleted here. A morning delivery is a simple way to start the day with a fresh list.
Step 24: Understand loaded results
The count describes your current results. More rows load as you continue through the list.
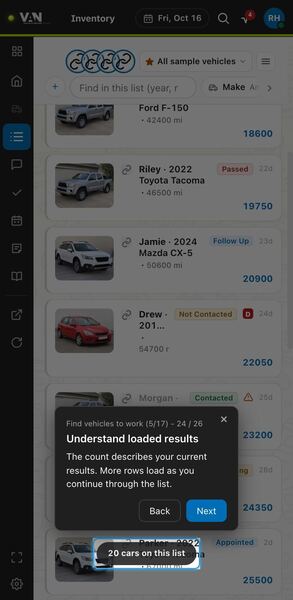
The pill at the bottom, such as 20 cars on this list, describes your current results. More rows load as you continue through the list. Check the count before assuming a car is missing.
Step 25: Notice a changing list
This notice tells you the list changed while you were loading it. Dismiss the notice after reviewing it.
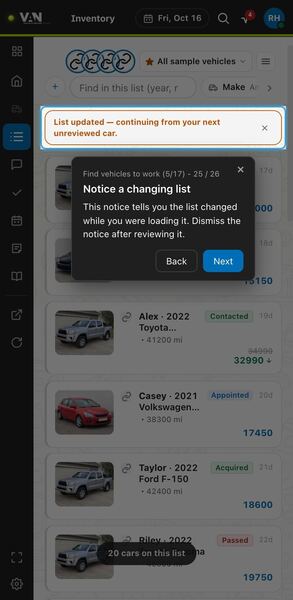
This notice, such as List updated, continuing from your next unreviewed car, appears when the list changed while you were loading it. Review it, then close it with the X. Keep it in mind if cars seem to shift as you go.
Step 26: Retry an older list
Retry refreshes a list that could not update. Empty-state actions help when search, filters, or the selected view exclude everything.
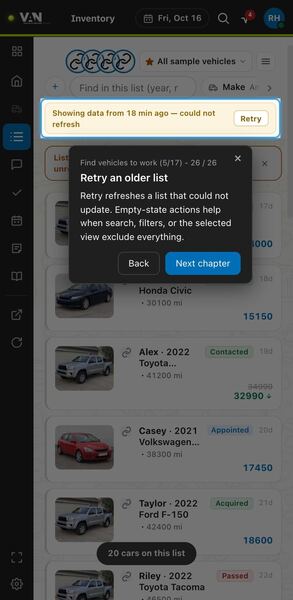
The stale bar, for example Showing data from 18 min ago, could not refresh, tells you the list is older than it should be. Press Retry to refresh it. When search, filters, or the view hide every car, empty-state buttons help you broaden the results.
Chapter 6: Evaluate a vehicle
Once you open a vehicle, the vehicle page brings everything about it into one place. This chapter walks through identity, price, photos, seller details, contact options, and the deeper sections like specs, market data, and reports. Use it to decide quickly whether a car is worth pursuing and how to approach the seller.
Step 1: Work one vehicle
This page brings the vehicle, seller, conversation, and next actions together. Back returns to the previous view.
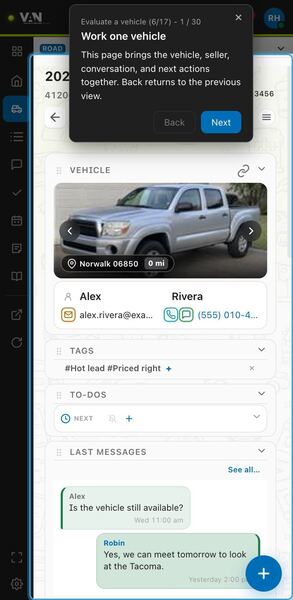
The vehicle page gathers the car, the seller, tags, to-dos, recent messages, and next actions in one place. The back arrow returns you to the view you came from. Treat this page as your workspace for a single car.
Step 2: Move through your list
Use the arrows to move between vehicles. The list name returns to the list, and the count shows your position.
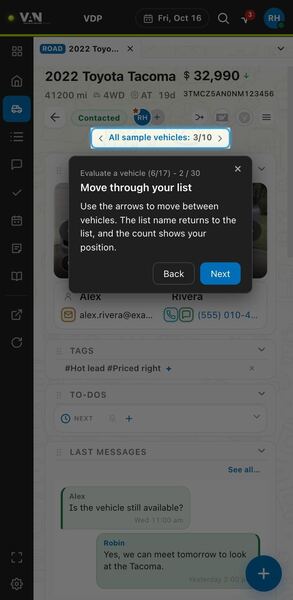
Below the stage and action buttons, the list bar shows the list name and your position, such as 3/10. The arrows on each side move to the previous or next vehicle, and the list name returns to the list. This lets you work through a list car by car.
Step 3: Read the vehicle identity
Read the title, asking price, facts, and VIN together at the top of the vehicle page.
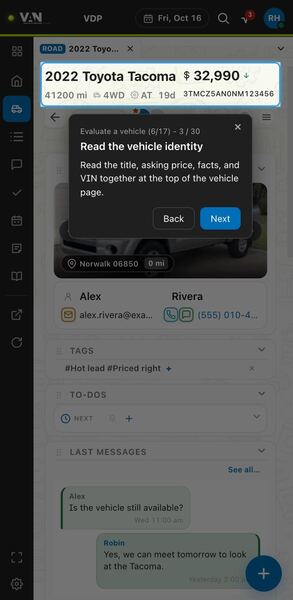
The identity block at the top shows the title, asking price with its change arrow, mileage, drivetrain, transmission, days online, and VIN. Read it first to confirm you are on the right car. It is also a quick summary to glance at while talking with a seller.
Step 4: Check editable facts
Check mileage, drivetrain, transmission, and days online. Editable facts require an explicit save; leaving the field does not save these changes.
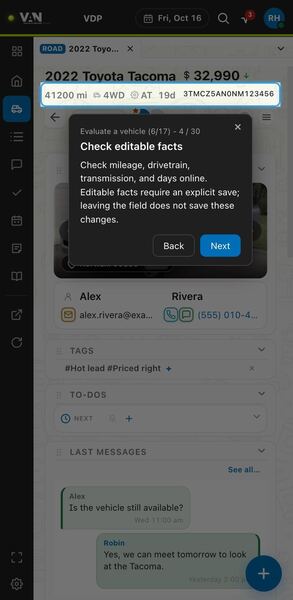
The fact row under the title shows mileage, drivetrain, transmission, and days online. Editable facts need an explicit save; leaving the field does not save your change. Correct them when the seller gives better information, and remember to save.
Step 5: Check or correct the VIN
Copy the VIN or edit it. VIN edits save on Enter or blur; Escape restores the previous value. Invalid VINs are rejected.
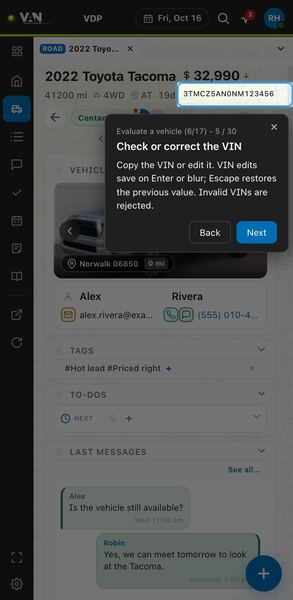
The VIN sits at the right of the fact row. You can copy it or edit it: an edit saves on Enter or when you leave the field, Escape restores the previous value, and invalid VINs are rejected. Copy it to run it elsewhere, and fix it when the listing had a typo.
Step 6: Recognize VIN-derived information
VIN-derived information identifies its source. A trim decoded from the VIN is shown, never saved to VAN.
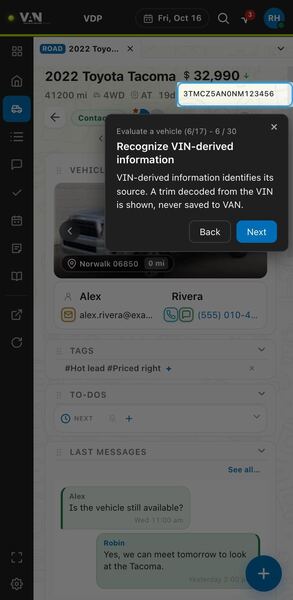
Information decoded from the VIN is labeled with its source so you know where it came from. A trim decoded from the VIN is shown for reference but never saved to VAN. Treat it as a hint and confirm with the seller.
Step 7: Review the asking price
Check the asking price and its direction of change. Open price history when more than one recorded price is available.
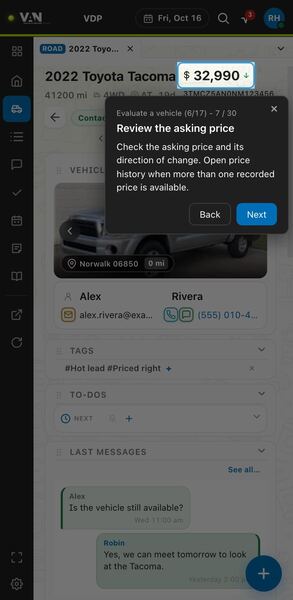
The asking price sits next to the title, with an arrow showing whether it went up or down. When more than one price is recorded, it opens the price history. A recent drop can signal a seller ready to deal.
Step 8: Inspect price changes
Compare recorded prices and dates before deciding how to approach the seller.
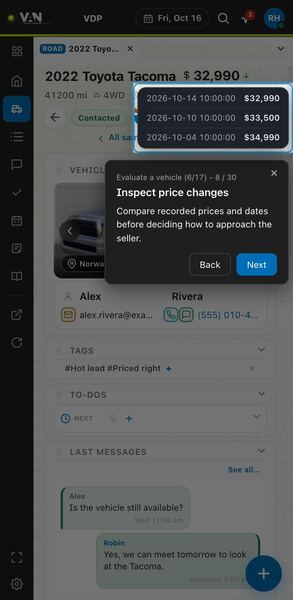
The price history lists each recorded price with its date and time, newest first. Compare them to see how much and how often the seller lowered the price. Check it before your first message so your approach fits the seller.
Step 9: Inspect vehicle photos
Browse photos with the arrows, or open the gallery for a larger view. Vehicles without photos show an explicit empty state.
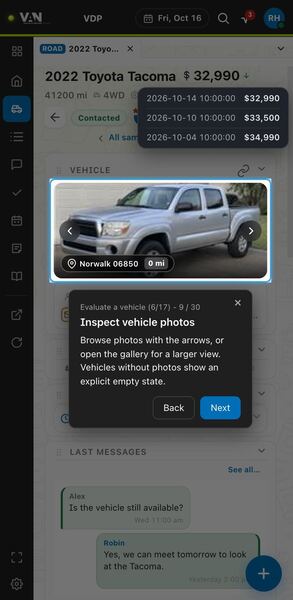
The photo area at the top of the Vehicle section shows the vehicle pictures; use the side arrows to browse or open the gallery for a larger view. Vehicles with no photos show a clear empty state. Look for damage or mismatches before contacting the seller.
Step 10: Check distance and directions
Open directions from your dealership when location is known. The displayed distance is straight-line distance, not driving distance.
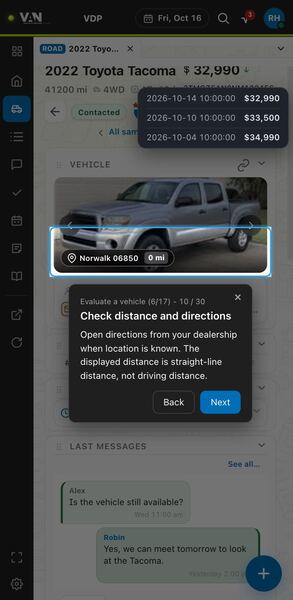
The location pill on the photo shows the seller city and ZIP with the distance from your dealership. That distance is straight-line, not driving distance. Click the location for directions when it is known.
Step 11: See the route to the seller
Selecting the location opens a map from your dealership to the seller. Open it in Google Maps for turn-by-turn directions.
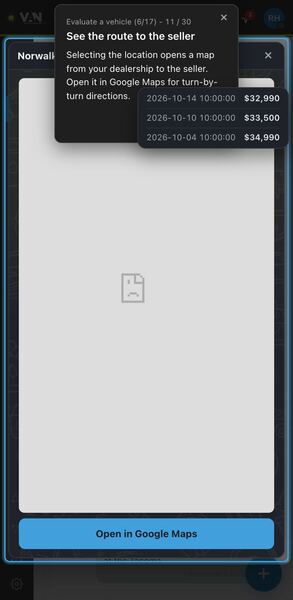
Clicking the location opens a map panel from your dealership to the seller. The Open in Google Maps button gives turn-by-turn directions. Use it to estimate travel before booking an appointment.
Step 12: Check the seller details
Review the seller's name and contact information. Add missing fields or edit existing details when you have verified corrections.
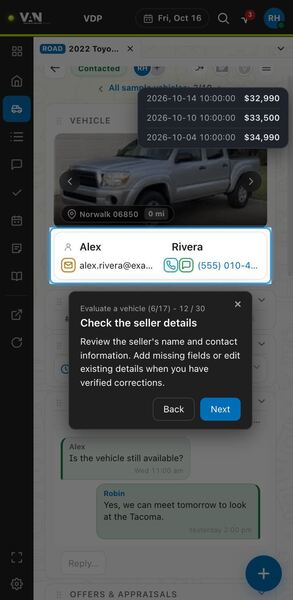
The seller card under the photo shows the first and last name, email, and phone. You can add missing fields or edit existing ones once you have verified the correction. Accurate details keep calls, texts, and emails going to the right person.
Step 13: Correct contact information
Edit the seller's email or phone carefully. These changes save to VAN when writes are enabled outside the tour.
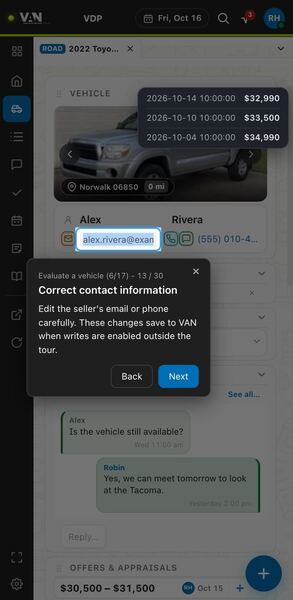
Clicking the email or phone turns it into an editable field. Outside the tour these changes save to VAN when writes are enabled, so double-check what you type. Update contact details as soon as the seller gives you better ones.
Step 14: Use a detected seller name
Companion can find a missing seller name on the listing site. Your preference determines whether it adds the name automatically or offers it first.
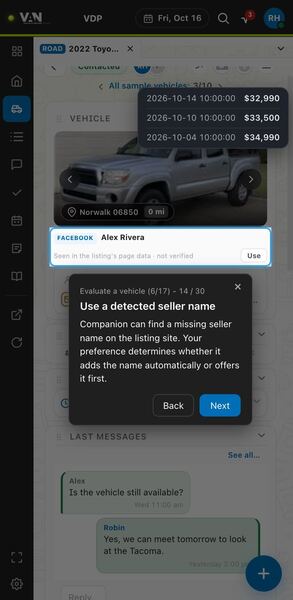
When the seller name is missing, Companion can find it on the listing site and show it with a note that it was seen in the listing page data and is not verified. Press Use to apply it, or let your preference add it automatically. Review it before using so your messages address the right person.
Step 15: Choose how to contact
Text and Email open the conversation. Call asks for confirmation, then VAN rings your phone first. Unavailable channels explain why.
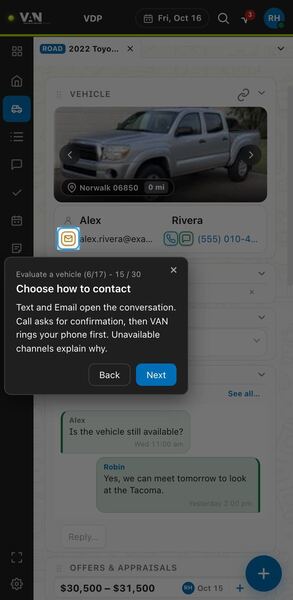
The small icons beside the seller email and phone are the contact channels. Text and Email open the conversation, while Call asks for confirmation and then VAN rings your phone first. When a channel is unavailable, it explains why instead of failing silently.
Step 16: Recognize an unknown contact
Some incoming contacts lack a complete seller or vehicle. Copy the ID for reference or dismiss the unknown-contact view.
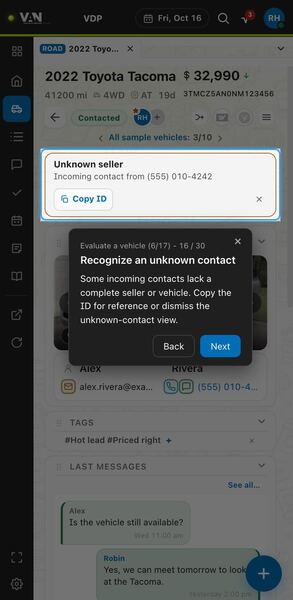
An Unknown seller card appears for an incoming contact without a complete seller or vehicle, showing what is known, such as the phone number. Copy ID saves its ID for reference, and the X dismisses the card. Share the ID when asking a teammate to help match the contact.
Step 17: Review a dealer warning
A warning explains a match with your dealer list. A weaker name match needs particular care before you act.
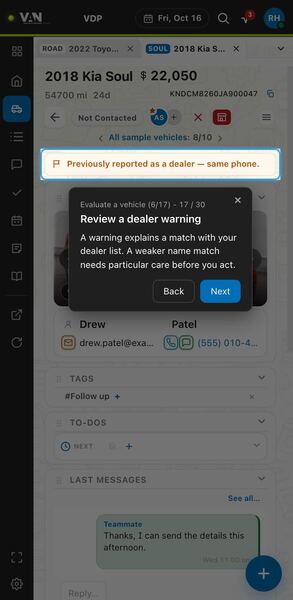
A dealer warning bar explains why the seller matches your dealer list, for example Previously reported as a dealer, same phone. A weaker match such as a name only needs extra care. Verify before you pass on the car or treat the seller as a dealer.
Step 18: Open the original listing
Open the source listing to inspect the seller's original page. Shift+C copies its URL outside the tour.
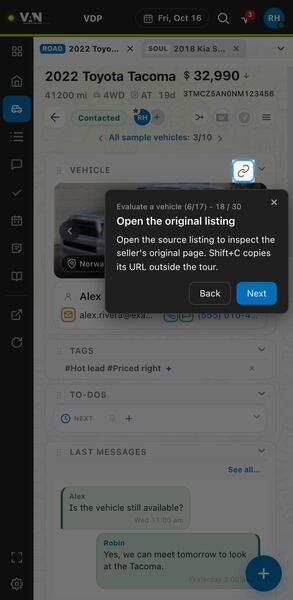
The link icon in the Vehicle section header opens the original listing on the listing site. Outside the tour, Shift+C copies its URL. Check the original page when you want the latest photos or description.
Step 19: Arrange your vehicle details
Available sections follow your layout preferences. Fold permitted sections from their headers; Settings controls visibility and whether they can collapse.
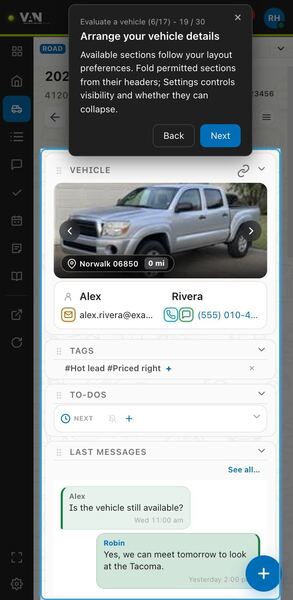
The vehicle page is split into sections such as Vehicle, Tags, To-Dos, and Last Messages, following your layout preferences. Click the arrow in a section header to fold it when allowed; Settings controls which sections show and whether they can collapse. Folding sections you rarely use keeps the important ones in view.
Step 20: Reorder side-panel sections
Drag a section's grip to change its order in the side panel. Workspace uses its own module controls.
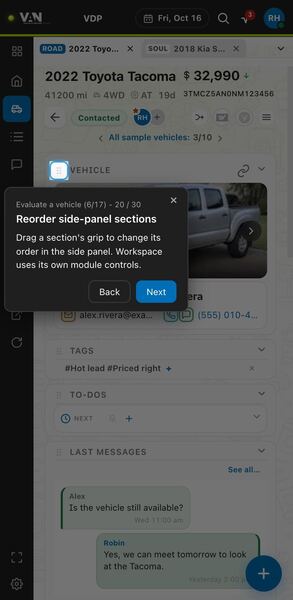
Each side-panel section has a dotted grip at the left of its header. Drag it to move the section up or down, for example to keep reports near the top. The workspace has its own module controls.
Step 21: Inspect vehicle specifications
Review vehicle specifications here. Select an editable value when you need to correct it.
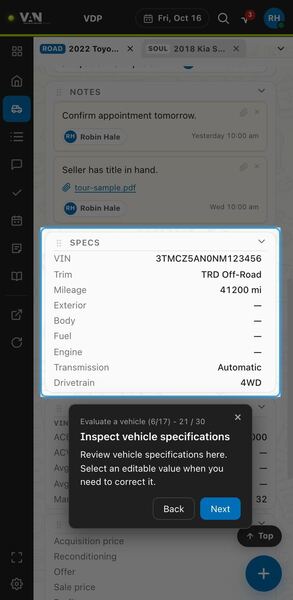
The Specs section lists VIN, trim, mileage, exterior, body, fuel, engine, transmission, and drivetrain, with a dash for missing values. Click an editable value to correct it. Accurate specs help with valuation.
Step 22: Save specification changes
Save verified specification edits or cancel them. The editor also shows count and missing-value indicators.
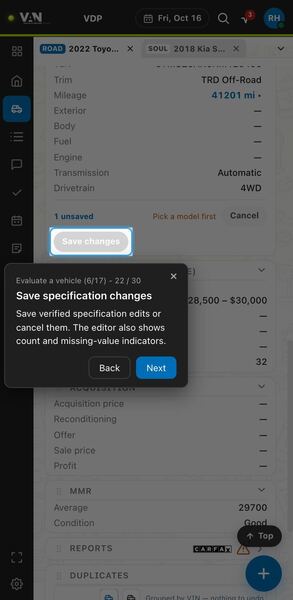
While you edit specs, the editor shows how many changes are unsaved and flags what is missing, such as Pick a model first. Press Save changes to keep verified edits or Cancel to discard them. Fill in specs when the seller confirms them.
Step 23: Review appraisal-tool information
Review available provider data and open its linked record. An empty state means the vehicle has not supplied that information.
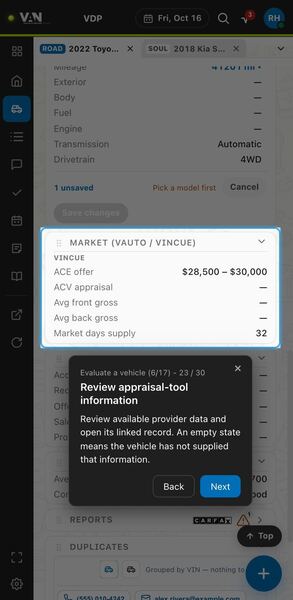
The Market section shows appraisal-tool data, such as an ACE offer range, ACV appraisal, average gross, and market days supply, with a dash where nothing is available. Open the linked record when one is offered. Check it to gauge value before making an offer.
Step 24: Check acquisition information
Review acquisition details when available. A vehicle without acquisition data shows "Not acquired yet."
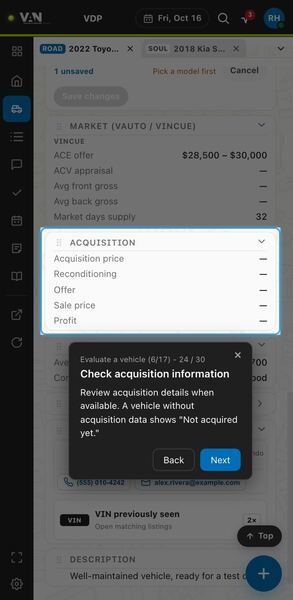
The Acquisition section lists acquisition price, reconditioning, offer, sale price, and profit. A vehicle without acquisition data shows Not acquired yet. Use it to confirm whether a car is already bought.
Step 25: Review available MMR information
Review MMR values when available. Missing MMR data remains explicitly unavailable.
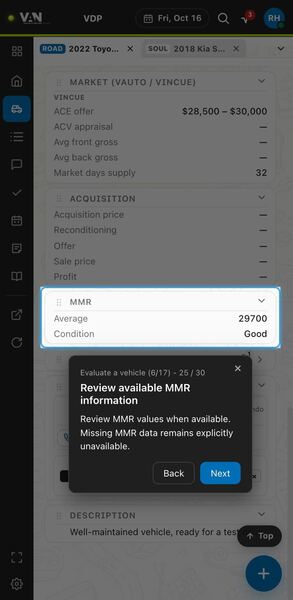
The MMR section shows values such as the average and condition when they are available. Missing MMR data is shown as unavailable rather than filled in. Use it with market data to judge the asking price.
Step 26: Review vehicle reports
Open available Carfax or AutoCheck reports and review the NHTSA recall state. Availability depends on the vehicle and integrations.
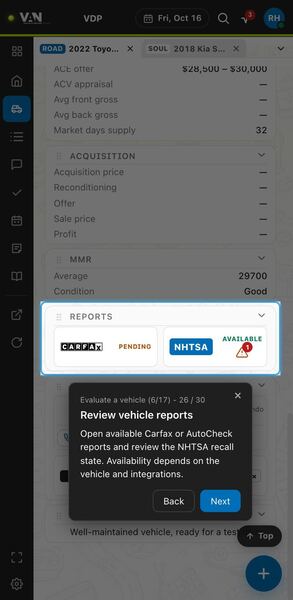
The Reports section shows a card per source, such as Carfax with its status and NHTSA with recall information and a warning count. Open available Carfax or AutoCheck reports from their cards. What appears depends on the vehicle and your integrations.
Step 27: Request an available report
When Carfax is active and no report is loaded, this control requests the report. Tour samples never make that request.
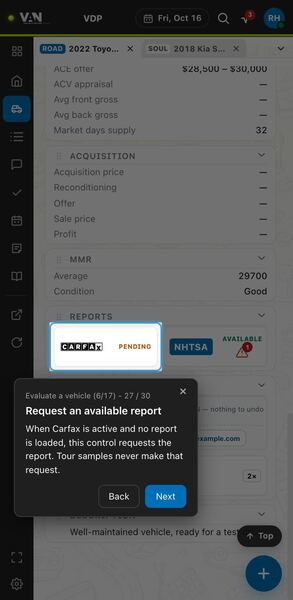
When Carfax is active and no report is loaded, the Carfax card becomes a control that requests the report. The tour sample never sends that request. Request a report once a car looks worth a closer look.
Step 28: Find compact report access
When the Reports section is hidden, report shortcuts can appear in the vehicle head.
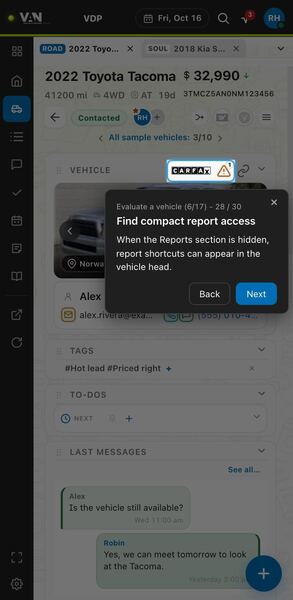
When the Reports section is hidden, report shortcuts such as the Carfax logo and a recall warning can appear in the Vehicle section header. They give quick access to reports without the full section. This suits you if you prefer a shorter vehicle page.
Step 29: Read the listing description
Read the seller's listing description. Missing text is shown as "No description."
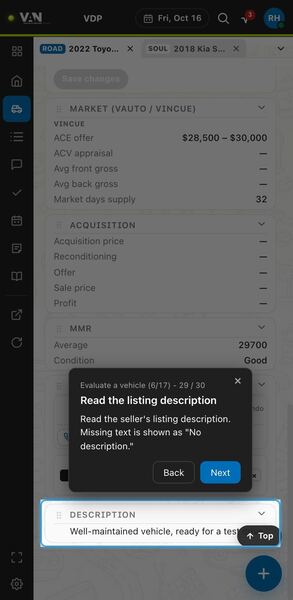
The Description section shows the seller listing text. If there is none, it says No description. Read it for details about condition, reason for selling, or price flexibility.
Step 30: Return to the top
Use this control after scrolling down a long vehicle page to return to its top.
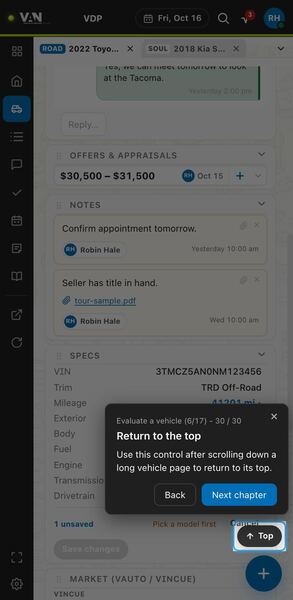
After you scroll down a long vehicle page, the Top button near the bottom right takes you back to the top. Use it to get back to the identity, price, and contact details quickly. It saves scrolling between sections.
Chapter 7: Inspect photos and identify vehicles
Photos are often the fastest way to judge a car and to pin down exactly which vehicle you are working. This chapter walks through the photo galleries and the built-in plate and VIN reader, from opening a photo to checking what the reader found. Nothing you do in the tour saves an identity to a real listing.
Step 1: Browse photos from a list
Browse photos without leaving the list. Close the gallery with its close button, Escape, or the backdrop.
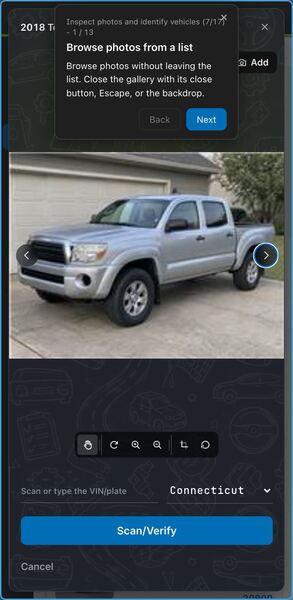
The gallery opens on top of the list with the vehicle name and a photo counter in its header. Use the left and right arrows to move through the photos, so you can judge a car without opening its vehicle page. When you are done, use the X in the corner, press Escape, or click the backdrop to land back where you were in the list.
Step 2: Identify and open photo sources
"From seller" identifies a seller-supplied photo. Open full size or add pictures using the available gallery tools.
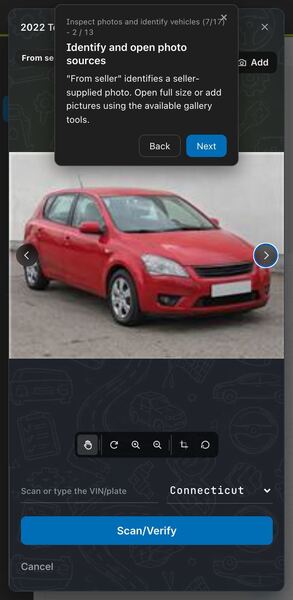
The label in the top-left corner of the gallery tells you where the current photo came from; "From seller" means the seller supplied it. The Add button in the top-right lets you add pictures to the vehicle. Check the source before you rely on a photo to judge condition or read a plate.
Step 3: Browse the vehicle gallery
The vehicle-page gallery has its own photo navigation and zoom controls. Close it to return to the vehicle.
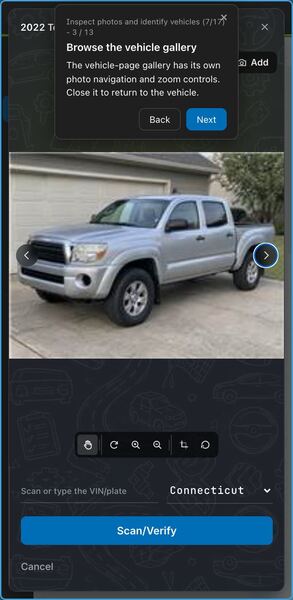
The vehicle page has its own gallery with the same layout: arrows to step through photos and a toolbar under the photo with zoom in and zoom out. Zoom in on details such as tires, panels or the dash. Close it with the X to return to the same vehicle page.
Step 4: Identify the vehicle from photos
The built-in reader scans sample plate and VIN photos here. The tour never saves a vehicle identity.
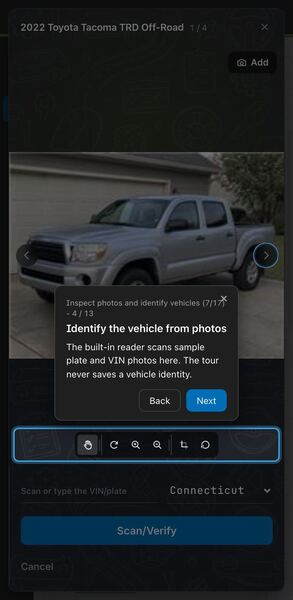
The highlighted toolbar under the photo belongs to the built-in plate and VIN reader. From left to right it has move, rotate, zoom in, zoom out, select a scan area and reset. Below it you type or scan the identity and press Scan/Verify. In the tour this works on sample photos and nothing is saved.
Step 5: Add a missing identity
Use Add plate / VIN when the vehicle has no saved VIN. You can enter an identity or inspect a photo.
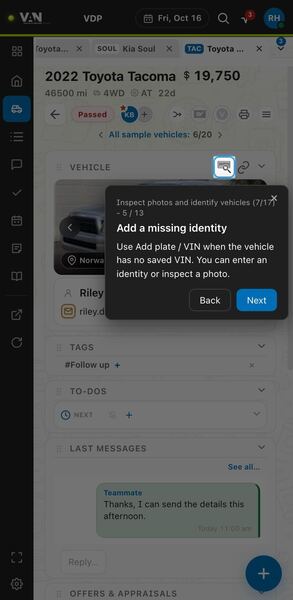
This small scanner icon sits in the header of the Vehicle card on the vehicle page. Click it when the vehicle has no saved VIN to open the identity tool, where you can type a plate or VIN or read one from a photo. Identifying the car early lets you check it before spending time with the seller.
Step 6: Enter a plate or VIN
Enter a plate or a seventeen-character VIN. Plate lookup also needs the issuing state. Help explains the tool's workflow.
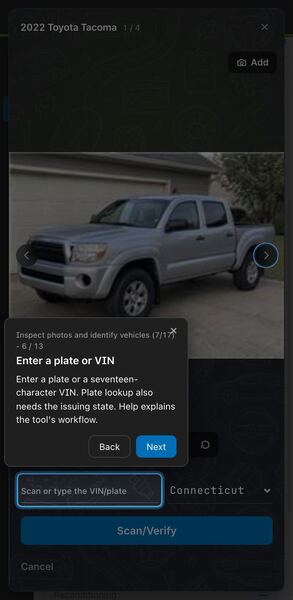
This field, labeled "Scan or type the VIN/plate", is where the identity goes. A VIN must be the full seventeen characters; for a plate, also pick the issuing state in the dropdown beside it. Press Scan/Verify to check it, or Cancel to leave. The Help control explains the workflow if you get stuck.
Step 7: Choose a plate photo
Choose the sample rear photo and inspect its plate before reading. The tour never saves an identity.
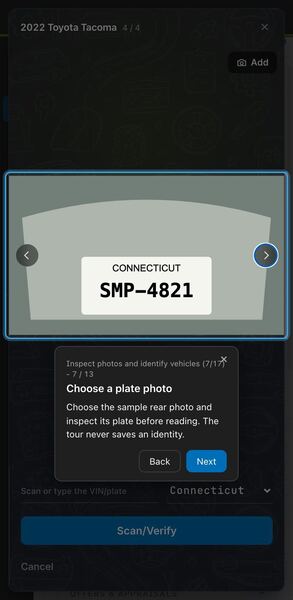
Use the arrows to reach the sample rear photo, where the plate is shown. Look at it closely, zooming if needed, to make sure every character and the state are clear before you ask the reader to scan. In the tour the plate is a sample and no identity is saved.
Step 8: Choose a VIN photo
Select a photo containing the VIN. Use previous and next to inspect other listing photos before selecting a scan area.
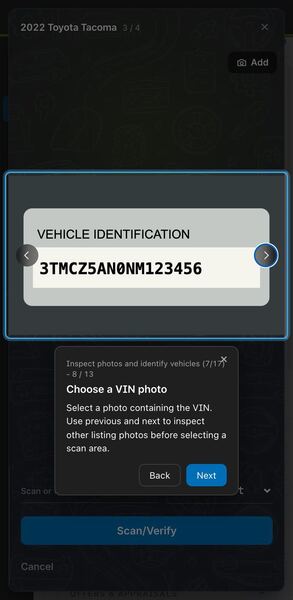
To read a VIN, move through the listing photos with the previous and next arrows until you find the one that shows the VIN clearly. The sample photo here shows a vehicle identification label. Once you have the right photo, select the scan area around the VIN so the reader focuses only on it.
Step 9: Make the identity readable
Rotate or zoom the photo, move it, select a scan area, or reset adjustments before reading the identity.
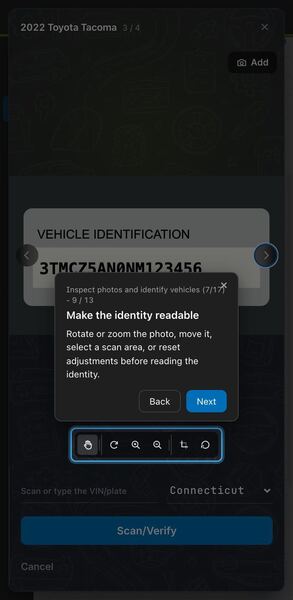
The editing toolbar has move, rotate, zoom in, zoom out, select a scan area and reset. Use them when a photo is sideways, small or cluttered: turn it upright, zoom in, drag it into place, then draw the scan area around the plate or VIN. Reset puts the photo back if you want to start over.
Step 10: Follow the identity check
Status messages distinguish scanning from identity verification. Read the current action label before continuing.
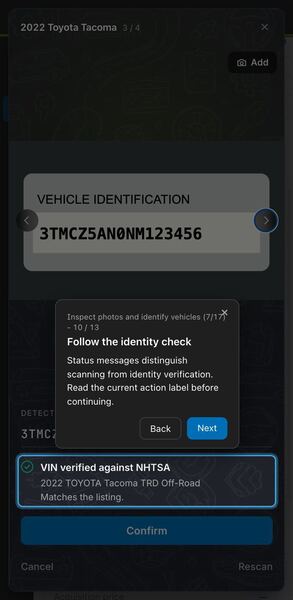
After a scan, the status box shows the result of the identity check. In the sample, it reports the VIN as verified against NHTSA, shows the year, make and model, and says it matches the listing. Read this box and the button label below it, Confirm or Rescan, before you continue.
Step 11: Compare possible readings
When readings disagree, inspect the alternatives and confirm the correct identity against the photo.
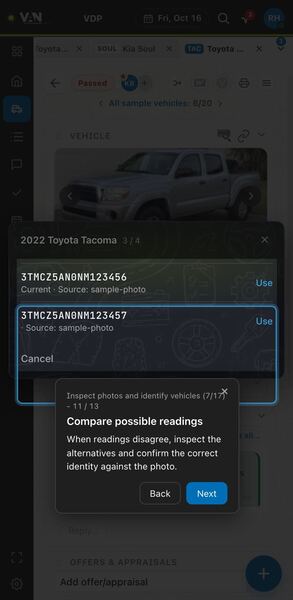
When readings disagree, the tool lists each candidate VIN with its source, and a Use button beside each one. Compare every character against the photo, then press Use on the one that matches. Cancel closes the list without choosing.
Step 12: Check what the reader found
Review the detected plate and VIN. Correct errors, rescan when necessary, and read the final action before saving outside the tour.
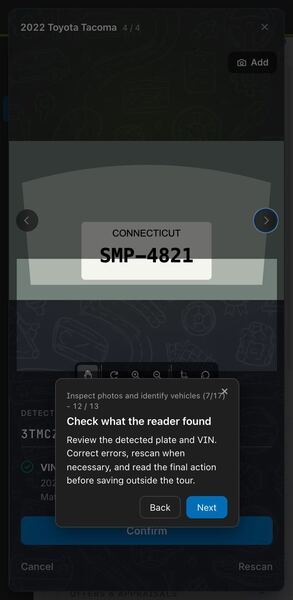
This area shows what the reader detected, the verification result, and the Confirm and Rescan buttons. Check the detected plate and VIN against the photo, correct a wrong character, or press Rescan if the result looks off. Outside the tour, the final action saves the identity to the listing, so read it before you press it.
Step 13: Remove an incorrect saved VIN
Use this control only when the saved VIN belongs to the wrong vehicle. Removing it changes the listing outside the tour.
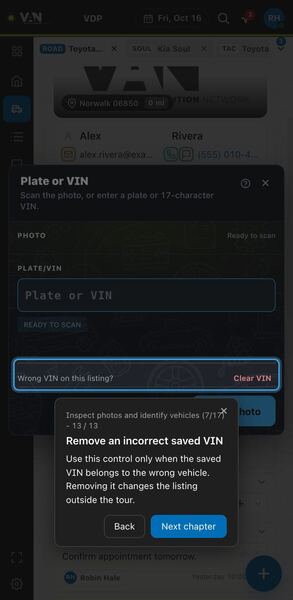
At the bottom of the Plate or VIN panel, "Wrong VIN on this listing?" offers a Clear VIN button. Use it only when you are sure the saved VIN belongs to a different car. Outside the tour, clearing it changes the real listing.
Chapter 8: Find seller conversations
Communications is where you find every seller conversation in one place. You will learn to pick a message list, search, sort and filter it, read a conversation card, and manage or export your lists. Mastering this view keeps follow-ups from slipping through the cracks.
Step 1: Choose a message list
Search saved message lists, open one, or choose a default. The count reflects the current results.
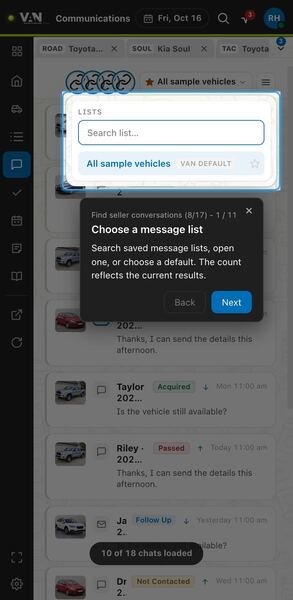
The lists panel opens under the list name at the top of Communications. Type in the search box to find a saved list, click a list to open it, and use the star to make one your default; the VAN DEFAULT badge marks VAN's own list. Pick the list that matches the work you are doing right now.
Step 2: Find a conversation
Search by seller, message text, or vehicle within the loaded list. Clear the query to restore the list.
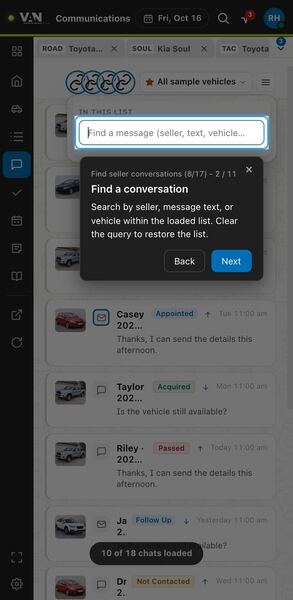
The search box finds conversations inside the list you have loaded. You can search by seller name, words in the messages, or the vehicle. It is the quickest way to find one seller when they call you back; clear the box to see the full list again.
Step 3: Sort your conversations
Choose the available sort that puts the conversations you need first. Communications supports sorting as well as filtering.
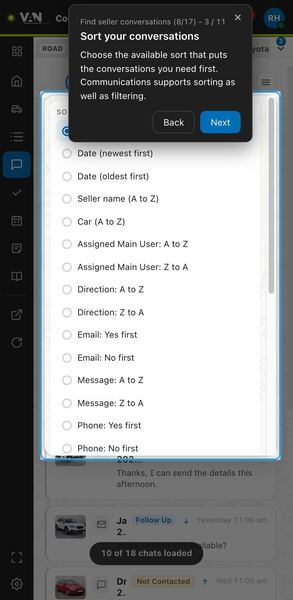
The sort panel lists every available order: date newest or oldest first, seller name, car, assigned main user, direction, email, message, phone and more. Pick the one that brings the conversations you need to the top. Sorting works together with any filters you have applied.
Step 4: Show conversation filters
Show the filter rail to narrow conversations. Available steps depend on the data; empty steps are omitted.
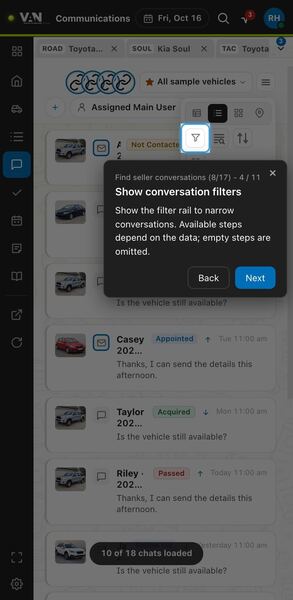
The funnel button, in the toolbar next to the view buttons, shows or hides the filter rail. The rail lets you narrow conversations by their fields. Only filters that have data are offered, so empty ones do not clutter the rail.
Step 5: Filter for missing information
With and Without options distinguish conversations that have a field from those that do not.
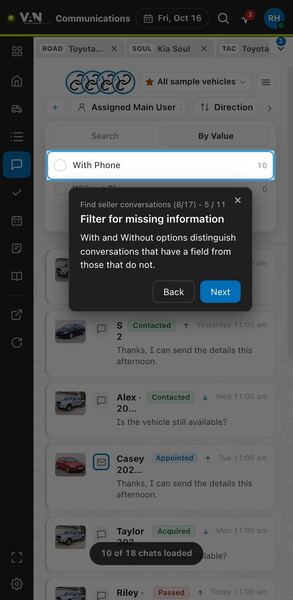
Many filters offer With and Without options, each with a count. In the sample, With Phone shows conversations that have a phone number and Without Phone shows those that do not. Without is handy for finding conversations still missing a piece of information you need.
Step 6: Search within a filter
Use Search or By Value where available. Apply text criteria or find and choose individual values.
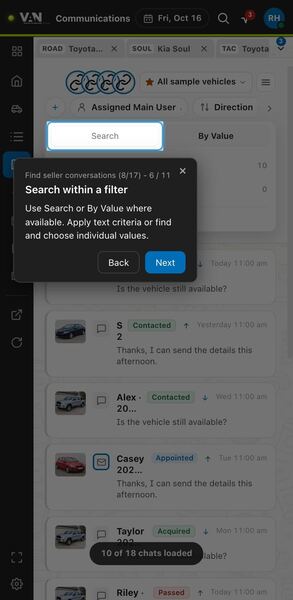
Some filters have Search and By Value tabs. Search lets you match by text you type, while By Value lists the actual values so you can pick the ones you want. Use By Value when you are not sure how a value is spelled.
Step 7: Choose useful filter fields
Search or browse filter fields and hide unused ones. More contains header controls when space is limited.
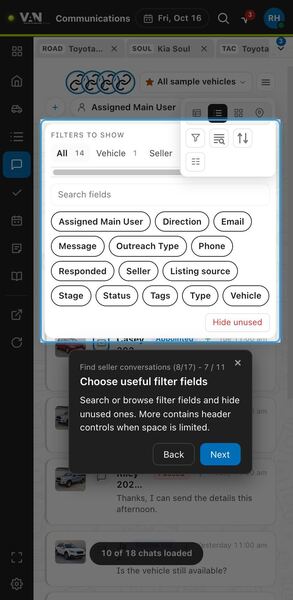
The Filters to show panel lists every filter field, grouped in tabs such as All, Vehicle and Seller, with a search box on top. Click the fields you want in the filter bar, and use Hide unused to clear out the ones you do not need. When the header is narrow, the More menu holds controls that did not fit.
Step 8: Read a conversation card
Check the channel, direction, time, preview, and vehicle stage. Opening the card opens the conversation and marks it read.
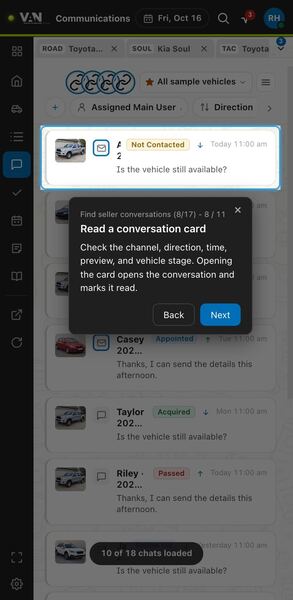
Each card summarizes one conversation: the channel, whether the last message was in or out, its time, a preview of the text, and the vehicle's stage. Scan these details to decide who needs a reply first. Clicking the card opens the conversation and marks it as read.
Step 9: Open the vehicle instead
Use the vehicle photo when you need the VDP rather than the conversation.
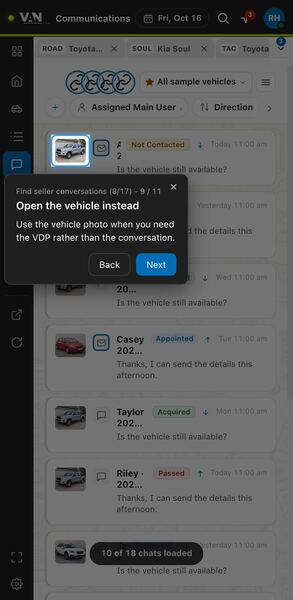
The small vehicle photo on a card is a separate shortcut. Click it when you want the vehicle page instead of the conversation, for example to check price or details before answering. Clicking the rest of the card still opens the chat.
Step 10: Manage message lists
Create, save, copy, rename, delete, or export a message list. Communications does not offer scheduled list delivery.
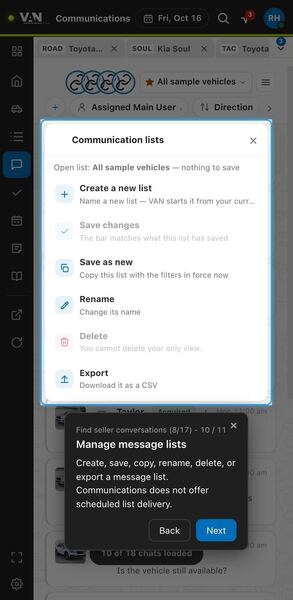
The Communication lists window shows which list is open and whether there is anything to save. From here you can create a new list, save changes, save as new with the filters in force now, rename, delete, or export it as a CSV. Delete is unavailable when it is your only view, and Communications does not offer scheduled list delivery.
Step 11: Export messages or logs
Choose the current message rows or logs. Review the scope before exporting outside the tour.
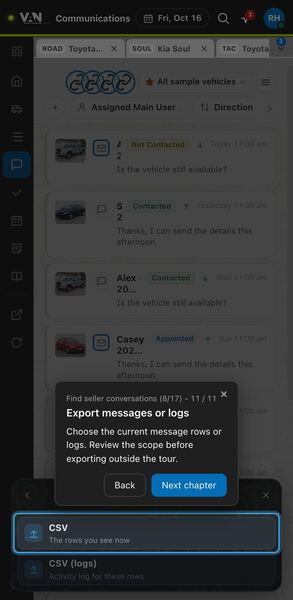
The export menu offers two choices: CSV, which exports the rows you see now, and CSV (logs), which exports the activity log for those rows. Check your filters first, because the export follows what is currently shown. Outside the tour this downloads a real file.
Chapter 9: Reply and prepare messages
The conversation view is where you actually talk to sellers. This chapter covers reading the thread, searching and filtering it, choosing a channel, and preparing replies with quick replies, vehicle fields, shortcuts and scheduling. Every send asks for confirmation first, and tour samples never send anything.
Step 1: Stay with the right vehicle
The header identifies the conversation. Open its vehicle when available, or close an overlay conversation to return to your previous work.
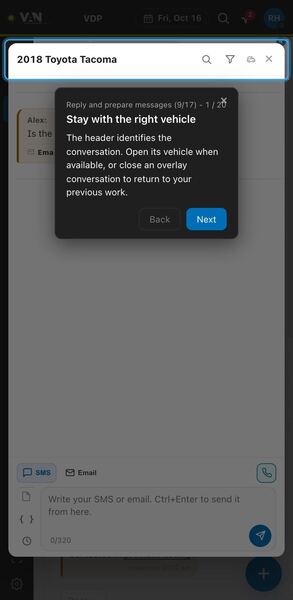
The header shows the vehicle this conversation belongs to, so you always know which car you are discussing. Its icons let you search the thread, filter it, open the vehicle, and close the conversation. If the chat opened as an overlay, closing it takes you straight back to your previous work.
Step 2: Read the conversation history
Review dated messages, delivery indicators, missed contact, and notices. Media may include photos, audio, video, or documents.
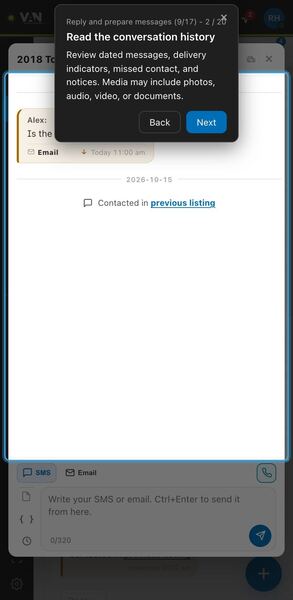
This is the full message history, with dates, delivery marks, missed calls and system notices. Media such as photos, audio, video or documents appear inside the thread too. Read back through it before replying so you do not repeat a question the seller already answered.
Step 3: Follow earlier vehicle context
This link opens the older listing referenced by a message, so you can understand the conversation's previous context.
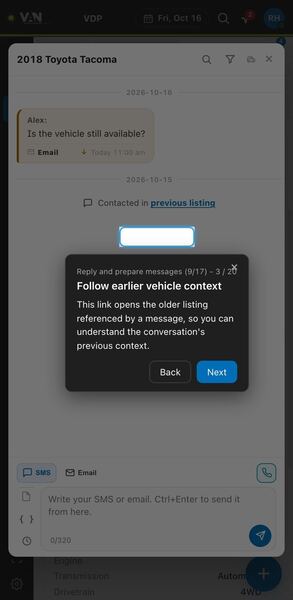
A notice such as "Contacted in previous listing" means this seller was contacted about an earlier listing. Click the link to open that older listing and see what was discussed there. It helps when the same seller relists a car or comes back about another vehicle.
Step 4: Search this conversation
Search the thread and use the result count to see how many messages match.
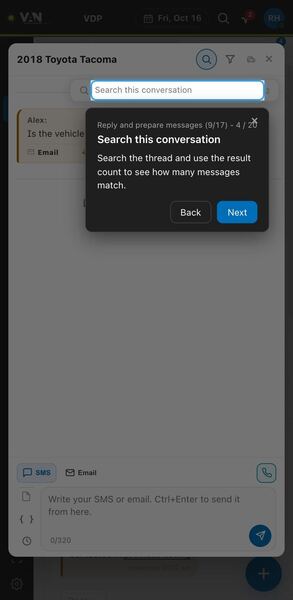
The search box looks for words inside this conversation only. The result count tells you how many messages match. Use it in long threads to quickly find a price, an address or a time the seller mentioned.
Step 5: Narrow the conversation history
Filter by channel, external communications, status, direction, flags, outbound system, or source. Clear filters to restore the thread.
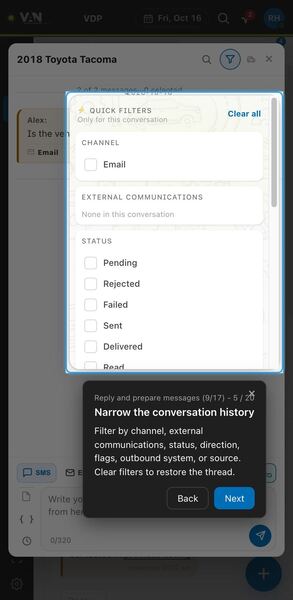
The filter icon in the header opens Quick filters that apply only to this conversation: channel, external communications, status (such as Pending, Failed, Sent or Delivered), direction, flags, outbound system and source. Sections with no data say so. Use Clear all to bring the whole thread back.
Step 6: Choose your sending channel
Choose SMS or Email. Disabled channels explain their limitation; the channel detail helps you understand the selected route.
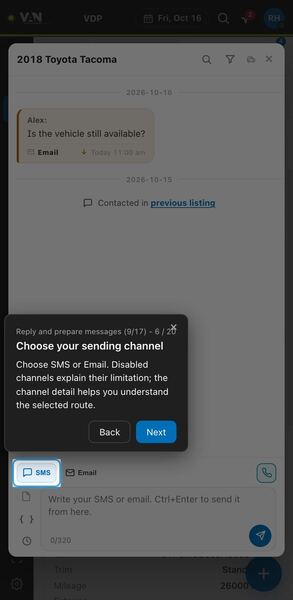
The SMS and Email buttons above the message box choose how your reply goes out; the selected one is highlighted. If a channel cannot be used, it is disabled and explains why. The channel detail confirms the route your message will take, so check it before writing.
Step 7: Prepare an external reply
Copy & send copies your message and opens the external platform. You still send the message there yourself.
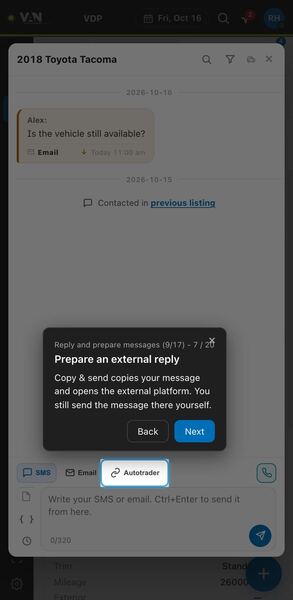
When the seller is on an external platform, an extra channel button appears beside SMS and Email, named after that platform. Copy & send copies your message and opens that platform; you still paste and send it there yourself. Use it when the conversation lives on that platform.
Step 8: Call from the conversation
Start a confirmed call from here when a phone number is available. VAN calls your phone first.
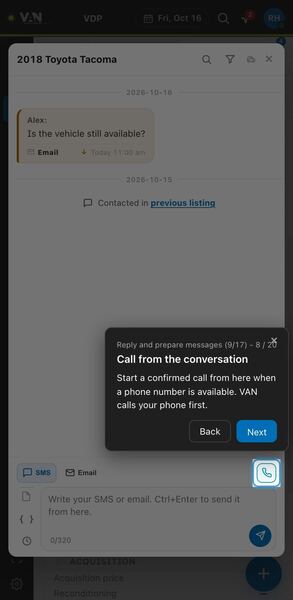
The call button starts a phone call from inside the conversation when the seller has a number. After you confirm, VAN rings your phone first and then connects you to the seller. It keeps calls tied to the right conversation without dialing by hand.
Step 9: Add an email subject
Email includes a subject field above the message. Check both before sending.
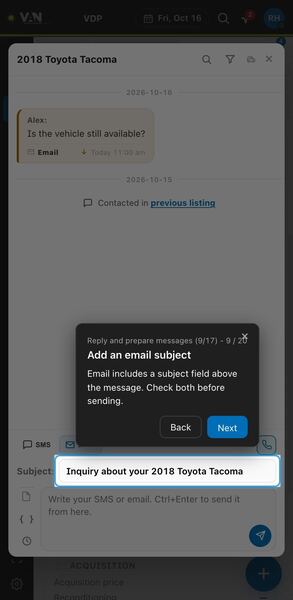
When Email is selected, a Subject field appears above the message box. In the sample it is already filled in with the vehicle, such as an inquiry about the 2018 Toyota Tacoma. Check or edit the subject and the body before sending.
Step 10: Prepare your message
Type your reply and review the character count. Highlighted fields help you spot values that still need attention.
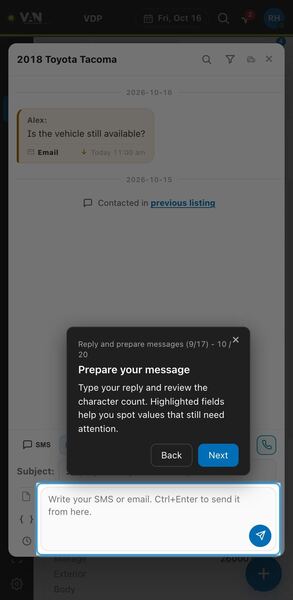
The message box sits at the bottom of the conversation with the send button inside it. As you type, the counter below shows how many characters you have used, such as 0/320. Highlighted fields mark values that still need attention, and Ctrl+Enter sends from here.
Step 11: Insert a quick reply
Search and choose a quick reply to insert it into your message. Selecting a reply never sends it.
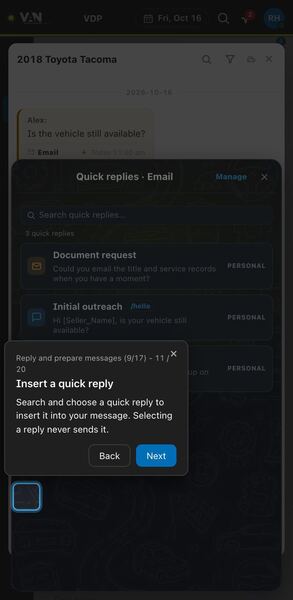
The document icon to the left of the message box opens Quick replies for the current channel. Search or scroll the list, which shows each reply's preview, its shortcut such as /hello, and a PERSONAL tag. Choosing one only inserts the text, so you can still edit it before sending.
Step 12: Maintain your quick replies
Open template management or create a new template. Retry appears if the template list could not load.
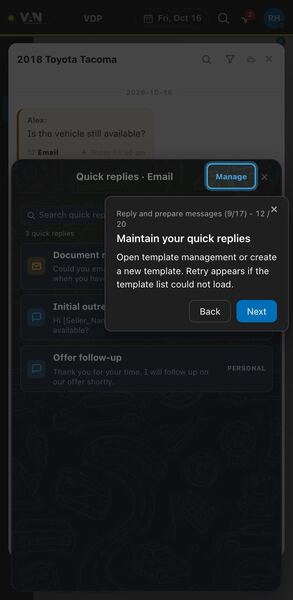
Manage, at the top of the Quick replies window, opens template management where you can edit your replies or create a new one. Build templates for the messages you send every day. If the list could not load, a Retry control appears instead.
Step 13: Insert a vehicle field
Search available fields and insert one into your message. Review the filled text and any unresolved placeholders before sending.
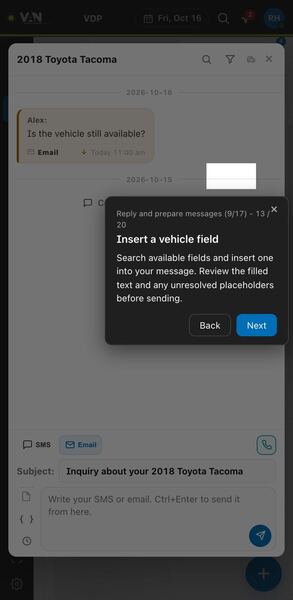
The fields menu inserts vehicle details, like year, make or price, into your message. Search for the field you need and click it. Afterward, read the filled text and look for any placeholder that could not be filled, since a gap is shown rather than hidden.
Step 14: Expand a saved shortcut
Type a template shortcut and use Space or Tab to expand it in supported text fields, including supported listing-site fields.
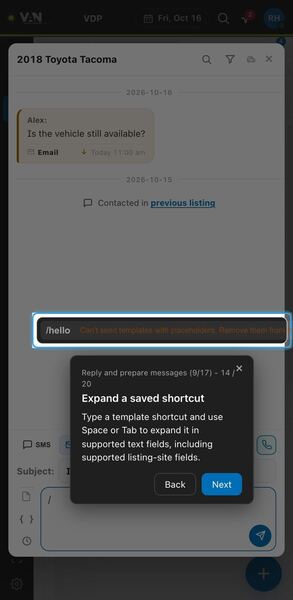
Type a template's shortcut, such as /hello, and press Space or Tab to expand it into the full text. This works in supported text fields, including supported fields on the listing site. If the template still has placeholders, a warning says it cannot be sent until you remove them.
Step 15: Schedule a later message
Choose a send date and time, or clear the schedule to return to an immediate message.
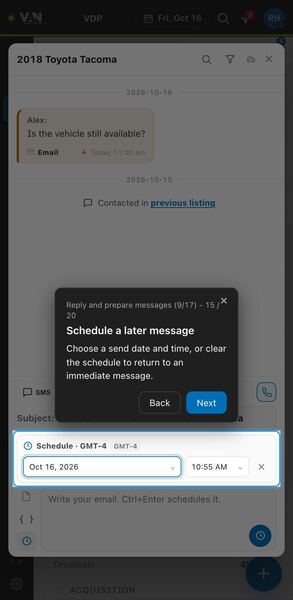
The clock icon to the left of the message box opens the schedule row. It shows your time zone and lets you pick a date and a time; the X clears the schedule and returns you to sending immediately. While scheduled, Ctrl+Enter schedules the message instead of sending it.
Step 16: Choose the send date
Browse months and choose the intended date. Check the selected day before continuing.
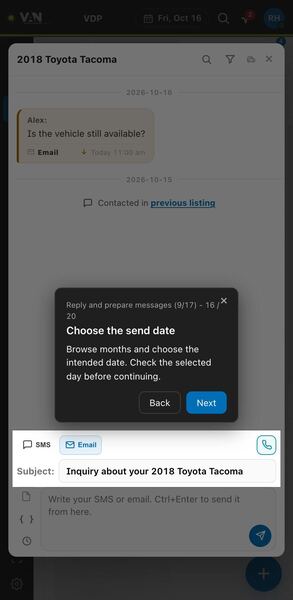
Open the date picker in the schedule row to browse months and choose the day to send. Check that the selected day is the one you meant before continuing.
Step 17: Choose the send time
Choose the intended time. Scheduling errors explain what needs correcting before the message can proceed.
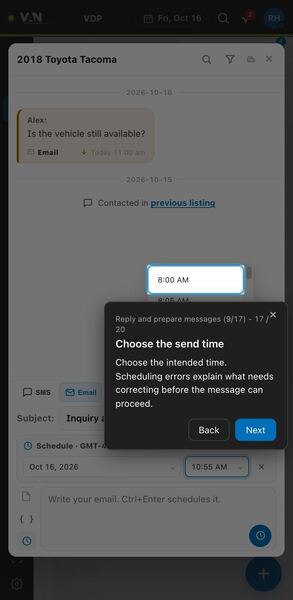
Open the time picker in the schedule row and choose the send time from the list. If something about the schedule is wrong, an error explains what to correct before the message can be scheduled.
Step 18: Confirm before sending
Send or Ctrl/Cmd+Enter opens confirmation. Review the message, then confirm or cancel. Tour samples never send messages.
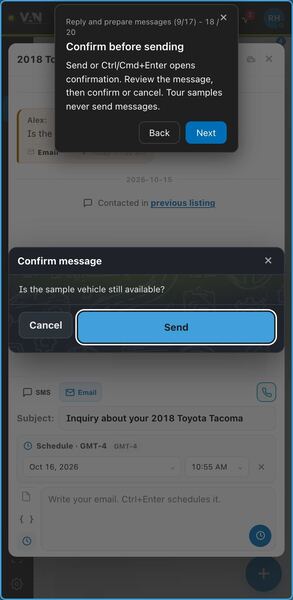
Pressing Send, or Ctrl/Cmd+Enter, opens the Confirm message window instead of sending right away. It shows your message text with Cancel and Send buttons. Read it once more, then confirm or cancel; tour samples never send.
Step 19: Review a failed send
A failed send remains visible with a retry control. Review the failure before trying again.
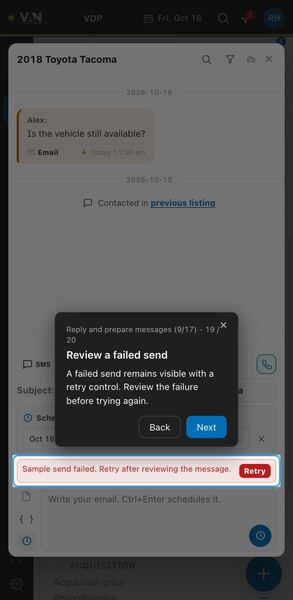
If a send fails, a red notice stays above the message box with a Retry button. Read the failure and review your message before pressing Retry, so you fix the cause instead of retrying blindly.
Step 20: Reply from the vehicle preview
Review recent messages, then use See all for the conversation or Reply to reach the composer.
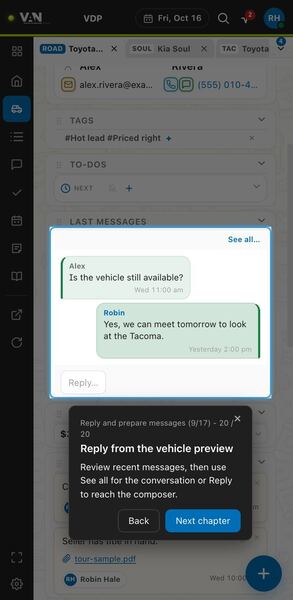
The vehicle preview has a messages card showing the latest messages with that seller. Use See all to open the full conversation, or Reply to jump straight to the composer. It lets you answer quickly while you are already looking at the car.
Chapter 10: Record decisions and next steps
This chapter covers the controls you use to record what you decided about a vehicle and what happens next. You will see how to change the stage, pass or report a dealer, assign people, tag the car, log offers, and build follow-up plans. These controls write to VAN, so in the tour you look at them without saving anything.
Step 1: Understand the vehicle's status
Read the current stage, suspected-dealer indicator, and gone flag before deciding what to do next.
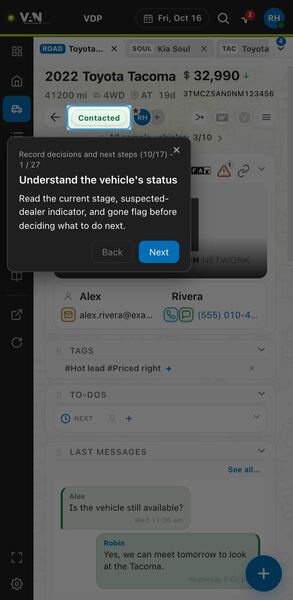
The stage pill, such as Contacted, sits in the row just under the car's title and price, next to the assigned users. This area also shows a suspected-dealer indicator and a gone flag when they apply. Glance at it every time you open a car: it tells you where the deal stands and whether the vehicle is still worth working.
Step 2: Change the stage deliberately
Choose an available stage. Disabled choices reflect VAN workflow restrictions, and the current stage is marked.
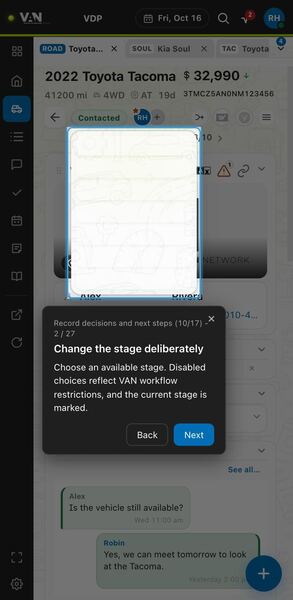
Clicking the stage pill opens the stage menu, a list of every stage for the car. The current stage is marked, and stages VAN does not allow from here appear disabled. Pick a new stage only when it truly reflects where the deal stands, not as a shortcut or a guess.
Step 3: Pass on a vehicle
Pass moves an eligible vehicle to the configured passed stage. Your navigation preferences determine whether you move to the next vehicle.
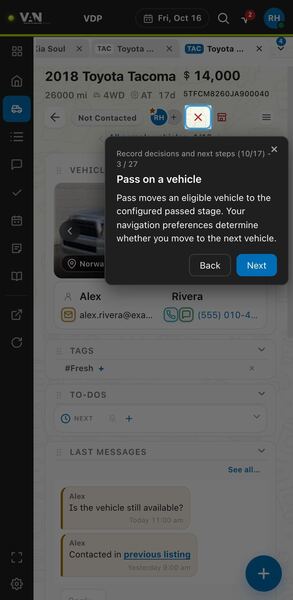
Pass is the red X button in the row under the title, right after the assigned users. It moves an eligible car to the passed stage set for your account, and depending on your navigation preferences the panel may then jump to the next vehicle. Use it when a car is clearly not a fit so it leaves your queue.
Step 4: Review dealer reporting
Report as dealer asks for confirmation outside the tour. Cancel if the seller should not be reported; reporting can advance the list.
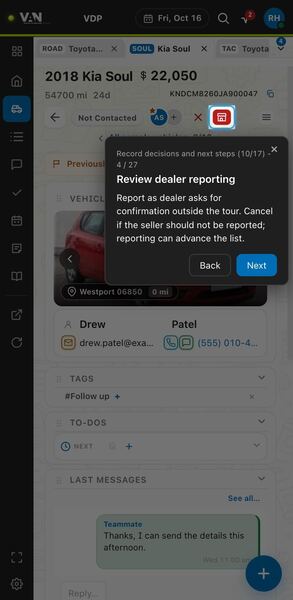
Report as dealer is the red storefront button right after the Pass X. In real use it asks you to confirm first, so you can still cancel if you are not sure. Use it when the seller turns out to be a dealer rather than a private seller; keep in mind that reporting can also advance you to the next listing.
Step 5: Stay before advancing
This notice counts down to the next listing. Choose Stay here to keep working on the current vehicle.
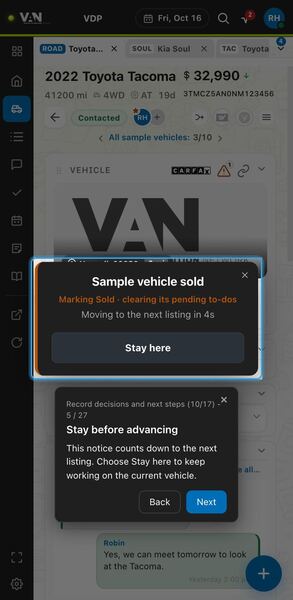
After an action that moves you on, a notice like Sample vehicle sold explains what is happening and counts down, for example Moving to the next listing in 4s. If you still need this car, for example to add a note, click Stay here to cancel the jump. Otherwise let the countdown finish and keep working.
Step 6: Review action feedback
Toasts report outcomes and may offer Undo or See all. Read the available action before dismissing the message.
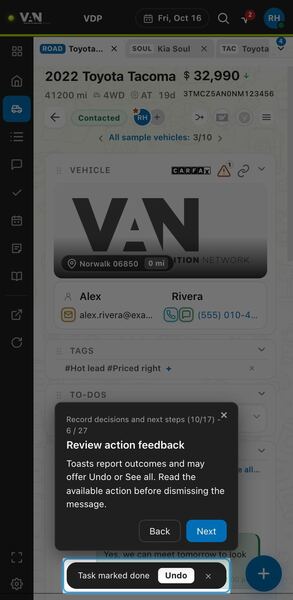
Toasts appear at the bottom of the panel to confirm what just happened, for example Task marked done. Some carry a button such as Undo or See all, plus an X to dismiss. Read them before closing: Undo is the quickest way to reverse a mistaken click.
Step 7: Assign the right people
Select users in Main, Secondary, then Follower order. Save the assignment when the choices are correct.
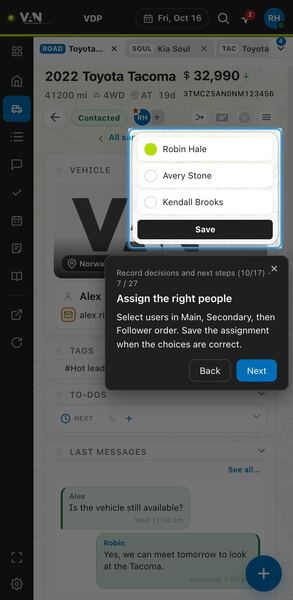
Clicking the assigned-user avatar next to the stage opens a list of team members, each with a circle to select, and a Save button. Pick users in order: Main first, then Secondary, then Follower, and save once the choices look right. Use it when you hand a car to a teammate or add someone to follow it.
Step 8: Label the vehicle
Tags organize vehicles for your team. Open the tag controls to change labels; collapsed sections show a summary.
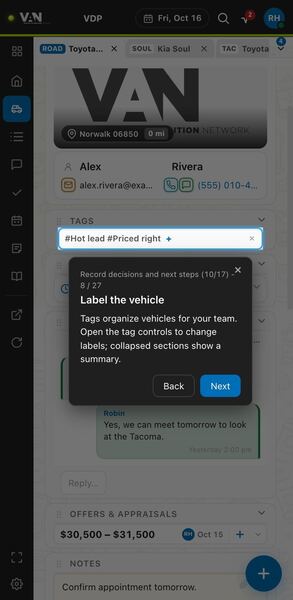
The Tags section shows the labels on this car in one line, such as #Hot lead #Priced right, with a + to open the tag controls and an X on the right. When the section is collapsed you only see this summary. Tags help your team group cars, for example by priority or follow-up reason.
Step 9: Add or remove tags
Search existing tags or create one. Add or remove vehicle tags; deleting a tag from the account is a separate confirmed action.
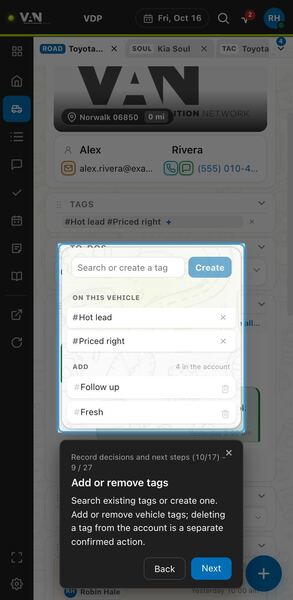
The tag menu has a Search or create a tag box with a Create button. Under On this vehicle, the X removes a tag from the car; under Add, you pick from the tags in the account. The trash icon deletes a tag from the whole account, a separate action that asks you to confirm, so reuse existing tags instead.
Step 10: Review offers and appraisals
Review the offer summary or open the list. Log an offer when you have a specific amount or range to record.
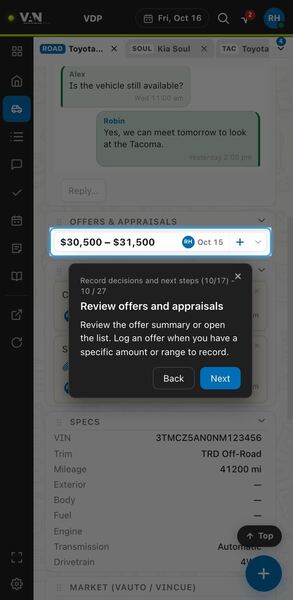
In the Offers and Appraisals section, the strip shows the latest amount or range, who entered it and when. The + logs a new one and the arrow opens the full list. Log a number here as soon as you have a concrete amount or range, so everyone sees the latest value before talking to the seller.
Step 11: Record an amount or range
Enter the amount and optional upper limit, then choose Offer or Appraisal. Write permissions and validation govern saving.
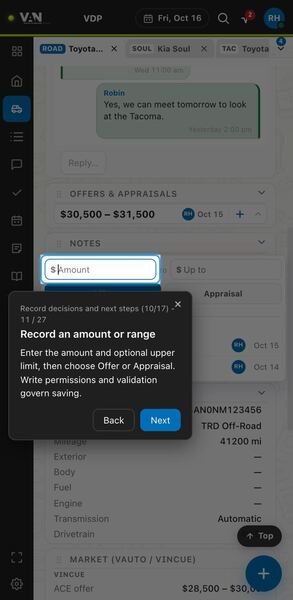
The entry row has an Amount field and an optional Up to field that turns it into a range, followed by Offer and Appraisal buttons to choose what you are recording. Saving depends on your write permissions and the values passing validation. Record numbers as soon as you get them so the history stays complete.
Step 12: Compare recorded offers
Review offers and appraisals, validity, author, and integration source. Open an offer row to edit it.
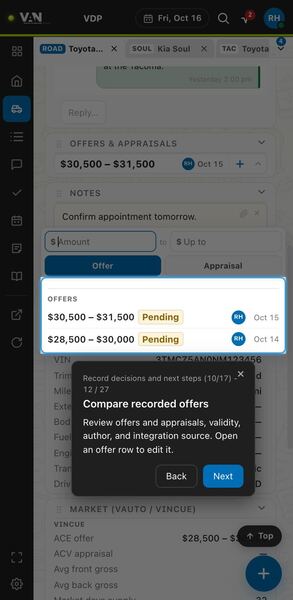
The list under the entry row shows each recorded offer and appraisal with its range, a status such as Pending, who entered it and the date, plus its integration source when it has one. Click a row to edit it. Compare the entries before you negotiate so you know the strongest current number.
Step 13: Check the next action
Review what is next or missed. Complete or delete it, toggle its reminder, or add another to-do.
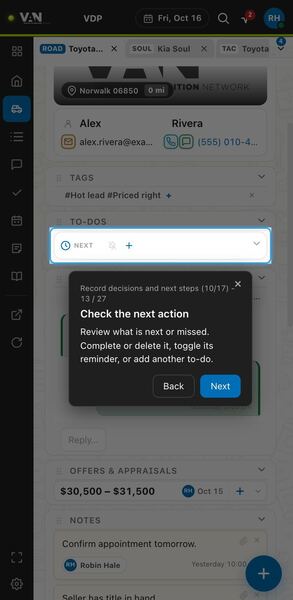
The Next row in the To-dos section shows the next pending or missed to-do for this car. From it you can complete or delete it, switch its reminder with the bell icon, or add another to-do with the +. Check it first when you open a car so you know exactly what you promised the seller.
Step 14: Review the full action plan
Review pending and completed work. Open a row to edit it, show more rows, or complete or delete individual actions.
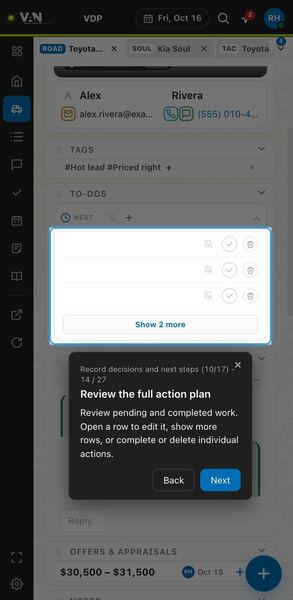
Expanding the Next row shows the full action plan. Each row has a bell for its reminder, a check to complete it and a trash icon to delete it; click a row to edit it, and use Show more when the list is long. Review it before you call a seller back so you know the whole follow-up history.
Step 15: Review bulk task actions
Complete or delete all pending actions only after reviewing the list. Individual delete controls require a second click within three seconds.
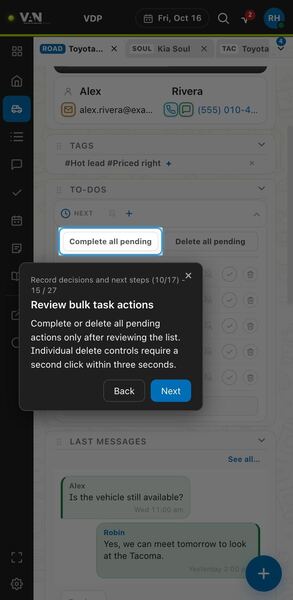
Complete all pending and Delete all pending sit at the top of the expanded to-do list and act on every pending action at once, so review the list first. Single delete buttons need a second click within three seconds, which protects you from removing a task by accident. Bulk complete helps when the remaining steps no longer apply.
Step 16: Start a follow-up plan
When no actions exist, add an action plan to establish the next steps for this vehicle.
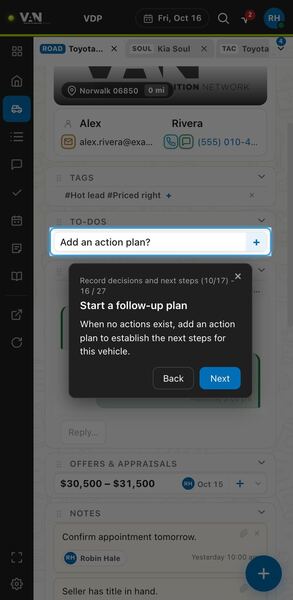
When a vehicle has no actions, the To-dos section shows Add an action plan? with a + button. Use it to set up the next steps for the car, so a vehicle you are still working never sits without a follow-up. A good moment is right after your first contact with the seller.
Step 17: Open vehicle actions
Actions provides messages, notes, tasks, appointments, plans, merging, offers, tags, pictures, and new listings when available.
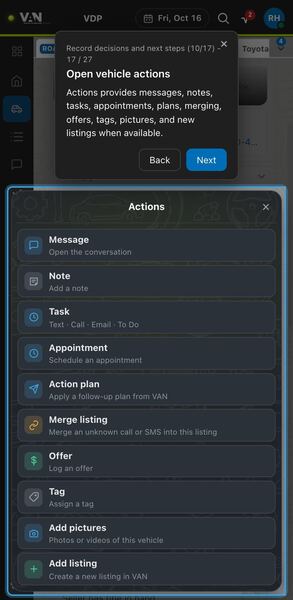
The Actions sheet lists everything you can create for this car: Message, Note, Task, Appointment, Action plan, Merge listing, Offer, Tag, Add pictures and Add listing, each with a short description. Some options only appear when available. It is your one-stop menu when you want to record something new without hunting through the page.
Step 18: Add a listing note
Enter the note, optionally attach a file, choose its user, and save when ready outside the tour.
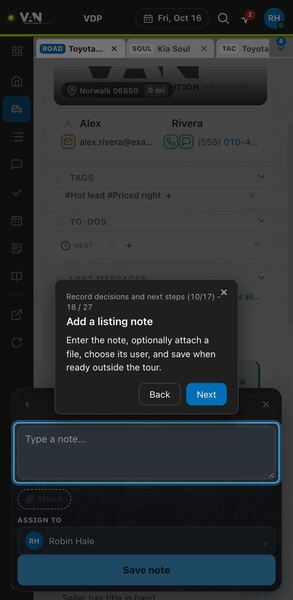
The note form has a Type a note box, an Attach button for a file, an Assign to picker for the user, and Save note. Notes are where you capture details from calls, such as the seller's price expectations, so a teammate can pick up the car without asking you. In the tour you only look; saving happens in real use.
Step 19: Choose a follow-up type
Choose Text, Call, Email, or To Do. Set the task details and reminder before saving outside the tour.
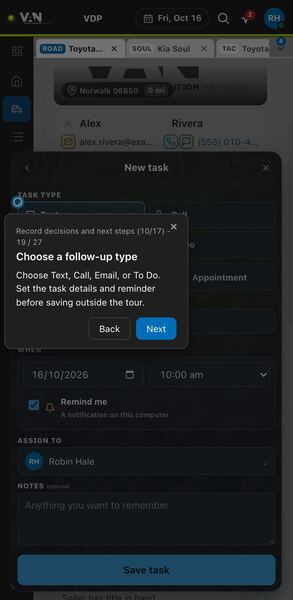
The New task form starts with the task type: Text, Call, Email or To Do. Below it you set the date and time, a Remind me option that sends a notification on this computer, who it is assigned to and optional notes, then Save task. Picking the right type tells you at a glance whether the next step is a call or a message.
Step 20: Prepare an appointment
Use a preset or available appointment options to prepare the appointment. Verify its details before saving outside the tour.
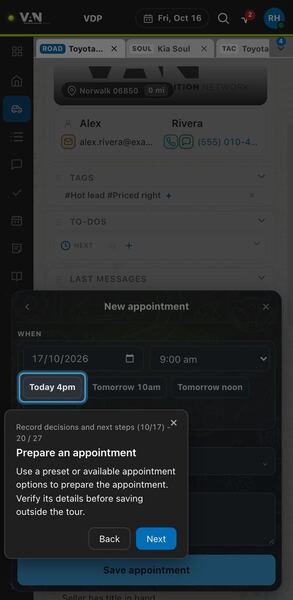
The New appointment form shows preset chips such as Today 4pm, Tomorrow 10am and Tomorrow noon. Clicking one fills in the date and time for you. Presets save time when you book appointments often, but always check every detail before you press Save appointment.
Step 21: Set when, who, and why
Set the date and time, choose who the appointment is assigned to, and describe it. Most used picks which presets show as chips.
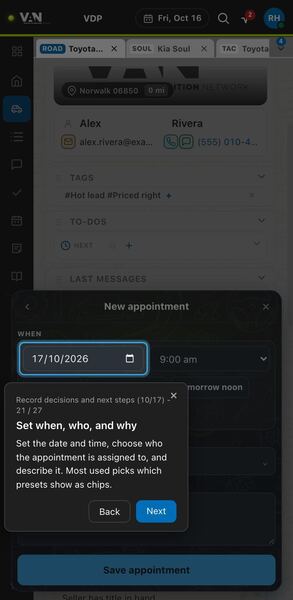
Under When you set the appointment date and time, then choose who it is assigned to and write a short description. The Most used setting decides which presets appear as chips. Confirm the time with the seller before saving, since the appointment shows up in the Calendar view.
Step 22: Choose a follow-up plan
Choose an available plan, edit or star it, or create a local plan. Apply the selected plan when ready.
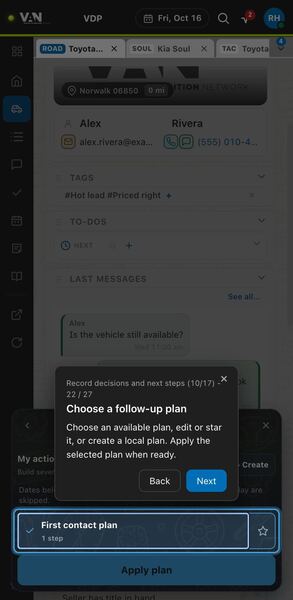
The action plan sheet lists the follow-up plans you can apply, such as First contact plan with its number of steps. Select one, use the star to mark a favorite, edit it, or Create your own, then press Apply plan. Starring the plans you use most keeps them easy to find.
Step 23: Build your own plan
Name the plan, then add to-dos with a type, days after applying, time, and notes. Your plans live on this device.
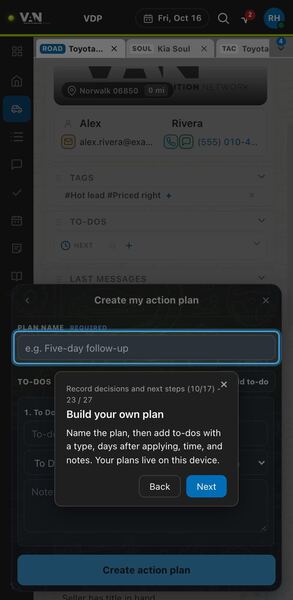
The Create my action plan form asks for a required plan name, then a list of to-dos, each with a type, the number of days after applying, a time and notes. Press Create action plan when done. These plans are saved on this device only, so build one that matches your own follow-up rhythm.
Step 24: Merge an unknown call or SMS
Paste the unknown listing ID from an incoming call or SMS. A copied ID fills in by itself; Merge listing moves it here.
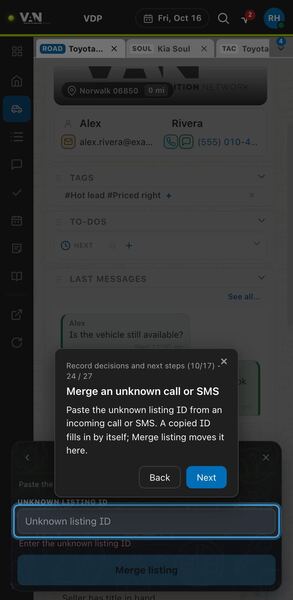
The merge sheet has an Unknown listing ID field and a Merge listing button. Paste the ID of an unknown call or SMS, or let a copied ID fill in on its own, then press Merge listing to move that conversation onto this vehicle. Use it when a seller contacts you from a record VAN did not match to the car.
Step 25: Add pictures to the vehicle
Choose, paste, or drop images and videos of this vehicle. Each file must be 19 MB or less; Upload sends the ones accepted.
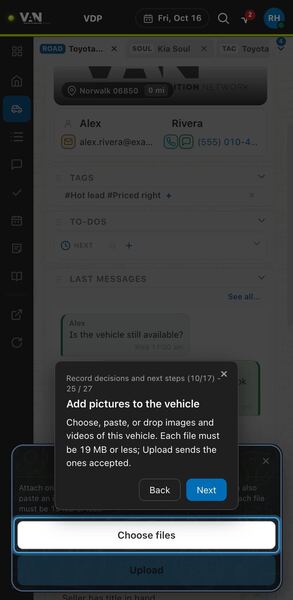
The pictures sheet has a Choose files button and an Upload button; you can also paste or drop files. It takes images and videos of this vehicle, each 19 MB or less, and Upload sends only the accepted files. Add photos the seller sends you so the car's record is complete for your team.
Step 26: Create a listing in VAN
Fill in the listing, vehicle, and seller details. Model unlocks after Make; Create listing has VAN check the details first.
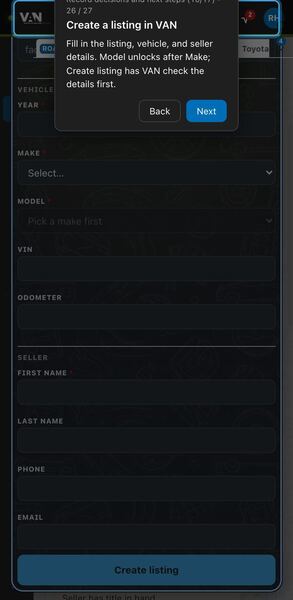
The Add listing form asks for vehicle details like Year, Make, Model, VIN and Odometer, and seller details like first and last name, phone and email; fields marked with a red star are required. Model stays locked with Pick a make first until you choose a Make. Create listing has VAN check the details before the record is made.
Step 27: Maintain listing notes
Review listing notes, edit text, attach files, change the assigned person, or delete a note when appropriate.
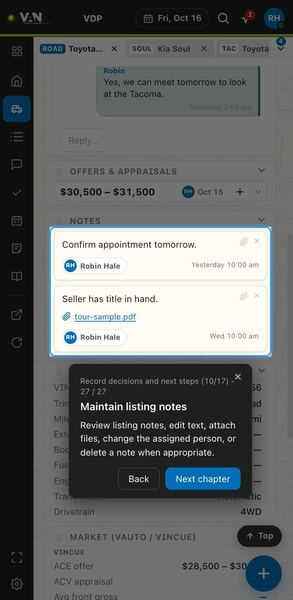
The Notes section shows each note with its text, any attached file, the assigned person and the time. The paperclip attaches a file and the X deletes the note; you can also edit the text or change the person. Read the notes before contacting a seller so you know what was already discussed.
Chapter 11: Check history and connected tools
This chapter covers the tools that give you context beyond the listing itself. You will check related and duplicate listings, see where a VIN or seller showed up before, send the car to appraisal tools, and review the activity log. Use them before you contact a seller so you never duplicate work.
Step 1: Find hidden vehicle tools
More tools contains actions that do not fit in the side-panel toolbar.
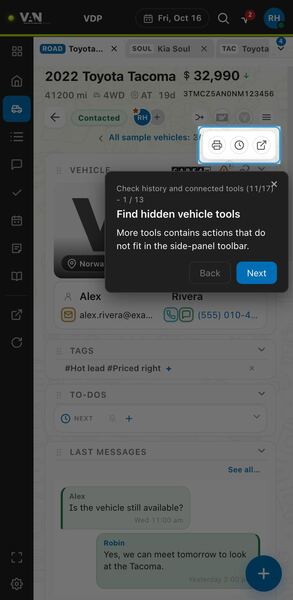
The More tools menu drops down under the toolbar row and holds tool buttons that do not fit in the toolbar itself, such as print, listing logs and open in VAN. If you cannot find a tool in the toolbar, open this menu before assuming it is missing.
Step 2: Review related listings
Review grouped listings and possible duplicates before creating another record or contacting the same seller again.
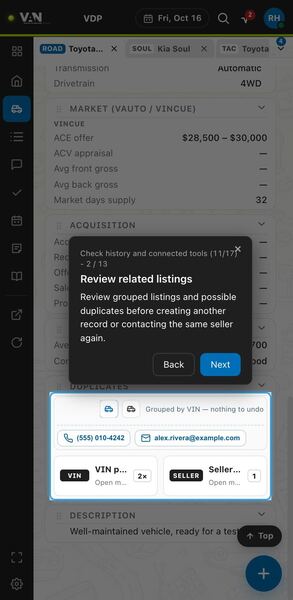
The Duplicates card shows how this listing is grouped, for example Grouped by VIN, the seller's phone and email, and cards like VIN and Seller with a count of matches. Check it before creating a new record or messaging the seller, so you do not contact the same person twice.
Step 3: Inspect a listing group
Switch between grouped sources and review pooled channels. Ungroup separates this listing after confirmation.
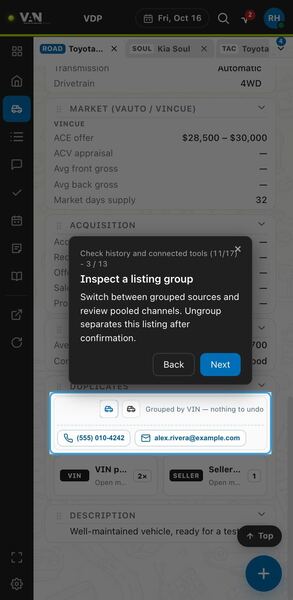
The top of the Duplicates card is the listing group. Its buttons switch between the grouped sources, and below them you see the pooled channels, such as the seller's phone and email. Ungroup separates this listing from the group after you confirm; when there is nothing grouped, the card says nothing to undo.
Step 4: Choose what to merge
Merge similar listings groups listings of the same vehicle; conversations stay separate. Merge incoming messages/calls takes the ID of an unknown call or SMS.
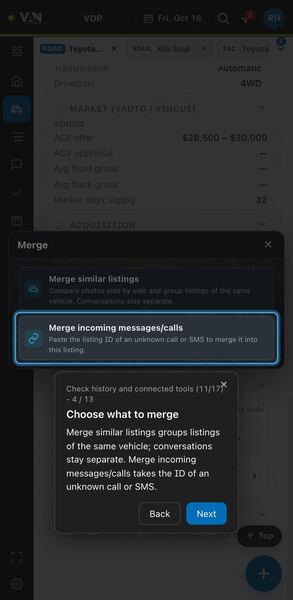
The Merge sheet offers two choices. Merge similar listings lets you compare photos side by side and group listings of the same vehicle, while their conversations stay separate. Merge incoming messages/calls takes the listing ID of an unknown call or SMS. Pick carefully, since the two do very different things.
Step 5: Find listings to group
Search by VIN, vehicle, city, or listing ID. Select matching candidates, then review the grouping action.
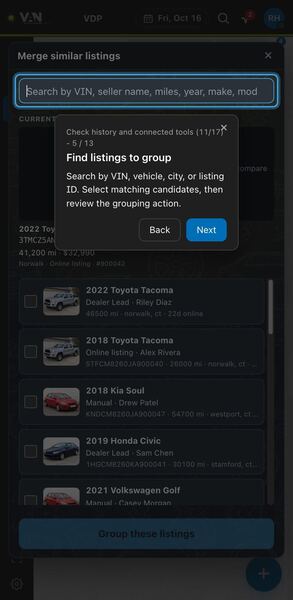
The Merge similar listings sheet shows the current car at the top and a search box above a list of candidates, each with a checkbox. Search by VIN or by vehicle details, tick the matching listings, then review the Group these listings button before using it. Searching by VIN is the surest way to catch the same car posted twice.
Step 6: Check previous encounters
Review where the VIN or seller appeared before. This history can reveal repeat listings and earlier contact.
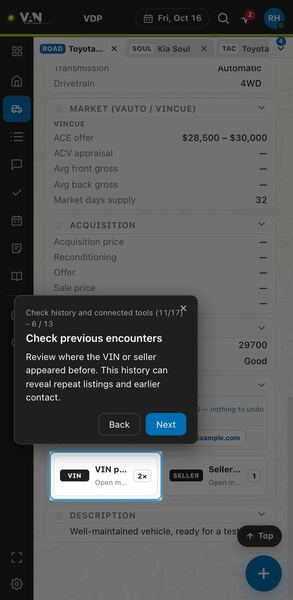
The VIN and Seller cards in the Duplicates section show how many times the VIN or the seller appeared before, such as 2x. Open one to see where. A match can reveal a repeat listing or earlier contact with the same seller, so check it before your first message.
Step 7: Inspect earlier listing history
Open an earlier listing for context. The current listing's row can expand its visit history.
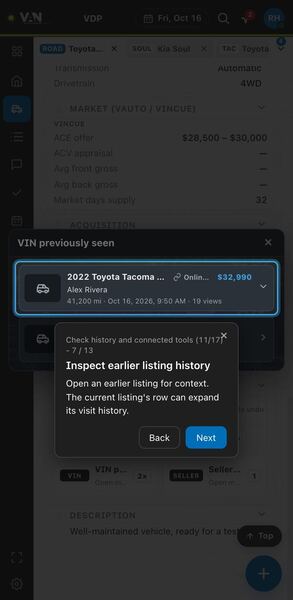
The VIN previously seen sheet lists each listing where the VIN appeared, with its price, seller, mileage, date and views. Open an earlier listing to see its context; the row for the current listing can expand to show its visit history. It helps you see how the car was priced the last time.
Step 8: Send to appraisal tools
Available integration controls send the vehicle to Vincue or vAuto. Availability depends on your account and permissions.
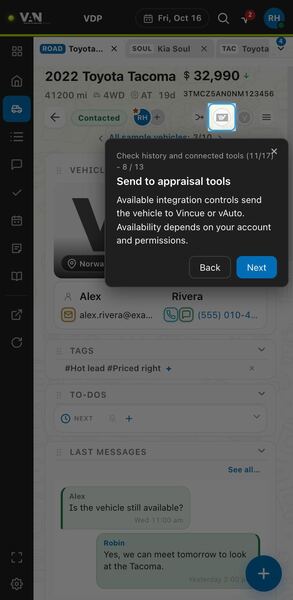
The integration buttons in the toolbar row send the vehicle to Vincue or vAuto. They only appear if your account and permissions allow it. Push a car when you need an appraisal value before making an offer.
Step 9: Open an existing appraisal record
After a push, a linked icon opens the provider's record. A status-only icon has no destination link.
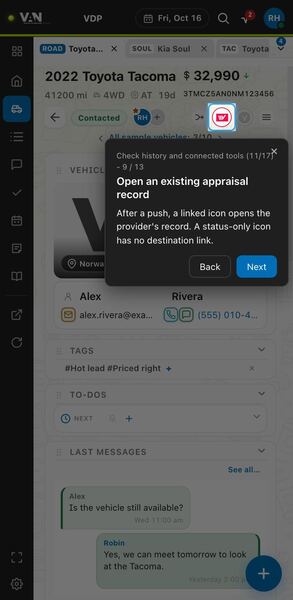
After a push, the integration icon changes to show the car is in the provider. When the icon is linked, clicking it opens the provider's record for this car; a status-only icon has no link to open. Use the linked icon to jump straight to the appraisal instead of searching for the car again.
Step 10: Open a configured browser profile
Kameleo uses VAN Bridge and your configured profiles. The button offers profile selection; K uses the direct shortcut behavior.
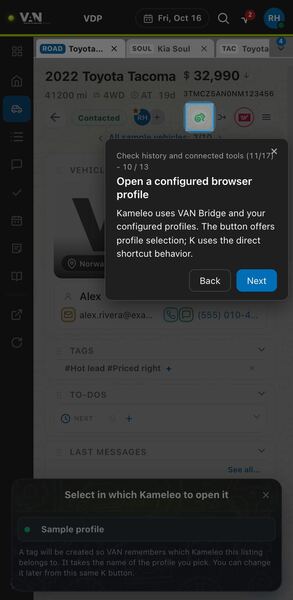
The Kameleo button works with VAN Bridge and your configured browser profiles. Clicking it opens Select in which Kameleo to open it, with your profiles listed. Picking one creates a tag with that profile's name so VAN remembers which Kameleo the listing belongs to; you can change it later from the same button.
Step 11: Review listing activity
Review recorded listing activity. Search the logs to narrow the history; empty and failed states are shown explicitly.
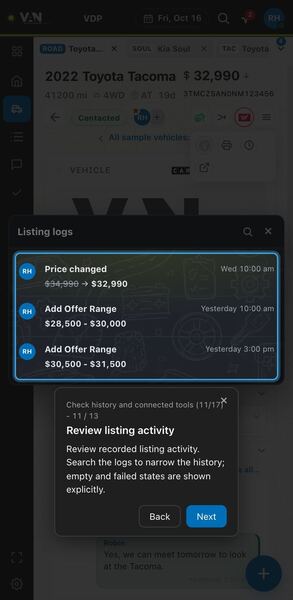
The Listing logs sheet lists recorded activity on this listing, such as Price changed or Add Offer Range, with who did it and when. The search icon in its header narrows the history. Empty and failed states are shown plainly, so you can tell whether there is no activity or the logs could not load.
Step 12: Prepare a printable vehicle page
Open the print view to choose columns, orientation, and sections, then print or save as PDF.
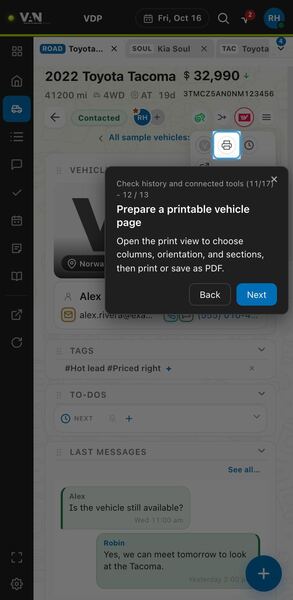
The print button in the More tools menu opens a print view where you choose columns, orientation and sections, then print or save as PDF. Use it when you need the car's details on paper or as a file to keep or share.
Step 13: Continue on the full VAN page
Open the full vehicle page in VAN when you need additional detail or workflow.
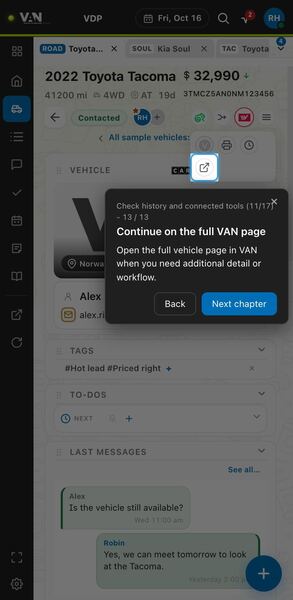
The open-in-VAN button in the More tools menu opens this vehicle's full page in VAN. Use it when you need more detail or a workflow the side panel does not offer.
Chapter 12: Plan appointments and time
The Calendar view shows your scheduled events for the date you pick at the top. Here you learn to search, sort and filter entries, move between days, and open the vehicle behind any event. It is the place to plan your day before you start calling sellers.
Step 1: Find scheduled work
Search calendar entries within the global date range. Clear the query to return to the unsearched results.
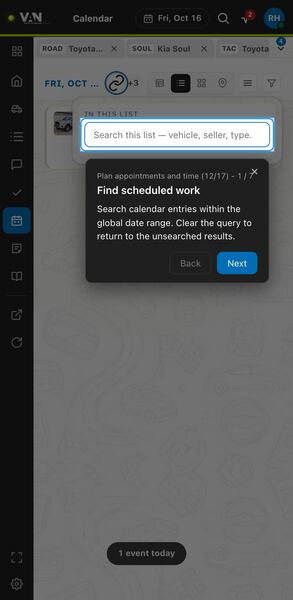
The search box, under In this list at the top of the calendar, filters entries within the global date range. Type a vehicle, seller or event type to find an event, and clear the box to see all results again. It is the quickest way to find one appointment on a busy day.
Step 2: Order calendar entries
Sort by time, seller, vehicle, type, or status to review the schedule from a useful angle.
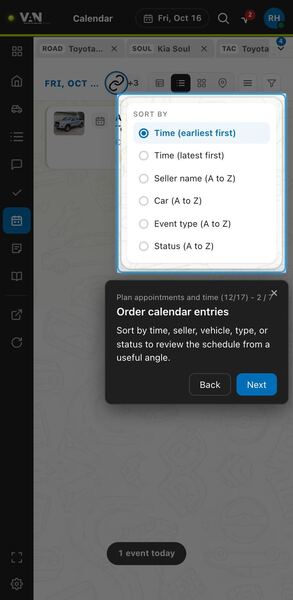
The Sort by panel orders calendar entries by time (earliest or latest first), seller name, car, event type or status. Sorting by time gives you the natural daily view, while sorting by status helps you spot items you still need to handle.
Step 3: Filter scheduled events
Filter task assignee, listing main user, event type, and status. The count reflects the matching events.
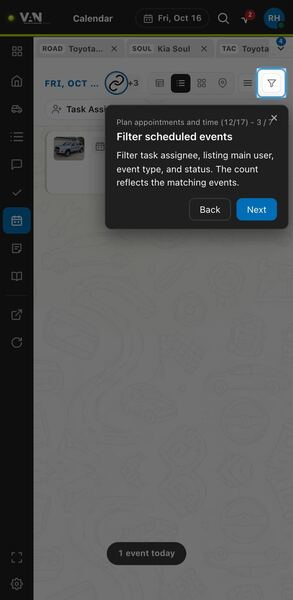
The funnel button at the top right of the calendar shows filter chips such as Task Assignee and Listing Main User. You can filter by task assignee, listing main user, event type and status, and the count shows how many events match. Filter to yourself to focus on your own work for the day.
Step 4: Choose calendar filter fields
Choose the filter fields you need. More holds header controls when the available width is limited.
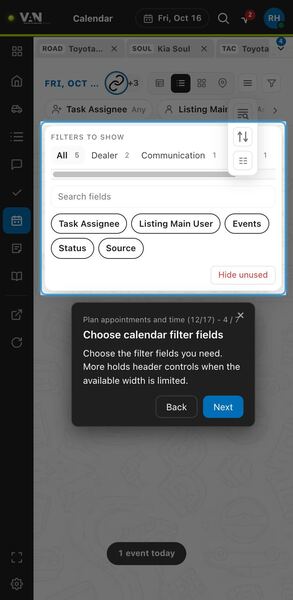
The Filters to show panel lets you choose which filter fields appear, such as Task Assignee, Listing Main User, Events, Status and Source. You can search the fields or use Hide unused. When the panel is narrow, More holds the header controls that do not fit.
Step 5: Move through your days
Change the day, week, or month with the date at the top. The band above the list shows your current day; its arrows jump between listed days.
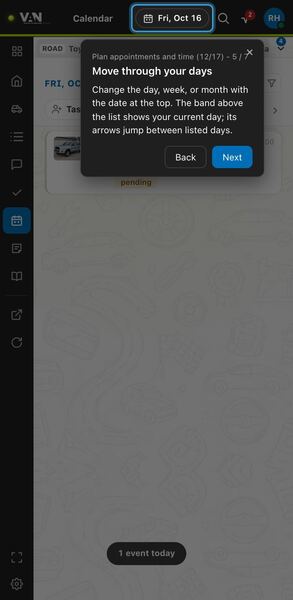
The date pill in the top header, such as Fri, Oct 16, changes the day, week or month you see. The band above the list marks your current day, and its arrows jump between days that have entries. Use it to look ahead and prepare for tomorrow's appointments.
Step 6: Open an event's vehicle
Check the event time and status, then open its vehicle for details. Calendar entries do not support swipe actions.
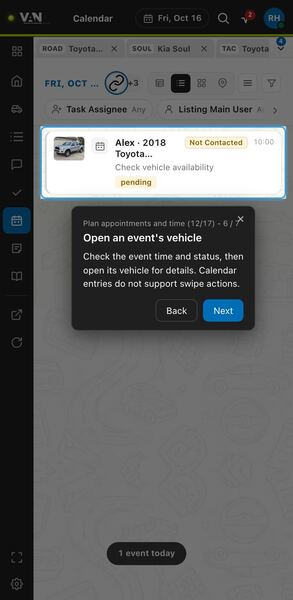
Each calendar entry shows the seller and car, the car's stage, the event description, its status such as pending, and the time. Click it to open the vehicle and see its details. Calendar entries do not support swipe actions, so open the car when you need to act on the event.
Step 7: Understand an empty schedule
"Nothing scheduled" means no events are available. "Nothing matches" means the current search or filters exclude them.
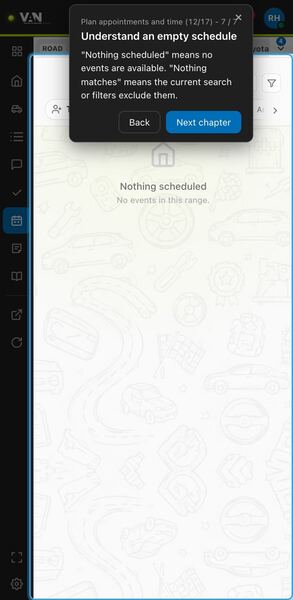
An empty calendar can mean two things. Nothing scheduled, with No events in this range, means there really are no events. Nothing matches means your search or filters are hiding them, so clear them before assuming your day is free.
Chapter 13: Keep useful notes
Notes keeps two kinds of notes in one place: personal notes that stay on this computer, and listing notes that come from vehicles you opened. This chapter shows how to search, sort, filter and create notes so nothing you learned about a seller gets lost.
Step 1: Choose your note scope
Show All, Personal, or Listing notes. Choose the default scope you want when opening Notes.
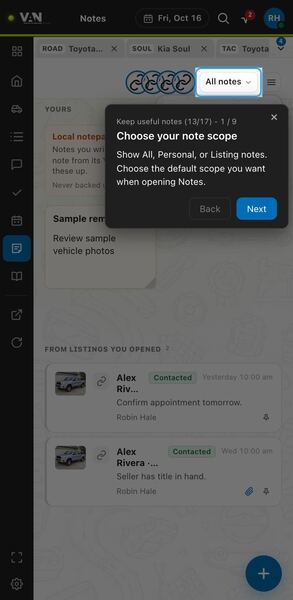
The scope button at the top of Notes switches between All, Personal and Listing notes. Picking one narrows the list right away, and you can save the scope you want Notes to open with. Use Personal when reviewing your own reminders, and Listing when you want what was written on vehicles.
Step 2: Find a note
Search personal and listing notes. Clear the query when you want to see the whole selected scope again.
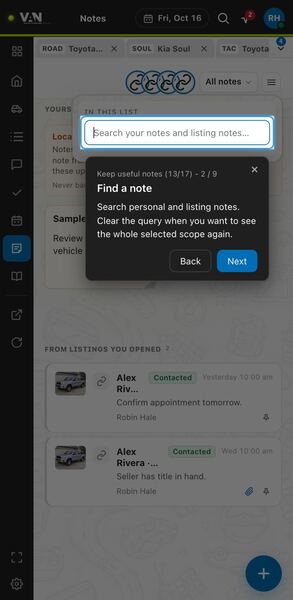
The search box at the top of Notes looks through personal and listing notes in the scope you selected. Type a seller name, a vehicle detail or any word you remember writing. When you are done, clear the box to see the full list for that scope again.
Step 3: Order your notes
Sort by date, vehicle, seller, or author to bring the notes you need into view.
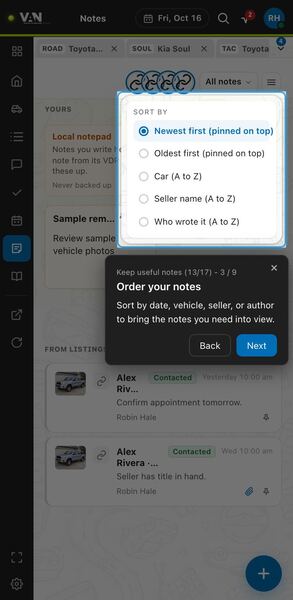
The sort panel opens a Sort by list: Newest first, Oldest first, Car (A to Z), Seller name (A to Z) and Who wrote it (A to Z). In the two date orders, pinned notes stay on top. Newest first is handy at the start of the day, while sorting by car or seller groups everything about one deal together.
Step 4: Filter listing context
Filter by source, main user, assigned user, or stage. Choose visible fields from the field chooser.
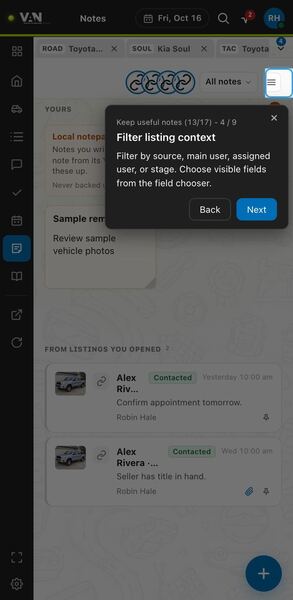
The menu button at the right of the Notes header holds the filters for listing notes: source, main user, assigned user or stage, plus a field chooser for what each note shows. Use it when you only want notes for cars in a certain stage or assigned to a certain buyer, so the list stays short.
Step 5: Know where personal notes live
Personal notes stay on this device. Check the local-notepad information and last backup; Settings provides export and restore.
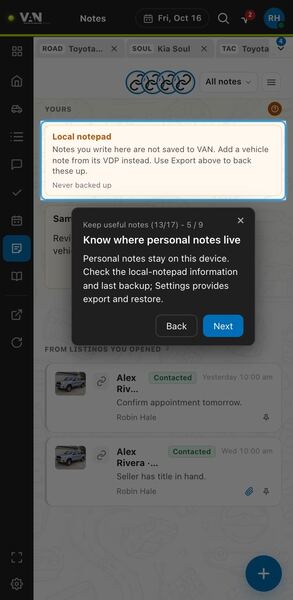
The Local notepad notice at the top of your notes explains that personal notes are saved only on this device and are not sent to VAN, and it shows when your last backup was made, such as Never backed up. Notes about a vehicle belong on its VDP instead. Use export and restore in Settings to keep a copy of your personal notes.
Step 6: Create a personal note
Add a title and note, then save. Ctrl+Enter also saves. VAN never receives personal notes.
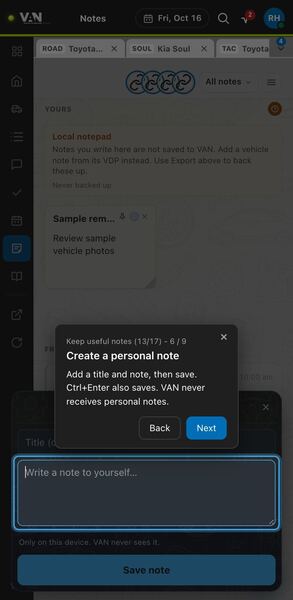
This form creates a personal note: add an optional title, write the note, then press Save note, or use Ctrl+Enter. The form reminds you the note stays only on this device and VAN never sees it, so use it for private reminders, not for notes the team should see on a vehicle.
Step 7: Arrange your personal notes
Edit the title or text, move or resize the note, pin it, change its color, or delete it.
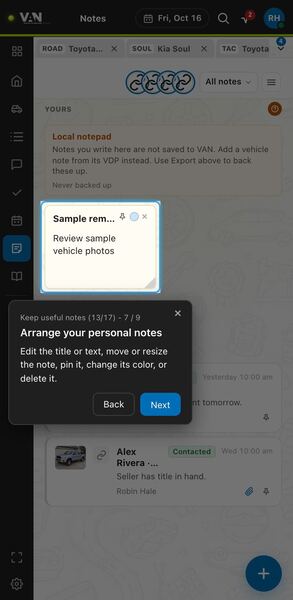
Each personal note is a small card. You can edit its title or text, move it, resize it from the corner, pin it, change its color with the dot, or delete it with the x. Pinning keeps the reminders you still need easy to find.
Step 8: Return to listing notes
These notes come from listings you opened. Open the vehicle, inspect an attachment, or pin a note for easier access.
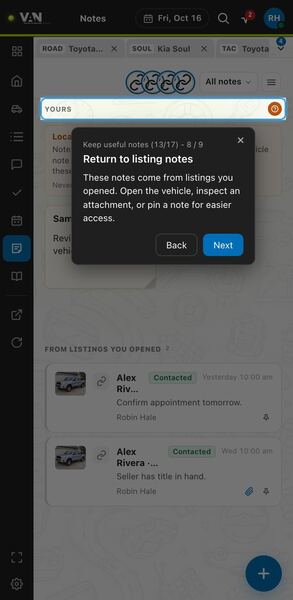
The From listings you opened section lists notes from vehicles you worked, each with the seller, stage, date and author. From a note you can open the vehicle, inspect an attachment marked with a paperclip, or pin the note for easier access. It is a quick way to recall what was said about a car before you call the seller back.
Step 9: Read an attached file
An attached PDF opens right here, images open in the gallery, and audio plays in place. Open full shows the file in its own tab.
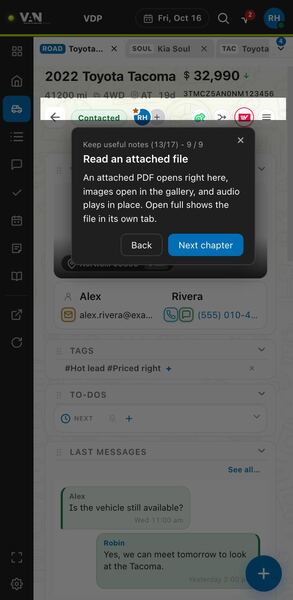
When a listing note has an attachment, it opens in a panel without leaving Companion: a PDF shows right there, images open in the gallery and audio plays in place. Choose Open full when you need the file in its own browser tab, for example to read a long document.
Chapter 14: Prepare reusable conversations
Scripts holds the wording you reuse every day. Templates prepare messages you send, and wordtracks walk you through a live conversation step by step, so you can answer sellers quickly and consistently.
Step 1: Choose templates or wordtracks
Show Templates, Wordtracks, or All. Templates prepare messages; wordtracks guide a conversation. Choose your preferred default tab.
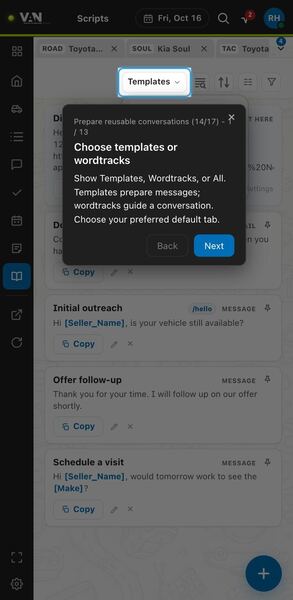
The Templates button at the top of Scripts switches between Templates, Wordtracks or All. Templates are ready messages; wordtracks guide a conversation step by step. You can also pick which one Scripts shows by default, so the one you use most is always first.
Step 2: Find useful wording
Search for a template or wordtrack. Clear the search to return to the selected tab's contents.
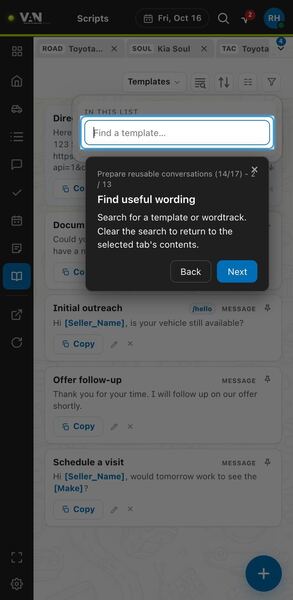
The search box, labeled In this list, finds a template or wordtrack by its words. Type part of a name or phrase to jump to it instead of scrolling. Clear the search to go back to everything in the tab you selected.
Step 3: Order your reusable content
Sort by name or origin. Pinned items remain at the top.
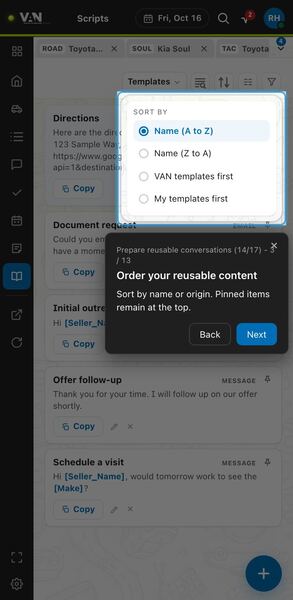
The sort panel orders templates by Name (A to Z or Z to A), VAN templates first, or My templates first. Pinned items always stay at the top, so pin the few templates you send all day and they never get buried.
Step 4: Filter channel and origin
Filter by SMS or Email and by Global or Local origin. Choose visible fields from the field chooser.
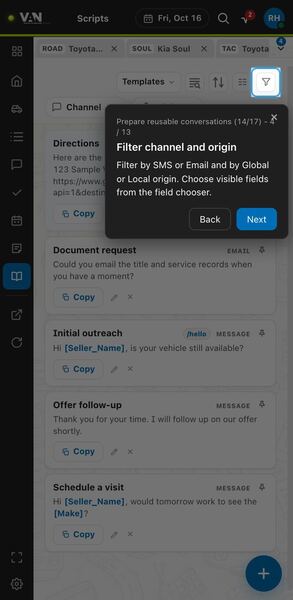
The filter button at the top right shows the Channel and Origin filters under the toolbar: filter by SMS or Email, and by Global or Local origin. The field chooser decides what each card shows. Narrowing by channel helps you see only wording that fits how you are contacting the seller.
Step 5: Copy dealership directions
Copy directions using the dealership address configured in Settings.
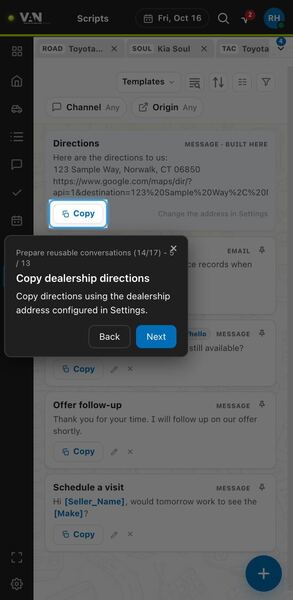
The Copy button on the Directions card copies a ready message with your dealership address and a map link. Paste it when a seller agrees to bring the car in. The card notes that the address is changed in Settings, so update it there if it is wrong.
Step 6: Choose what to create
Create a template for messages in VAN, or a wordtrack that stays on this computer.
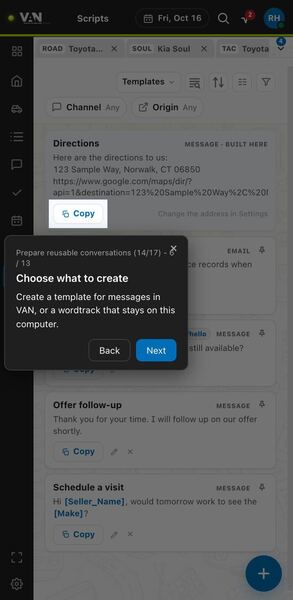
Choosing to create something asks whether you want a template or a wordtrack. A template is a message saved in VAN; a wordtrack is a guided conversation that stays only on this computer. Pick a template for wording you send often, and a wordtrack for calls you want to follow step by step.
Step 7: Reuse a message template
Pin a template, copy it with fields filled, edit it, or delete it. The card identifies VAN templates and available shortcuts.
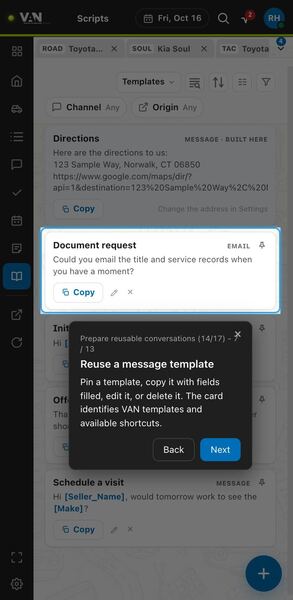
Each template card shows its name, its channel (Message or Email), and its snippet shortcut when it has one, like /hello. Use the pin to keep it on top, Copy to copy it with fields filled in, the pencil to edit it, or the x to delete it. Copying with fields filled saves you from typing names and details by hand.
Step 8: Define a reusable reply
Set the name, shortcut, channels, and access. Write the message, then save it or delete the existing template.
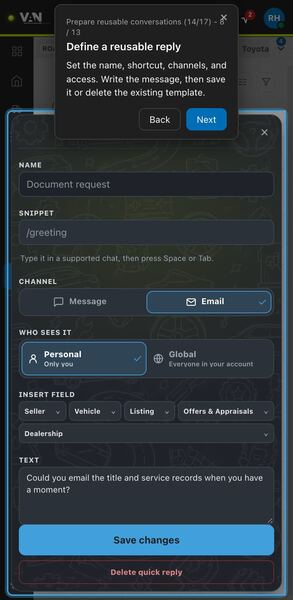
The editor sets the template Name, a Snippet you type in a supported chat followed by Space or Tab, the Channel (Message or Email), and Who sees it (Personal, only you, or Global, everyone in your account). Write the Text, then Save changes, or use Delete quick reply to remove it.
Step 9: Add fields to a template
Insert a field from the menu, or type an opening bracket to see suggestions. Review unresolved fields before using the template.
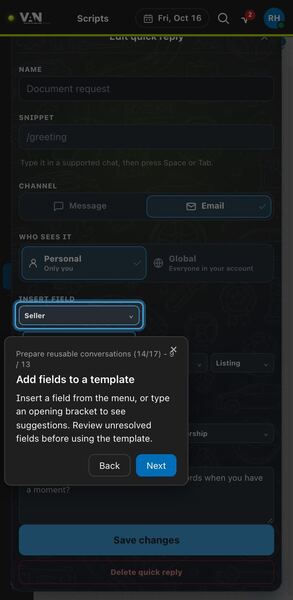
The Insert field menus (Seller, Vehicle, Listing, Offers and Appraisals, Dealership) add a field to the template text, and typing an opening bracket shows suggestions as you write. Fields appear in brackets, like [Seller_Name]. Review unresolved fields before using the template so the seller never sees a placeholder.
Step 10: Use a guided conversation
Open a wordtrack to follow it, edit its steps, or delete it. Wordtracks are local to this computer.
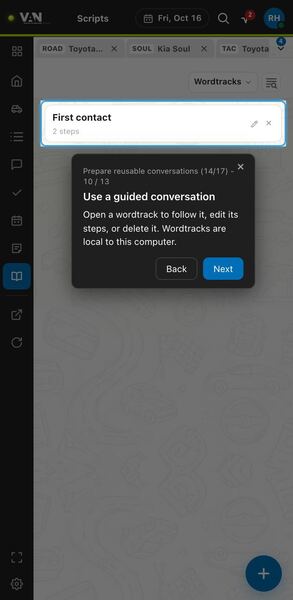
Each wordtrack card shows its name and how many steps it has. Open it to follow it, use the pencil to edit its steps, or the x to delete it. Wordtracks stay on this computer, so they are a good place for your own call scripts.
Step 11: Follow the seller's answer
Read the suggested wording, choose the seller's answer, and follow the next step. Go back, restart, or exit when needed.
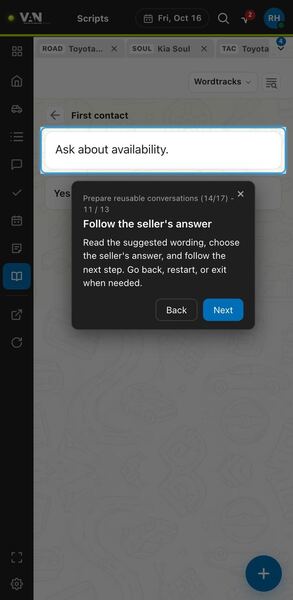
While following a wordtrack, the top card shows what to say, like Ask about availability, and the seller answers appear below it. Choose the answer the seller gave and you move to the next step. You can go back, restart or exit when needed, which keeps you on track during a live call.
Step 12: Build your conversation steps
Name the wordtrack, add steps, and write what you will say. Save the finished structure after reviewing any warnings.
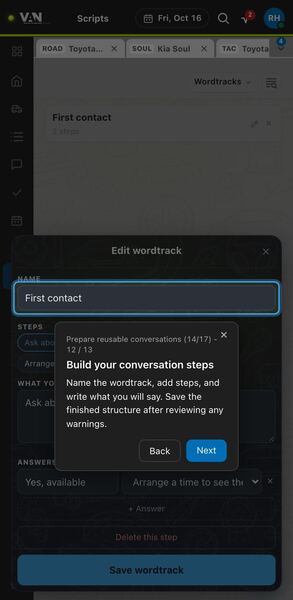
In Edit wordtrack you set the Name, then build Steps and write what you will say in each one. Each step has its answers, and Delete this step removes one you no longer need. Review any warnings, then press Save wordtrack.
Step 13: Connect answers to next steps
Write an answer and choose its next step, an ending, or a new step. Add or remove answers as needed.
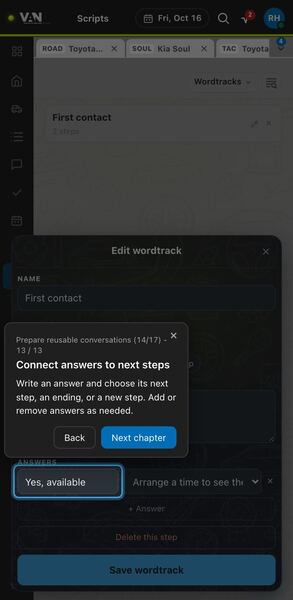
Under Answers, write what the seller might say and use the menu beside it to choose where it leads: another step, an ending, or a new step. Use + Answer to add more, or the x to remove one. Connecting every answer keeps the wordtrack from leaving you stuck mid-conversation.
Chapter 15: Return to earlier work
These tools help you get back to work you already started. You can search vehicles, notes and scripts, run a precise advanced search, and move between the vehicles you already have open.
Step 1: Search across your work
Type at least two characters for local results. VAN search follows after a short pause; Enter searches immediately outside the tour.
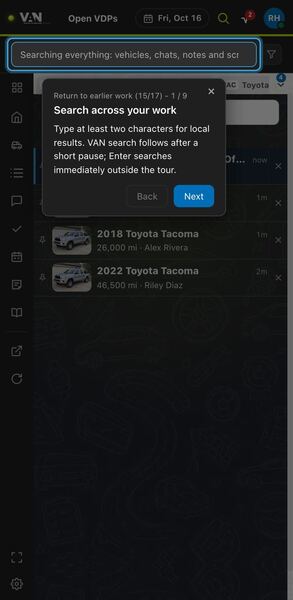
The search box at the top of the panel searches everything: vehicles, chats, notes and scripts. After two characters it shows local results, and VAN results follow after a short pause; outside the tour, Enter searches right away. Use it whenever you remember a name or detail but not where it lives.
Step 2: Open a matching vehicle
Local and VAN vehicle results open the corresponding VDP. Review the vehicle identity before choosing a result.
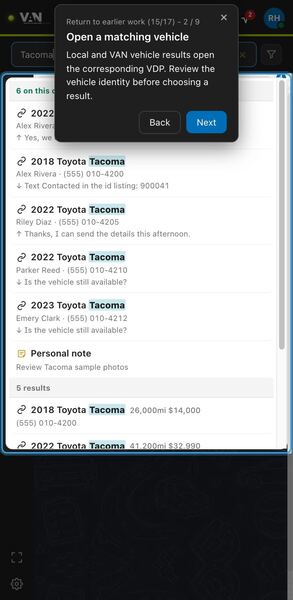
Results are grouped, with local matches first and VAN results below. Each vehicle result shows year, make, model, seller and phone, and some show the latest message. Choosing one opens its VDP, so check the seller and details first, since several cars can look alike.
Step 3: Find notes and reusable wording
Note results open Notes, wordtrack results open Scripts, and template results copy the template.
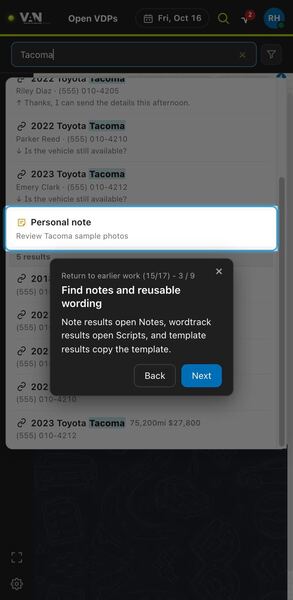
Search also finds notes and scripts. A personal note result like the one highlighted opens Notes, a wordtrack result opens Scripts, and a template result copies the template so you can paste it. This lets you grab saved wording without leaving what you are doing.
Step 4: Search precise vehicle details
Advanced search accepts a year range, make, model, VIN, or listing URL when ordinary search is not specific enough.
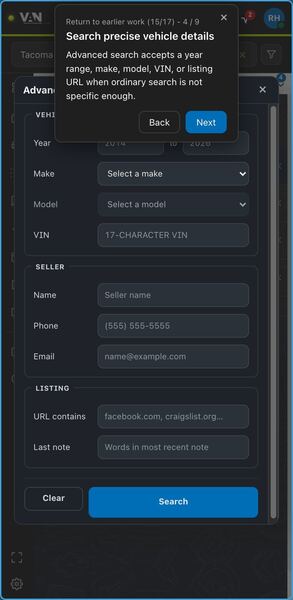
Advanced search opens from the filter button beside the search box. Its Vehicle section takes a year range, make, model and a 17-character VIN, and its Listing section can match part of the listing URL. Use it when an ordinary search returns too many cars.
Step 5: Search seller details or notes
Search by seller name, phone, email, or note text. Clear fields, run the search, or close the overlay.
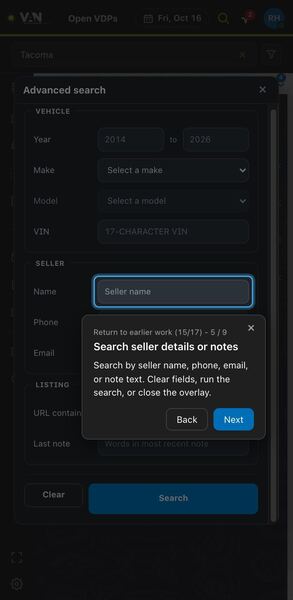
The Seller section of Advanced search looks up a name, phone or email, and the Last note field searches words in the most recent note. Use it when a seller calls or texts and you only have their number or name. Clear empties the fields, Search runs it, and the x closes the overlay.
Step 6: Find vehicles already open
Search your open vehicles and review Pinned and Recent groups. Unread counts help you spot conversations needing attention.
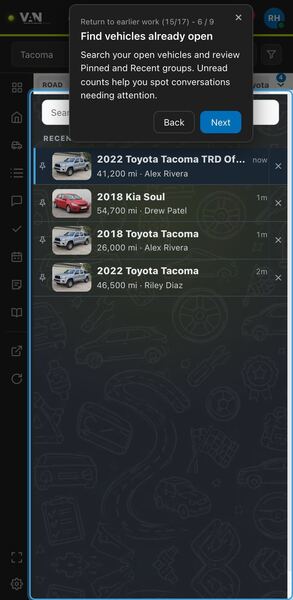
Open VDPs lists the vehicles you have open, with a Search open vehicles box on top and Pinned and Recent groups. Each row shows the car, mileage, seller and how long ago you opened it. Unread counts flag conversations that need attention, so check it to see which sellers to answer first.
Step 7: Keep or close a vehicle
Open a vehicle, pin it for later, or close it from this list. Closing offers an Undo toast.
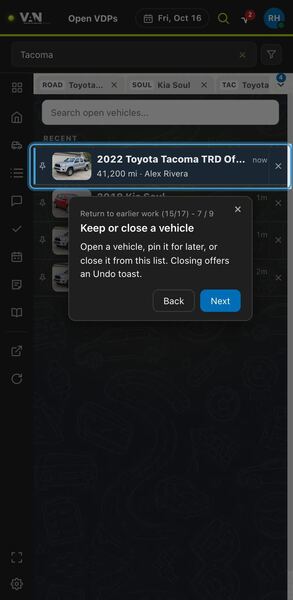
Each row in the open vehicles list opens that vehicle when you choose it. Use the pin at the left to keep it in Pinned, or the x at the right to close it. If you close one by mistake, an Undo notice lets you bring it back.
Step 8: Switch between open vehicles
Each vehicle you open gets a tab above the page. Select one to switch, close it with x, drag to reorder, or right-click to group tabs.
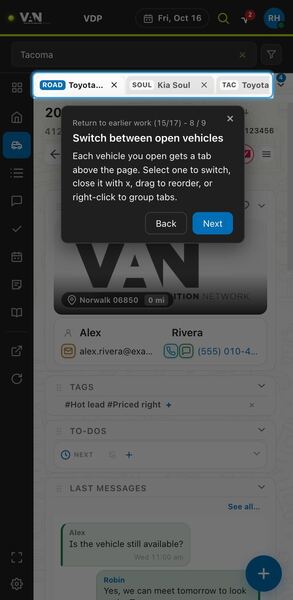
Every vehicle you open gets a tab in the strip above the page, labeled with a short name such as ROAD or SOUL. Click a tab to switch, use x to close it, drag tabs to reorder them, or right-click to group them. The badge on the arrow shows how many vehicles are open.
Step 9: Find any open vehicle
The arrow at the end of the tabs lists every open vehicle. Filter by year, make, model, or name, or reopen one you recently closed.
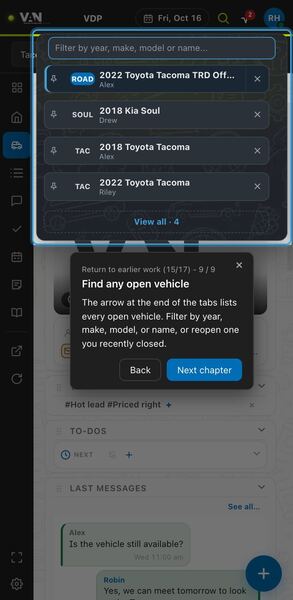
The arrow at the end of the tab strip opens a list of every open vehicle with a Filter by year, make, model or name box. Each row can be pinned or closed, View all shows the full count, and you can reopen a vehicle you recently closed. It is the fastest way to find a car when tabs no longer fit.
Chapter 16: Tune and protect your workflow
Settings lets you shape Companion around how you work, from text size and card fields to alerts, automation and backups. Some choices protect or change data, so read each one before changing it.
Step 1: Find a preference quickly
Search Settings by the feature you want to change. Clear the query to browse the sections again.
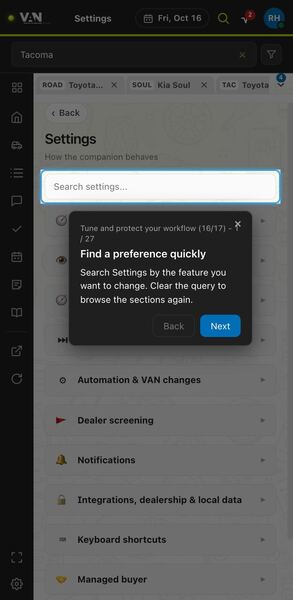
The Search settings box sits at the top of Settings, above sections like Dealer screening, Notifications and Keyboard shortcuts. Type the feature you want to change to narrow the list. Clear the box to browse all the sections again.
Step 2: Return to any tour topic
Start the full tour, choose a chapter, or search for one feature. Completed marks reflect chapters you actually visited.
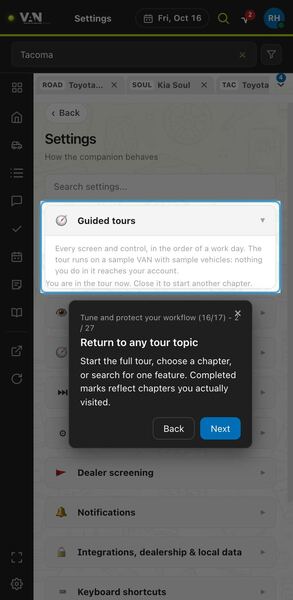
The Guided tours section is where you start the full tour, choose a chapter, or search for one feature. Completed marks show only the chapters you actually visited. The tour runs on a sample VAN with sample vehicles, so nothing you do in it reaches your account.
Step 3: Make Companion comfortable to read
Choose text size, relative dates, and animation preferences. Text size affects both layout and the space available for controls.
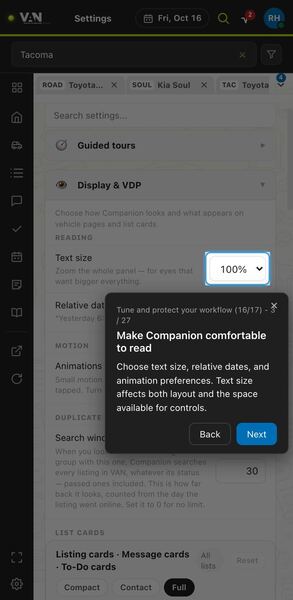
The Reading part of Display and VDP sets Text size, which zooms the whole panel, plus relative dates, and the Motion part turns animations on or off. Larger text is easier to read but leaves less room for controls. Turning animations off gives you a completely still panel.
Step 4: Set the duplicate search window
Choose how far back duplicate checks look. Zero removes the date limit.
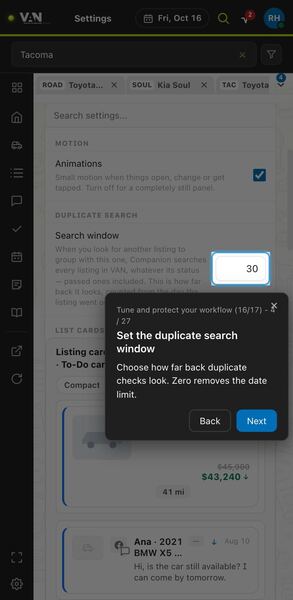
The Search window number sets how far back Companion looks when you search for another listing to group with this one. It searches every listing in VAN, whatever its status, counted from the day the listing went online. Set it to 0 for no limit.
Step 5: Choose what cards show
One setup shapes Listing, Message, and To-Do cards. Start from a preset, choose fields, check the three previews, or reset.
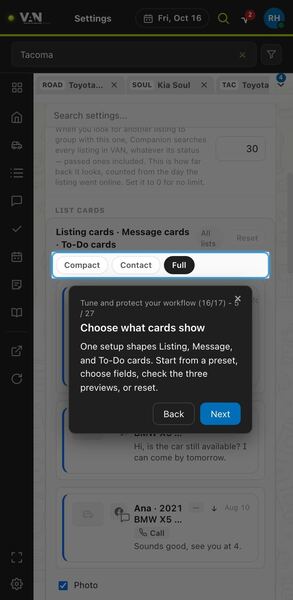
Under List cards, one setup shapes Listing, Message and To-Do cards together. Start from the Compact, Contact or Full preset, tick the fields you want, and check the three previews below. Reset brings back the default.
Step 6: Configure each vehicle layout
Choose a surface, show or hide available sections, and decide which may collapse. Undo or reset layout changes when needed.
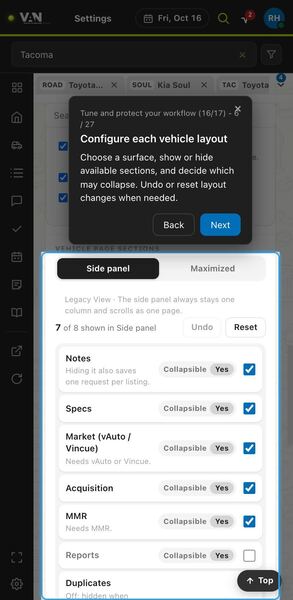
Under Vehicle page sections, choose the surface (Side panel or Maximized), then tick which sections show and whether each may collapse. The count shows how many are shown, and some notes explain a section's needs, such as MMR. Undo or Reset fixes a change you do not like.
Step 7: Choose where Companion opens
Use a reusable Workspace tab when you want more room. Configure which modules may open vehicles in mini VDPs.
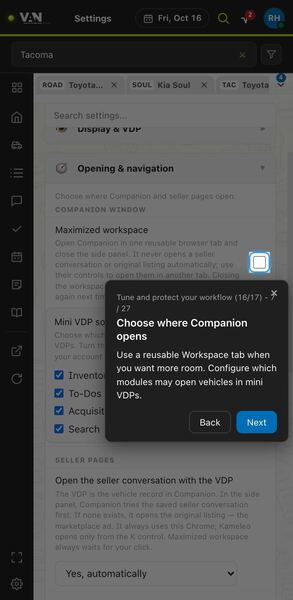
In Opening and navigation, Maximized workspace opens Companion in one reusable browser tab and closes the side panel, giving you more room. Below it, choose which modules, such as Inventory, To-Dos, Acquisition and Search, may open vehicles in mini VDPs.
Step 8: Control seller-page navigation
Choose whether opening a VDP opens the seller conversation, what happens when it is unavailable, and whether seller pages reuse one tab.
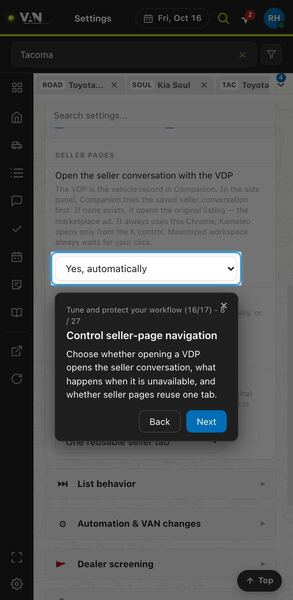
Under Seller pages, this menu decides whether opening a VDP also opens the seller conversation, for example Yes, automatically. In the side panel Companion tries the saved conversation first, and opens the original listing if none exists. Further options set what happens when it is unavailable and whether seller pages reuse one tab.
Step 9: Decide when to move on
Choose whether Pass, Sold, or Report as dealer advances to the next vehicle, and how long the notice remains.
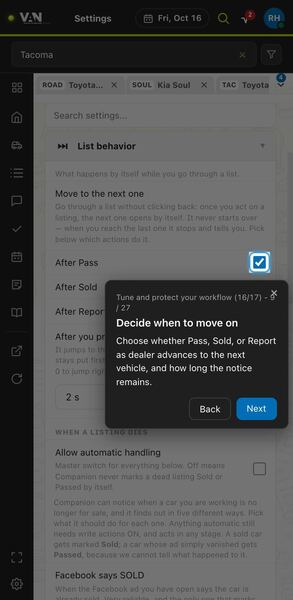
In List behavior, Move to the next one opens the next listing by itself once you act, so you can work a list without clicking back. Tick After Pass, After Sold or After Report as dealer, and set how long it waits before jumping. It never starts over; at the last listing it stops and tells you.
Step 10: Handle unavailable listings deliberately
Choose each source's response to sold or missing listings: no action, notice, suggested action, or automatic handling. Review the automation permission and notice duration.
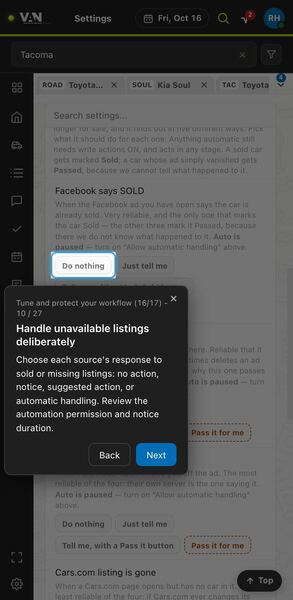
Under When a listing dies, each source gets buttons: Do nothing, Just tell me, Tell me with a Pass it button, or an automatic choice such as Pass it for me. Automatic choices stay paused until you turn on Allow automatic handling above, and they need write actions on.
Step 11: Control changes made in VAN
This preference allows Companion to change VAN data. Tour safety remains active regardless of its displayed sample value.
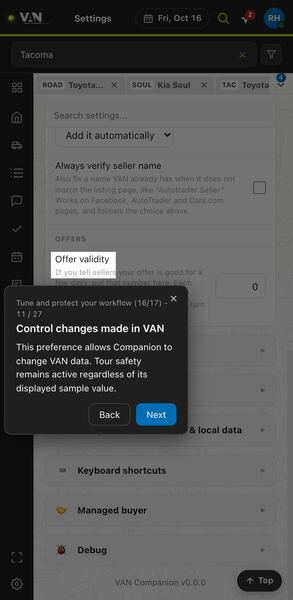
This preference, in Automation and VAN changes, decides whether Companion may write changes to VAN. Leave it on only if you want to make VAN changes from the panel. During the tour, safety stays active and nothing real changes, whatever value the setting shows.
Step 12: Set follow-up defaults
Choose the default task time and whether reminders start enabled. Reminders can produce a Windows notification at the task time.
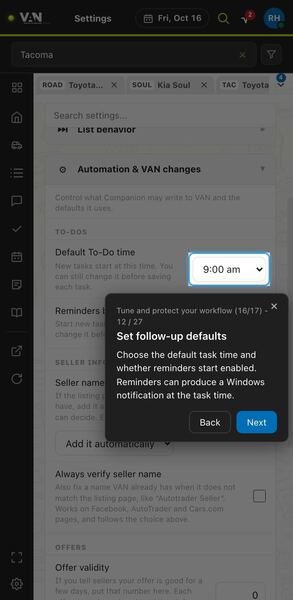
Under To-dos, Default To-Do time sets the time new tasks start at, and Reminders by default starts new tasks with Remind me on. You can still change both before saving each task. Reminders can bring a Windows notification at the task time, so you do not miss a follow-up.
Step 13: Choose how detected names apply
Decide whether a seller name found on the listing site fills a missing name automatically or requires your review.
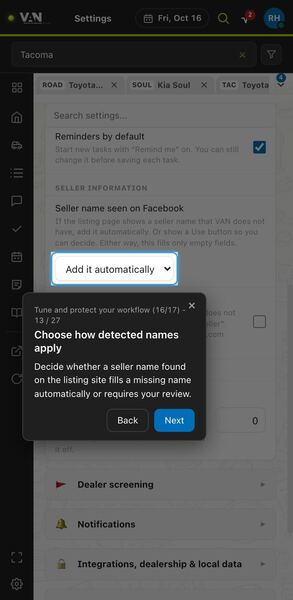
This menu decides what happens when the listing page shows a seller name that VAN does not have: add it automatically, or show a Use button so you decide. Either way it only fills empty fields. A separate Always verify seller name option can also fix names that do not match.
Step 14: Set offer validity
Choose how many days an offer remains valid. Zero turns the validity countdown off.
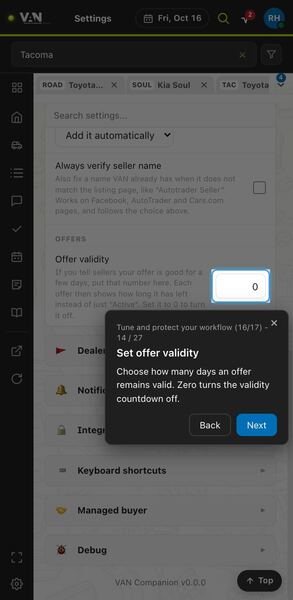
Offer validity is the number of days you tell sellers an offer is good for. With a number set, each offer shows how long it has left instead of just Active. Set it to 0 to turn the countdown off.
Step 15: Decide how dealers are flagged
Show a red dealer marker for flagged sellers. Automatic flagging and advancement is a separate preference with an Undo window.
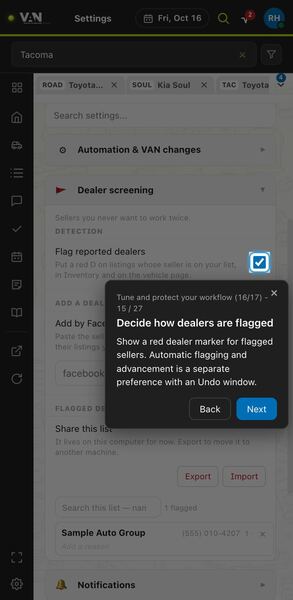
Flag reported dealers, under Dealer screening, puts a red D on listings whose seller is on your dealer list, in Inventory and on the vehicle page. It helps you skip sellers you never want to work twice. Automatic flagging and moving on is a separate preference with an Undo window.
Step 16: Maintain your dealer list
Add a profile, search existing entries, or export and import the dealer list when needed.
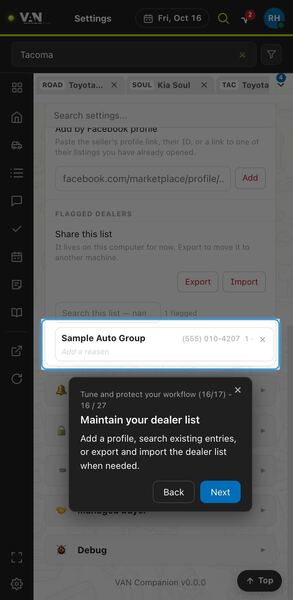
The flagged dealers list shows each entry with its phone and an Add a reason field, plus a search box and a count. Above it you can add a dealer by pasting a profile link, and Export or Import the list. It lives on this computer, so export it to move it to another machine.
Step 17: Choose which replies alert you
Choose which events alert you and whether Windows notifications are enabled. Seller reply alerts, which watch open chats, are experimental and off by default.
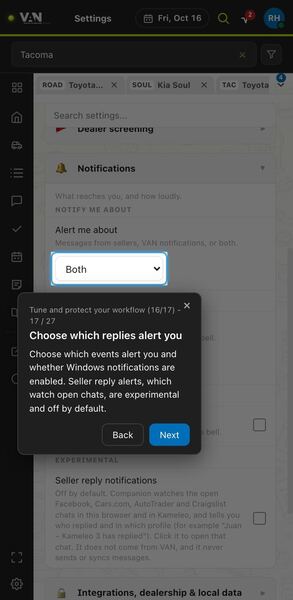
Alert me about chooses messages from sellers, VAN notifications, or both. Other options control Windows notifications. Seller reply notifications, under Experimental, watch your open chats and tell you who replied; they are off by default and never send or sync messages.
Step 18: Choose an alert sound
Select a notification sound and test it outside the tour.
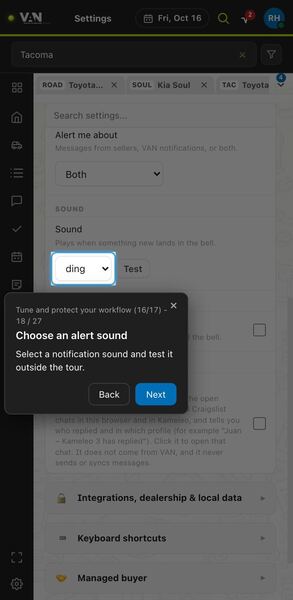
The Sound menu picks the sound that plays when something new lands in the bell, and Test plays it once you are outside the tour. Choose one you will notice over other browser sounds.
Step 19: Configure useful lookup information
Set your dealership address for directions.
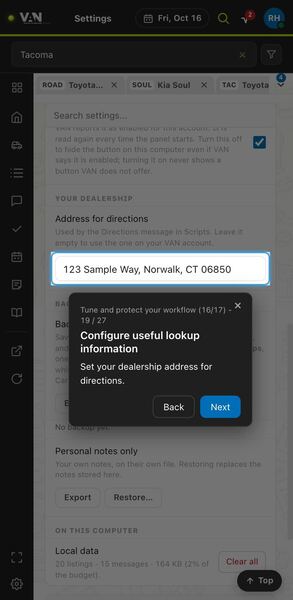
Address for directions, under Your dealership, is used by the Directions message in Scripts. Leave it empty to use the address on your VAN account, or type the one sellers should drive to.
Step 20: Protect local information
Check backup status, create a backup, or restore one. Review a restore carefully before replacing local information.
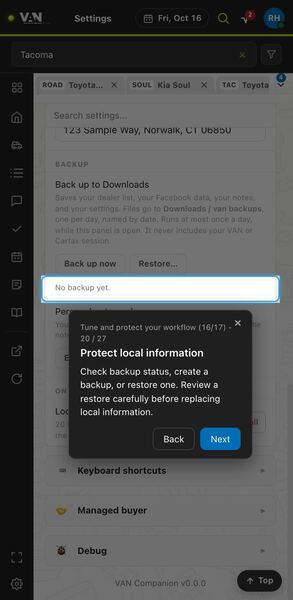
Back up to Downloads saves your dealer list, listing site data, notes and settings into a van backups folder, at most once a day while the panel is open. The line below shows the last backup, here No backup yet. Use Back up now any time, and review a Restore carefully before it replaces local information.
Step 21: Export or restore personal notes
Export personal notes for safekeeping, or import a notes file when you need to restore them.
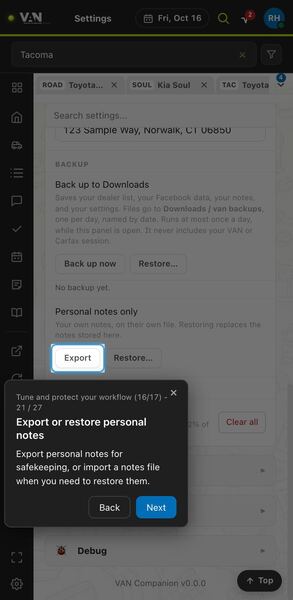
Personal notes only has its own Export and Restore buttons, saving your notes to their own file. Export them for safekeeping, since they live only on this computer. Restoring replaces the notes stored here, so restore only the file you mean to.
Step 22: Review device-local data
Inspect local storage information. Clear all is a destructive action; use it only when you intend to remove local data.
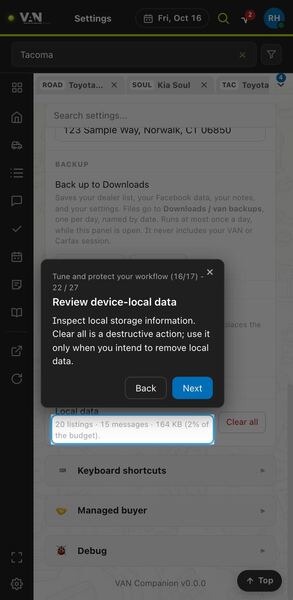
Local data shows what Companion keeps on this device, such as listings, messages and the space used. Clear all removes that local data, so use it only when you truly mean to start fresh, ideally after a backup.
Step 23: Choose comfortable shortcut keys
Remap supported actions to your preferred keys, or restore the default shortcuts.
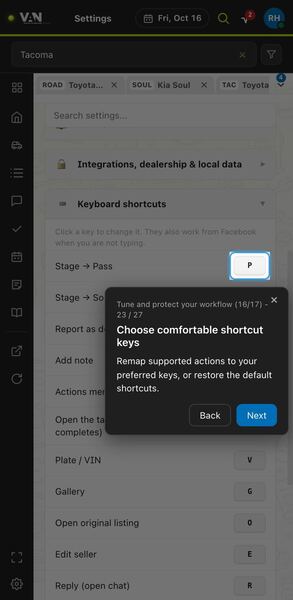
Keyboard shortcuts lists each action with its key, such as Stage to Pass on P. Click a key to change it, or restore the defaults. The shortcuts also work from the listing site when you are not typing.
Step 24: Configure Kameleo and VAN Bridge
Enable Kameleo integration with VAN Bridge, configure automatic tagging, and choose allowed profiles for each source.
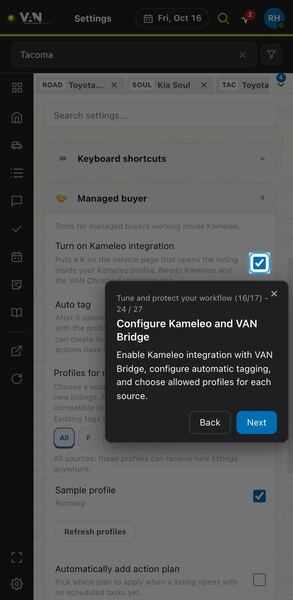
Turn on Kameleo integration, in the Managed buyer section, puts a K on the vehicle page that opens the listing inside your Kameleo profile; it needs Kameleo and VAN Bridge. Below it you set Auto tag and choose which profiles can receive new listings for each source. Refresh profiles reloads the list.
Step 25: Choose Kameleo follow-up behavior
Choose or change the automatic action plan and configure the Kameleo shortcut.
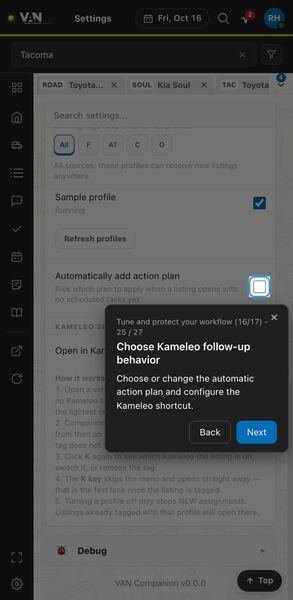
Automatically add action plan picks a plan to apply when a listing opens with no scheduled tasks yet. Below it, the Kameleo shortcut sets the key, K by default, that opens a vehicle in Kameleo, with a short How it works guide. Set these once so follow-ups start the same way every time.
Step 26: Pick the automatic plan
Turning it on asks which VAN action plan to apply. It runs only when the listing has no scheduled tasks yet.
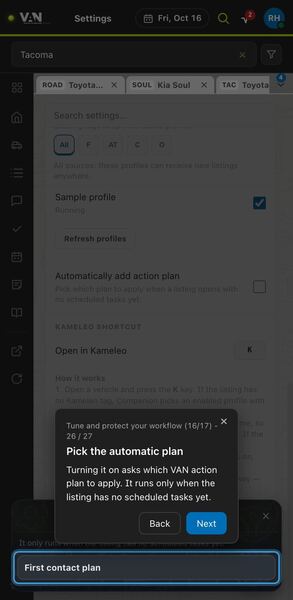
Turning on the automatic plan opens a list of VAN action plans, such as First contact plan, so you pick which one to apply. It only runs when the listing has no scheduled tasks yet, so it will not stack tasks on a car you already planned.
Step 27: Prepare a diagnostic report
Generate a diagnostic report when investigating a problem or working with support. Tour samples do not generate or export reports.
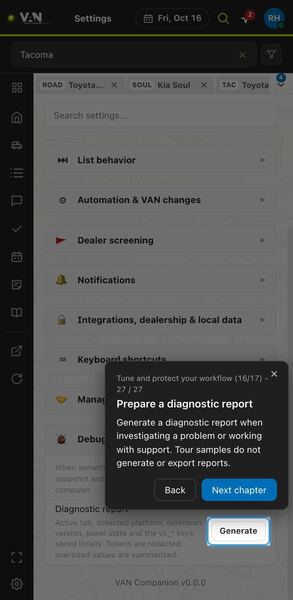
Generate, under Debug, builds a diagnostic report with details like the active tab, detected platform, extension version and panel state; tokens are redacted. Use it when you are investigating a problem or working with support. During the tour it does not generate or export anything.
Chapter 17: Work beside the listing site
Companion is built to sit beside the listing site while you work. This chapter covers opening the panel next to a listing, bringing that vehicle into view, using shortcuts on the listing page, and what to do when your session ends.
Step 1: Open Companion beside a listing
The browser toolbar icon opens the panel. Supported listing sites also offer a draggable VAN pull tab whose dot shows session status.
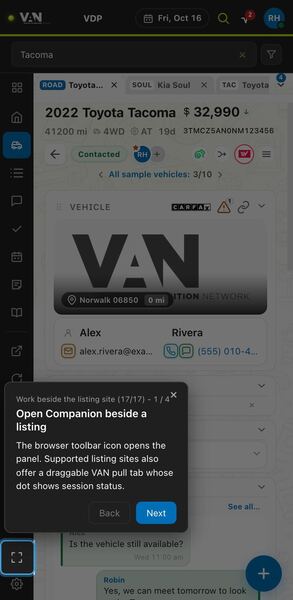
The highlighted button at the bottom of the rail opens Companion in its larger workspace. You can also open the panel from the browser toolbar icon, and supported listing sites offer a draggable VAN pull tab whose dot shows your session status. Keep Companion open beside the listing so you can work both at once.
Step 2: Bring the current listing into view
Opening a supported listing can identify its vehicle for Companion. When this offer appears, review which vehicle it proposes to bring into the VDP.
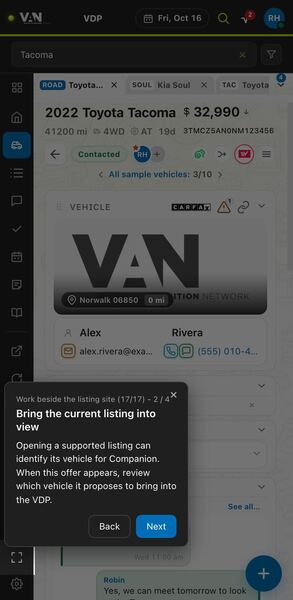
When you open a supported listing, Companion may recognize its vehicle and show an offer to bring it into the VDP. Before acting on that offer, check which vehicle it proposes, so your notes and actions go to the right car.
Step 3: Use shortcuts beside the listing
Supported listing pages forward vehicle shortcuts to Companion. Use the shortcut reference and your configured keys after leaving the tour.
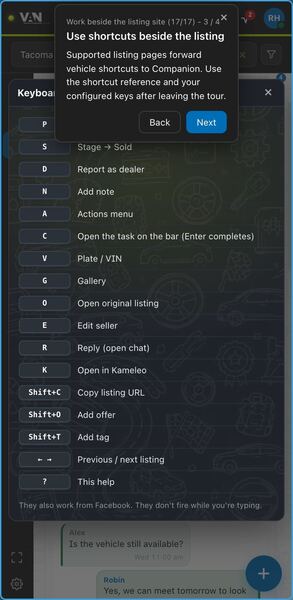
The Keyboard shortcuts reference lists every key, such as P for Pass, N to add a note, R to reply and the arrows for the previous or next listing. On supported listing pages these keys are passed to Companion, but they do not fire while you are typing. Press ? to see the list again after the tour.
Step 4: Recognize an ended session
When your session is unavailable, sign in through this control. The dimmed rail indicates that ordinary account work is unavailable.
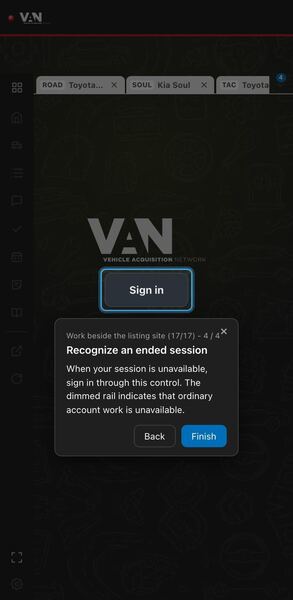
When your session has ended, the status dot turns red, the rail dims and a Sign in button appears in the middle of the panel. Normal account work is unavailable until you sign in again, so use that button and then continue where you left off.